Crawl Space Condensation in Winter: Causes & Checks
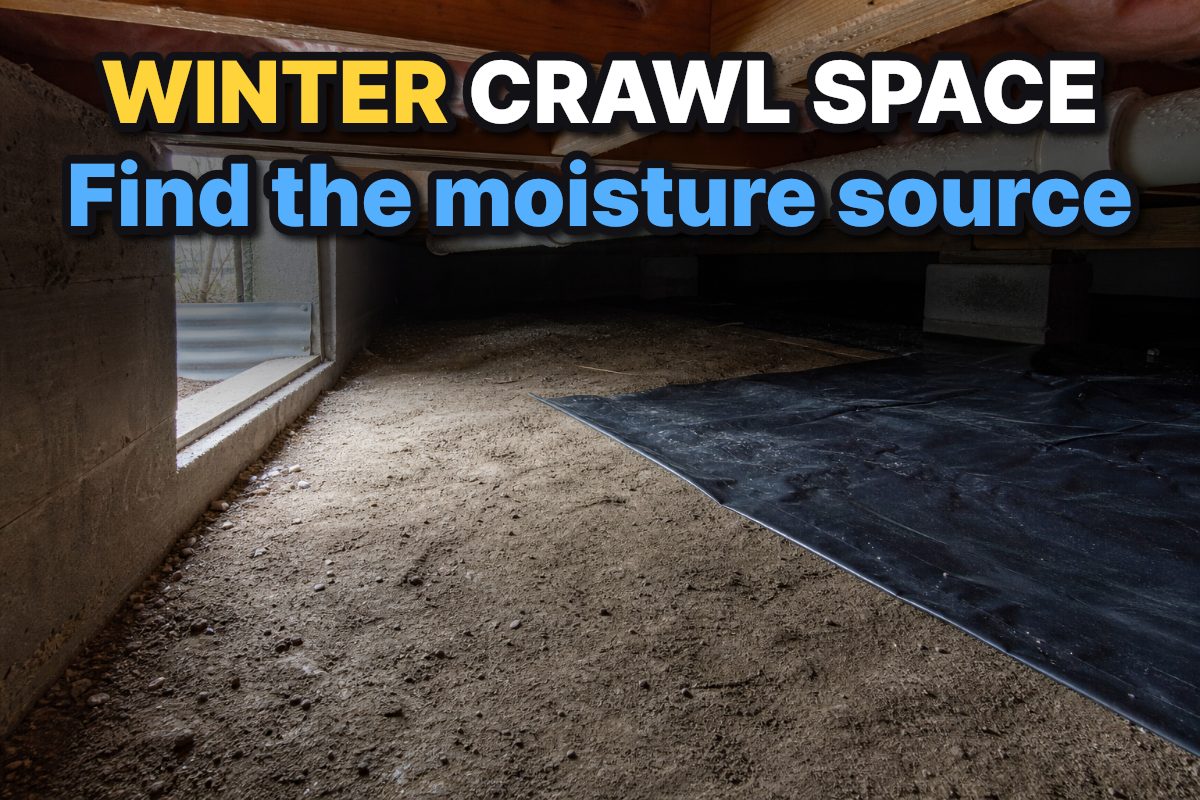
Key Takeaways
- Winter crawl space condensation forms when moisture-laden air meets a surface cold enough for water vapor to condense.
- Look for water droplets, damp or musty insulation, wet framing, and moisture patterns that point toward a leak, ground moisture, or cold surfaces.
- Check the crawl space after identifying the wet area, then trace moisture back to its source instead of treating every damp spot as the same problem.
- Cold floors, compressed insulation, framing thermal bridges, and air leaks can create cold areas where moisture becomes more likely to collect.
- EPA guidance emphasizes moisture control: address water entry and excess moisture rather than relying on a quick surface cleanup.
Table of Contents
- What causes crawl space condensation in winter?
- Where should you look first for winter moisture?
- How can you tell condensation from a plumbing leak?
- Can cold framing and insulation cause condensation?
- How do ground moisture and a vapor barrier fit in?
- What should you do after finding condensation?
- Which checks make sense for your situation?
- Common mistakes that make the problem harder to solve
- Frequently Asked Questions
- Key points to remember
Crawl space condensation in winter usually means moisture is reaching a cold surface, not simply that the season is damp. Start by locating the wettest area, noting what is wet and where it sits, then check for plumbing leaks, ground moisture, and cold surfaces that can collect condensation.
What causes crawl space condensation in winter?
Condensation is liquid water that forms when water vapor in the air touches a surface cold enough for moisture to collect. A crawl space can have condensation even when there is no standing water: moisture in the air may settle on cold pipes, framing, ducts, or other surfaces.
Winter creates a strong contrast between indoor warmth and cold materials near the ground or exterior. The University of Minnesota Extension explains that relative humidity generally needs to be low in cold winter conditions to prevent condensation and potential damage to a home's structure. That makes the source of moisture and the temperature of the surface equally useful clues.
| What you find | What it may point to | What to check next |
|---|---|---|
| Wetness localized around a pipe or fitting | A plumbing leak or water collecting on a cold pipe | Look along the pipe and nearby joints for a distinct wet point. |
| Dampness over a broad area near the ground | Moisture entering from soil or a gap in ground covering | Look for exposed soil, standing water, or visible openings in the ground vapor barrier. |
| Moisture concentrated on cold framing or the perimeter | A cold surface, insulation issue, or air leakage | Compare the damp area with insulation, framing, and exterior-wall locations. |
These patterns are starting points, not proof of a single cause. A plumbing leak can wet the ground, and condensation can appear near a leak because the surrounding materials are cold. Trace the wet area outward before deciding what repair it needs.
Where should you look first for winter moisture?
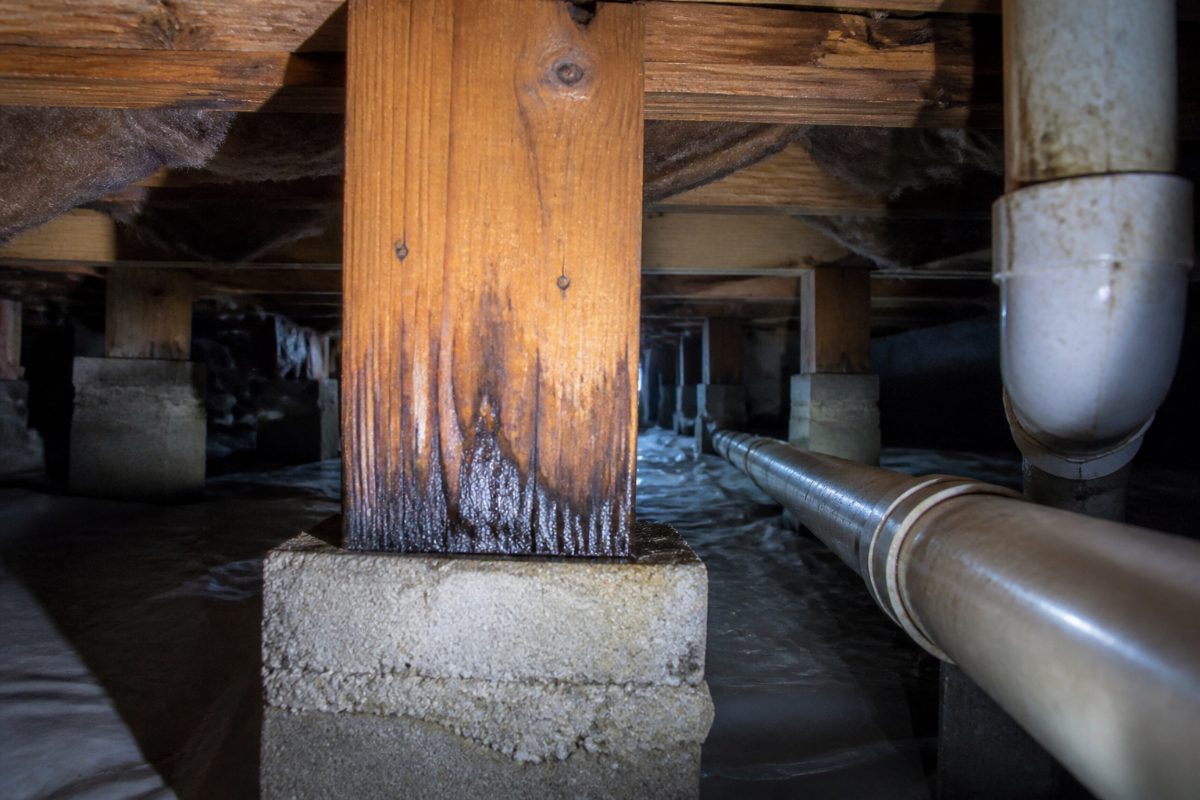
Begin with the visible signs: droplets, darkened wood, damp insulation, water on pipes, and any standing water. The U.S. EPA explains that mold can grow on many organic materials when moisture and oxygen are present, so damp wood or paper-faced materials deserve attention even if the affected area looks small.
Use a simple sequence rather than inspecting randomly. Work from the wettest spot toward possible sources, and compare wet areas with nearby dry surfaces. A small flashlight can help you see the underside of the floor framing and the edges of insulation without disturbing materials.
- Note the location. Record whether the wet spot is near a plumbing line, the perimeter, a support, a duct, or the ground. A rough sketch is enough to help you compare it during a later check.
- Identify the material. Separate water on a pipe from damp soil, wet insulation, or moisture on wood. Each material tells you something different about where the water may be coming from.
- Look above and beside the wet area. Check for plumbing, ductwork, a penetration through the floor, or a nearby low point where water could travel before collecting.
- Check the surrounding area. A single wet fitting suggests a different investigation from moisture spread across several framing bays or a long section of the perimeter.
- Take a follow-up look. Note whether the spot is still wet after a reasonable interval. Continuing moisture suggests an active source or a surface that repeatedly reaches condensation conditions.
Do not assume that the most obvious wet spot is the point where water entered. Water can run along framing or a pipe before it becomes visible. If you find standing water, treat that as a separate drainage or water-entry problem rather than labeling it condensation; the existing guide Standing Water in a Crawl Space Before Winter: What to Do addresses that situation.
How can you tell condensation from a plumbing leak?
Condensation tends to appear on a cold surface, sometimes as beads or a sheen spread along the surface. A plumbing leak is more likely to have a distinct source point, such as a joint or a damaged section, with water tracking away from that point. Those are visual clues rather than a guaranteed diagnosis.
Inspect a suspicious pipe along its length, including joints, connections, and the surface underneath it. If the pipe is wet but no fitting or section appears to be leaking, the pipe itself may be cold enough for moisture in the surrounding air to collect on it. If you can see a steady drip, a growing wet patch, or a clear trail from a connection, treat it as a leak to be repaired rather than as ordinary condensation.
| Clue | More consistent with condensation | More consistent with a leak |
|---|---|---|
| Shape of wetness | Fine droplets or a film across a cold surface | A wet point, drip, or trail that begins at a fitting or damaged area |
| Location | Several cold surfaces or a broad cold area | One plumbing line, connection, or localized source |
| Nearby materials | Moisture on the cold surface itself | Wetness that runs down or spreads from the suspected source |
| What to do | Investigate moisture, cold surfaces, and air movement | Find and repair the source of water before drying affected materials |
Do not use a single dry inspection as proof that a leak is absent. Water flow and condensation can change with household use and outdoor conditions. If the area repeatedly becomes wet, take another look and compare the location and pattern rather than only checking whether it looks dry at that moment.
Can cold framing and insulation cause condensation?
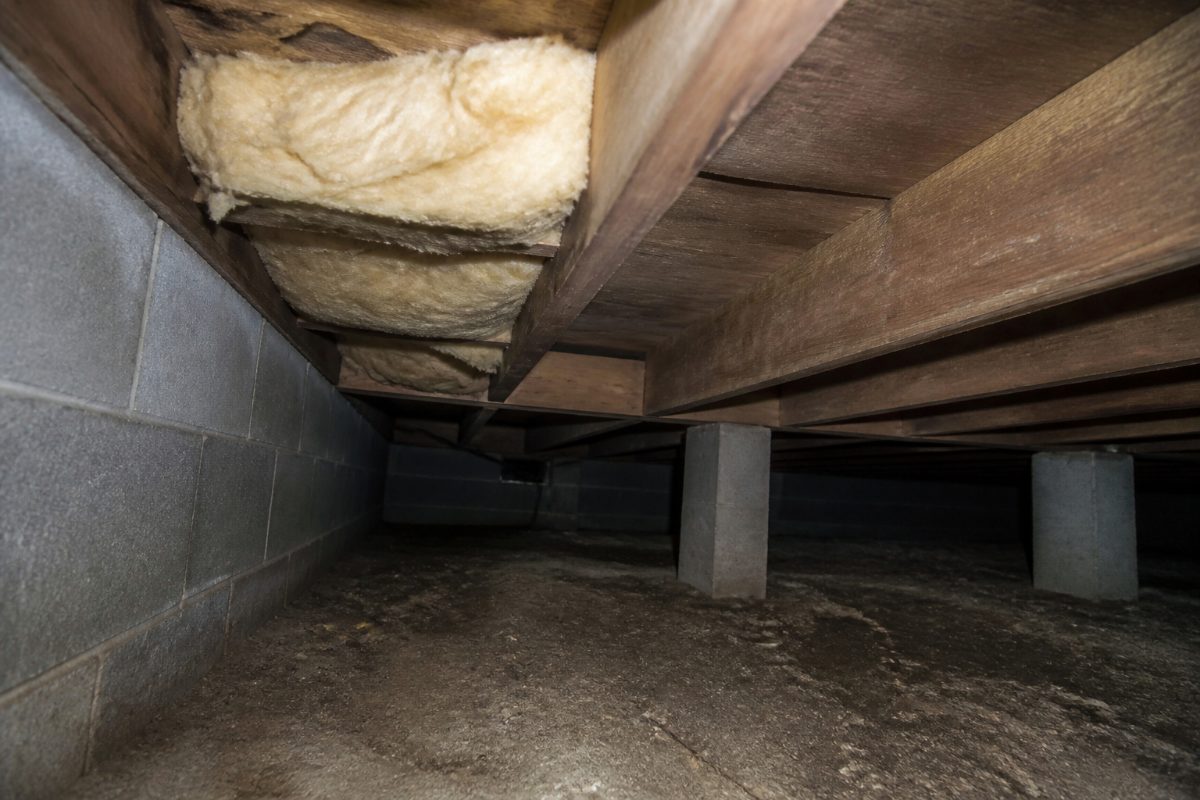
Yes. Cold surfaces can create the conditions for condensation, and insulation or air-leakage problems can contribute to cold areas. The U.S. Department of Housing and Urban Development describes winter cold spots near building perimeters as potentially related to compressed insulation, thermal bridging through framing, or air leaking beneath a wall.
A thermal bridge is a part of the building that conducts heat more readily than the insulated areas around it. Framing can form these paths, leaving some surfaces colder than adjacent insulated sections. HUD also notes that when a cold perimeter area has little air movement, localized humidity can rise or condensation can form if the surface is cold enough.
Inspect the floor perimeter and the underside of the subfloor for missing, displaced, or compressed insulation. Look for a repeated cold or damp line along the edge of the house, and compare it with areas farther toward the center. If the pattern follows framing or an exterior wall rather than a pipe, that points toward a building-envelope issue worth investigating.
- Cold strip along the perimeter: Compare the location with insulation compression, gaps, and framing members.
- One isolated cold patch: Look for a nearby opening, penetration, or local insulation gap before assuming the whole crawl space has the same issue.
- Moisture on the underside of the floor: Note whether it is concentrated around a cold area or spread broadly across the structure.
- Wet insulation: Find out why it is wet before replacing it. New insulation will not stop moisture if water or humid air continues to reach it.
Advanced Energy's closed-crawl-space guidance recommends addressing sources of water and air leakage as part of a moisture-control approach. It also discusses sealing penetrations between the crawl space and living area and sealing ductwork as part of an overall assessment. Those steps are not a substitute for identifying the particular source in your crawl space; sealing the wrong opening or changing a vented design without a complete plan can leave the underlying moisture problem untouched.
How do ground moisture and a vapor barrier fit in?
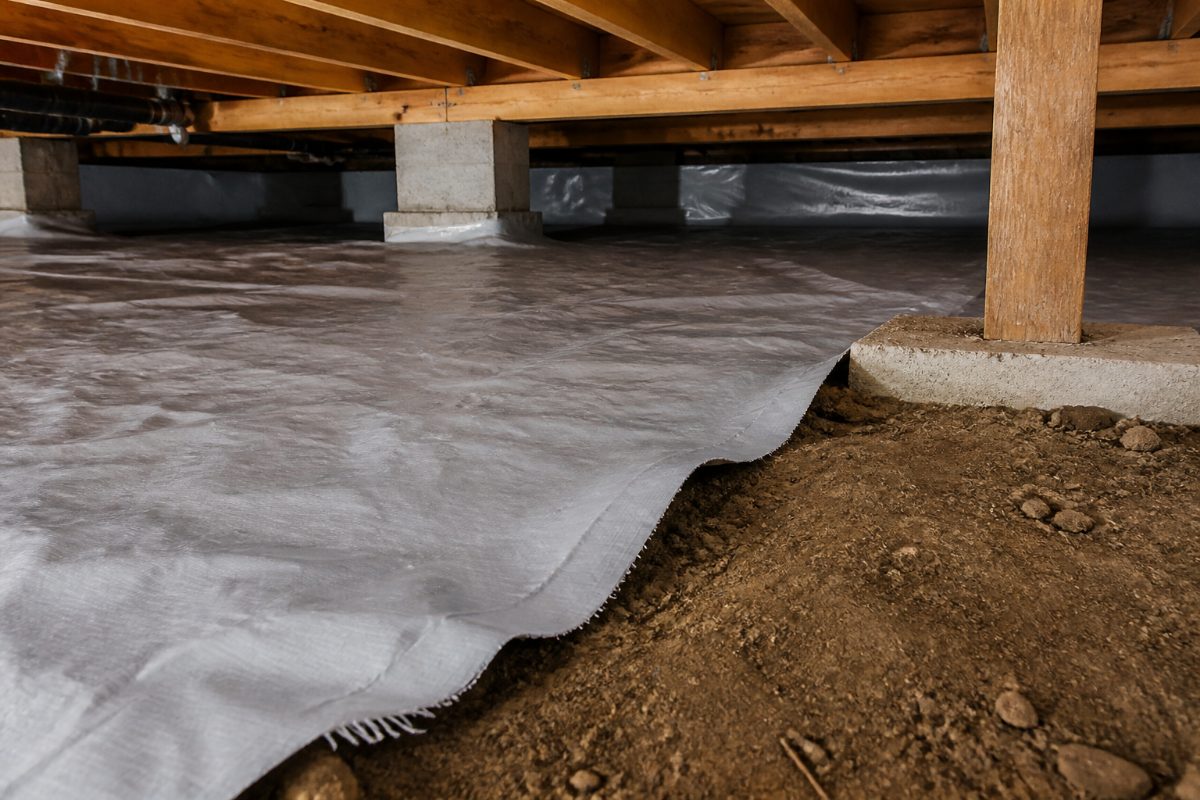
Moisture from the ground can contribute to damp conditions in a crawl space. A ground vapor barrier is a material laid over soil to limit water vapor moving from the ground into the space. Gaps, displaced sections, or uncovered soil give you places to investigate when the crawl space is damp across a broad area.
Walk the visible perimeter of the ground covering and look for tears, loose edges, exposed soil, or water sitting on top of it. Note whether dampness is concentrated at one opening or spread through the space. A continuous area of moisture over soil suggests a different path to investigate than droplets confined to one cold pipe.
A vapor barrier is not a fix for every wet crawl space. It does not repair a plumbing leak, correct water that is flowing in from outside, or warm a cold framing surface. The guide How to Check a Crawl Space Vapor Barrier for Gaps can help with the separate task of inspecting the barrier itself.
The U.S. EPA's moisture-control guidance centers on controlling moisture rather than merely covering up its visible signs. In practical terms, that means figuring out whether water is coming from a leak, the ground, or condensation before deciding what to patch or replace. If water is visibly pooling, focus on identifying the water-entry or drainage problem first.
What should you do after finding condensation?
Match the next step to the likely source. Drying a surface can make it look better temporarily, but it does not prevent repeat condensation if the surface stays cold and moist air keeps reaching it. The U.S. EPA lists moisture control as a main way to address mold problems, so source control should lead the repair plan.
- Photograph and map the area. Capture the wet spot and its relationship to pipes, framing, insulation, and the ground. That record makes repeat checks more useful than relying on memory.
- Address an active plumbing leak. If you see a clear drip or water trail from a plumbing connection, stop the water source through an appropriate repair before focusing on cleanup.
- Separate ground moisture from condensation. Look for standing water, exposed soil, or gaps in ground covering. Do not treat a puddle as condensation simply because it appears during winter.
- Investigate cold surfaces. Check nearby insulation, framing, and openings. If moisture follows the perimeter or a cold structural element, correcting the cold area or air path may be part of the solution.
- Recheck the same locations. Compare the same framing bay, pipe, and ground area after the source has been addressed. A recurring pattern tells you that the moisture pathway remains active.
When mold is visible, avoid disturbing a large affected area during a casual inspection. EPA guidance explains that mold grows where moisture and oxygen are present; fixing the moisture condition is central to preventing continued growth. If the affected area is extensive, materials are deteriorating, or you cannot identify the water source, bring in a qualified crawl-space or building-moisture professional to assess the cause and repair scope.
For related cold-weather work, How to Winterize a Crawl Space Before Freezing Weather covers broader winter preparation. Keep that task separate from condensation diagnosis: sealing, insulation, and vent decisions need to fit the crawl space's overall moisture-control design.
Which checks make sense for your situation?
A first-time inspection should focus on mapping moisture and recognizing patterns, not making several repairs at once. Someone who has already checked the space can use a repeatable comparison: same locations, same materials, and notes about whether moisture returned after a suspected source was addressed.
| Your situation | Best first move | Avoid this shortcut |
|---|---|---|
| First time seeing moisture | Photograph it, identify the wet material, and trace nearby pipes and openings. | Replacing insulation before finding out why it is damp. |
| Wetness appears on a pipe | Inspect the full pipe and its connections for a distinct leak point. | Assuming every wet pipe is leaking—or assuming every wet pipe is only condensation. |
| Dampness follows an exterior edge | Compare it with insulation, framing, and possible air leakage at the perimeter. | Adding insulation without addressing an air path or water source. |
| Moisture is spread over the ground | Look for standing water, exposed soil, and gaps in the ground barrier. | Treating broad ground moisture as a small surface-condensation issue. |
| The same location gets wet again | Compare photos and notes, then reassess the source pathway. | Repeating surface cleanup while leaving the cause unchanged. |
For homeowners who are already maintaining a sealed crawl space, include ductwork and floor penetrations in the inspection. Advanced Energy notes that sealing ductwork can reduce cold-air leakage into a crawl space during air-conditioning periods, reducing cold surface area that may experience condensation. That specific cooling-season mechanism is not a winter diagnosis by itself, but it illustrates why ducts and penetrations belong on a broader moisture inspection list.
If the crawl space has an existing vented or closed design, do not treat one winter symptom as a reason to change the whole system. Moisture control depends on the water source, air paths, insulation, and how the space is designed to operate. A change to vents or sealing should follow a coherent plan rather than a single visible patch of condensation.
Common mistakes that make the problem harder to solve
The most common misstep is treating every wet surface as the same problem. Condensation, plumbing leaks, and ground moisture can look similar from a distance, but they call for different repairs. A quick classification by location and pattern reduces the chance of fixing the visible symptom while leaving the source alone.
- Calling every damp patch condensation: Check for a visible leak, standing water, or a source on the ground before deciding.
- Replacing wet insulation first: Identify the moisture path before installing new material, or the replacement may become wet too.
- Focusing only on the center of the crawl space: HUD's description of winter cold spots specifically includes building perimeters, where insulation compression, framing, or air leakage may contribute.
- Ignoring a broad pattern: Several damp areas on cold surfaces suggest a different investigation from one localized wet fitting.
- Making several changes at once: If moisture improves, you will not know which change helped. Record the location and address the most likely source before moving on.
A practical rule: trace water to a plausible source before selecting a repair. If the clue is uncertain, record it and compare it over time rather than turning a guess into a permanent change.
Frequently Asked Questions
Is crawl space condensation normal in winter?
Condensation can form when moisture in the air reaches a cold surface, but recurring wetness deserves investigation. Find out whether the pattern points to a plumbing leak, ground moisture, or cold surfaces and air leakage.
Can a cold crawl space make the floor above feel cold?
Yes, cold areas near the building perimeter can be associated with compressed insulation, framing thermal bridges, or air leakage beneath a wall. HUD describes these as possible contributors to winter cold spots, so compare a cold floor area with insulation and framing below it.
Does a vapor barrier stop all crawl space condensation?
No. A ground vapor barrier can limit moisture moving from soil, but it does not repair plumbing leaks or remove the cold-surface conditions that cause condensation. Inspect for those separate sources before choosing a repair.
Should I close crawl space vents when I see winter condensation?
Condensation alone does not establish whether a vented or closed design is right for the crawl space. The moisture source, insulation, air leakage, and overall design all matter; avoid changing the vent arrangement as a one-step fix for an unidentified cause.
What is the first thing to check when crawl space insulation is wet?
Look above and around the wet insulation for plumbing, water entry, exposed ground, and cold surfaces. Find the moisture source before replacing insulation so the same condition does not wet the new material.
Key points to remember
Winter crawl space condensation forms when moisture reaches a cold surface. Identify the wet material, map where the moisture appears, and distinguish condensation from plumbing leaks or ground water before repairing anything.
Perimeter cold spots, compressed insulation, framing, and air leakage can contribute to cold surfaces. EPA and extension guidance emphasizes moisture control, so address the source and recheck the same locations after the repair rather than relying on surface cleanup alone.
References
- Controlling moisture problems in your home | UMN Extension
- What are the main ways to control moisture in your home? | US EPA
- Mold Course Chapter 2: | US EPA
- MOISTURE PROBLEMS IN MANUFACTURED HOMES
- Advanced Energy: Closed Crawl Spaces
Information in this post was checked as of October 2026. Policies and prices may change, so please verify important details with official sources.


Comments
Post a Comment