How to Keep Crawl Space Pipes from Freezing
Key Takeaways
- To keep crawl space pipes from freezing, combine a close-fitting insulation layer with control of cold air entering the space.
- Foam sleeves are a practical DIY option for many cold-water lines; closed-cell spray foam can fit irregular areas and also slows air movement.
- Insulation slows heat loss but does not create heat, so pipes exposed to prolonged, severe cold may need a properly rated heating cable as well.
- Follow the cable manufacturer’s instructions, use a GFCI-protected outlet, and never overlap or cover a cable with flammable material unless the product instructions specifically allow it.
Table of Contents
- Why do crawl space pipes freeze?
- Which pipe insulation works best in a crawl space?
- How should you prepare pipes before adding insulation?
- When should you use heat tape or a heating cable?
- Will closing vents or encapsulating the crawl space protect pipes?
- How can you choose a protection plan for your situation?
- What mistakes commonly leave pipes vulnerable?
- Frequently Asked Questions
- Key points to remember
To keep crawl space pipes from freezing, insulate exposed lines, reduce cold drafts around them, and add a suitable heating cable only where passive protection is not enough. The right setup depends on the pipe material, whether the crawl space stays damp, and how long the pipes are exposed to cold—not just the outdoor temperature.
Why do crawl space pipes freeze?
Crawl space pipes lose heat to cold air moving beneath the house. Foundation vents can let cold drafts sweep over a pipe, while gaps around the perimeter can create additional air movement. Insulation slows that heat loss, and limiting drafts helps keep the pipe closer to the temperature of the house above.
Water expands as it freezes. That expansion can put pressure on a pipe and cause a split, so a pipe may leak after temperatures rise again even if the frozen section is no longer visible. The aim is to keep the water and pipe from reaching freezing conditions, not simply to hide the pipe from view.
Oklahoma State University Extension’s pipe-freezing guidance explains why insulating exposed plumbing is part of cold-weather protection. For crawl spaces, it helps to think in layers: reduce drafts, insulate the pipe, and consider active heat for a line that remains vulnerable.
Which pipe insulation works best in a crawl space?
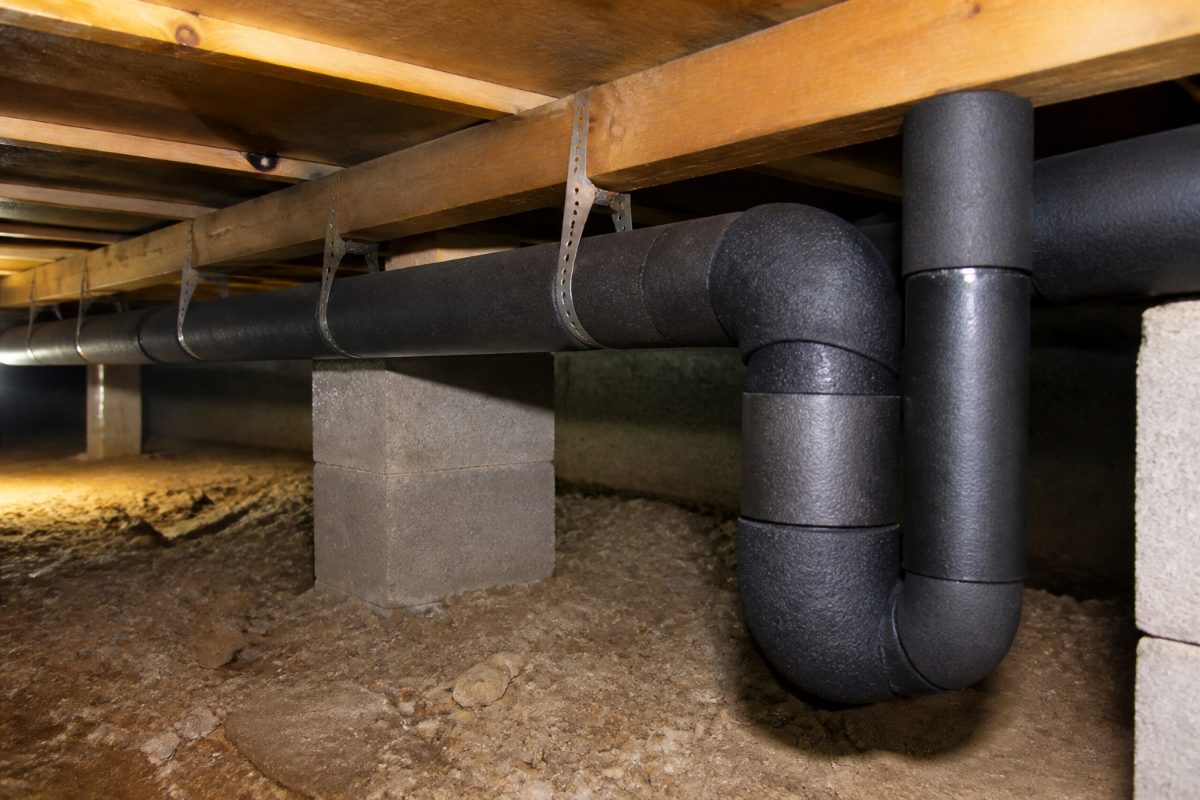
For a straightforward exposed run, a correctly sized foam sleeve is often the simplest starting point. A&E Plumbing describes polyethylene and rubber foam sleeves as common, budget-friendly choices, while closed-cell spray foam is useful when the pipe route or surrounding space is irregular.
R-value measures resistance to heat flow: a higher value means more resistance per inch of material. Leyton’s insulation guide lists closed-cell spray foam at about R-6.0 to R-6.5 per inch. Spray foam can also help seal air gaps around an irregular area, but the R-value alone does not determine whether a pipe will stay above freezing.
| Material | Where it can make sense | What to consider |
|---|---|---|
| Polyethylene or rubber foam sleeve | Accessible, fairly straight pipe runs | Choose a sleeve that fits the pipe closely and close its seams as the product directs. |
| Fiberglass or mineral wool | Situations where a noncombustible insulation layer is needed | Fiberglass can perform poorly if it becomes damp; moisture can reduce its insulating value and contribute to mold concerns. |
| Closed-cell spray foam | Irregular spaces or areas where air sealing around a pipe is also needed | It adheres in place, so plan the application carefully and follow the product instructions. |
AT Foam warns that damp fiberglass in a crawl space can absorb moisture, lose insulating performance, and contribute to mold problems. Before adding batts, look for water entry, plumbing leaks, or persistent dampness. Covering a wet area with more insulation does not solve the moisture source.
How should you prepare pipes before adding insulation?
Start by mapping which lines are most exposed: pipes near foundation vents, outside walls, gaps, or the crawl-space access are natural priorities because cold air can reach them directly. Check the full run, including elbows, joints, shutoff areas, and transitions, rather than insulating only the easiest straight section.
- Look for moisture first. Check for standing water, damp insulation, and visible plumbing leaks. Address the source of moisture before enclosing the pipe.
- Identify the pipe and its route. Note whether it is a cold-water or hot-water line, its material, and whether it passes close to a vent or opening.
- Measure the pipe. Match the insulation’s size to the pipe so it can sit close to the surface rather than leaving a large air gap.
- Cover the vulnerable details. Fit insulation around bends and joints as the product allows; an uncovered fitting can remain a weak spot even when the main run is insulated.
- Recheck the area after installation. Make sure the insulation is secure and that access to valves or other components you may need to inspect has not been blocked.
Oklahoma State University Extension recommends protecting exposed water pipes from freezing, and A&E Plumbing distinguishes among pipe-insulation materials. Those points support a practical rule: choose the material for the pipe and conditions, then check the entire exposed route for gaps rather than judging the job by one covered section.
When should you use heat tape or a heating cable?
Pipe insulation slows heat loss but does not generate heat. If a line remains at risk during extended cold despite insulation and draft control, a pipe-rated heating cable can provide active heat. Treat it as an additional safeguard, not as a substitute for insulation or a fix for water entering the crawl space.
Heating cables are not interchangeable. Some products provide a steady heat output, while self-regulating cables adjust their output as surrounding conditions change. Check the product label and instructions for the pipe material and installation location; do not assume that a cable suitable for one kind of pipe is suitable for another.
The U.S. Consumer Product Safety Commission (CPSC) advises homeowners to inspect heat tapes and cables before winter use. Its safety guidance includes using a GFCI-protected outlet and not allowing a cable to overlap or cross over itself unless the manufacturer specifically permits it. Follow the exact product instructions, since installation details differ among products.
- Choose a cable specifically intended for the pipe and setting.
- Check the full cable for damage before use; do not use a cable with bare wire, damaged insulation, or signs of overheating.
- Use a GFCI-protected outlet.
- Do not overlap, cross, or wrap the cable over itself unless the manufacturer explicitly allows that configuration.
- Do not cover a heating cable with flammable insulation. CPSC guidance identifies nonflammable insulation, such as fiberglass, as the appropriate type when insulation is used over a cable.
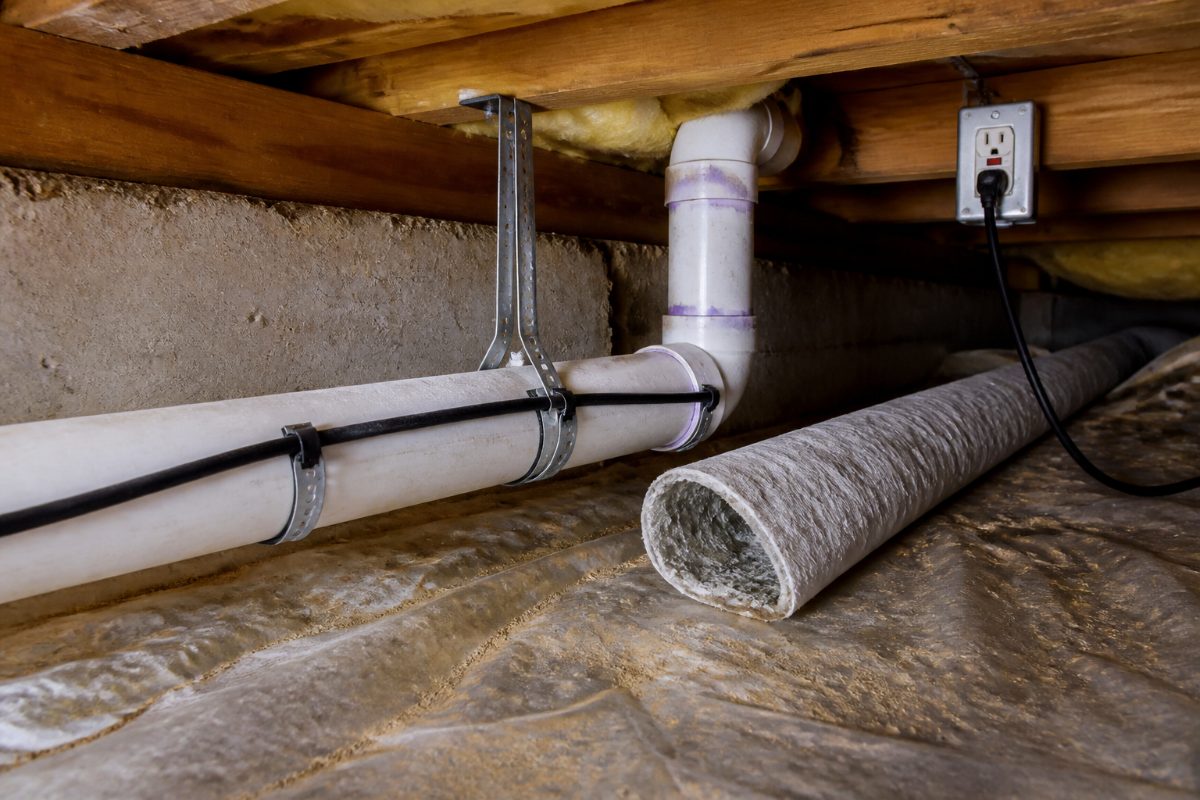
A common mistake is to install a cable and then cover it in a way the instructions prohibit. Read the cable’s instructions before buying insulation for it, and follow both products’ directions. If the cable’s requirements conflict with the insulation plan, do not improvise a layered setup.
Will closing vents or encapsulating the crawl space protect pipes?
Reducing cold air movement can support pipe insulation, but a vent or crawl-space plan should fit the home’s existing design. Lynchburg Water Resources and Greenville Water describe closing foundation vents in winter as a way to prevent cold drafts from reaching pipes. This is an environmental measure: it reduces convective heat loss, while pipe insulation slows heat transfer through the pipe’s surface.
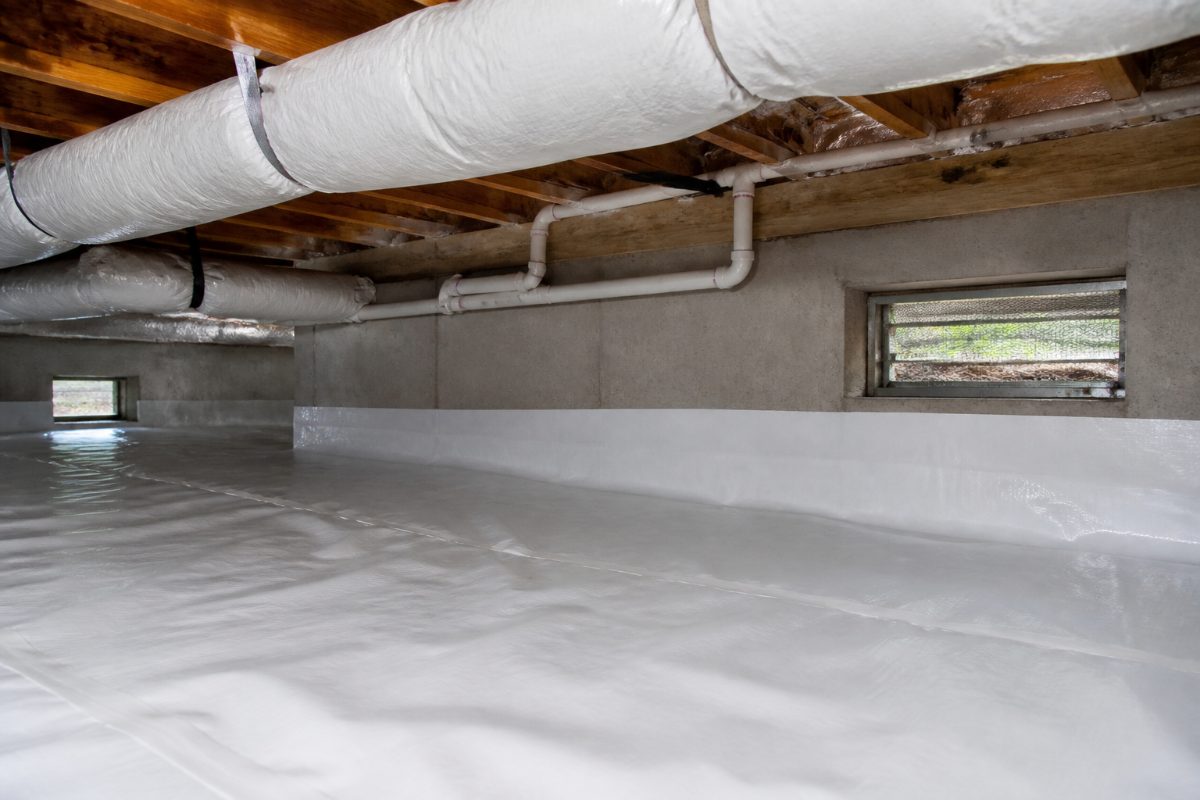
Encapsulation takes a broader approach by covering the ground with a vapor barrier and sealing the perimeter to create a more stable crawl-space environment. Palm Build describes encapsulation systems using heavy-duty vapor barriers, while Mr Attic discusses vapor-barrier thicknesses ranging from basic 6-mil material to thicker professional options. Those figures describe product choices, not a universal code requirement for every home.
Use this comparison to decide how much work is appropriate:
| Situation | Reasonable starting point | Why it fits |
|---|---|---|
| A few accessible pipes are exposed to drafts | Insulate the vulnerable pipe sections and address nearby air movement. | This targets the immediate heat-loss path without treating the whole crawl space. |
| Several pipe runs are exposed, or the space has persistent air movement | Review vent management and perimeter openings along with pipe insulation. | Protecting the surrounding environment can reduce cold air reaching more than one line. |
| The crawl space is damp or has moisture problems | Find and address the moisture source before adding insulation or planning encapsulation. | Wet materials can perform poorly, and enclosing a moisture problem does not remove it. |
Vents and vapor barriers are not simply interchangeable products. A vent-management decision affects air movement; a vapor barrier addresses moisture moving from the ground. For a broader explanation of seasonal vent choices, see Should Crawl Space Vents Be Open or Closed in Winter?
How can you choose a protection plan for your situation?
A first-time homeowner with one exposed line may need a different plan from someone who has already insulated the crawl space and still sees vulnerable pipes. Start with the simplest fix that addresses the actual failure point, then add protection only where inspection shows it is needed.
| Your situation | Practical next step | What to avoid |
|---|---|---|
| You are preparing before cold weather and have accessible pipes. | Inspect the route, fit appropriate pipe insulation, and check for drafts or dampness. | Do not assume the visible straight section is the only vulnerable part. |
| You already have insulation, but a pipe remains exposed to severe cold. | Check for gaps and drafts; consider a compatible, pipe-rated heating cable if passive protection remains insufficient. | Do not expect insulation alone to add heat. |
| You find damp fiberglass or standing water. | Address the water or moisture source before replacing or adding insulation. | Do not cover wet material and assume its insulating performance is unchanged. |
| You want to use heat tape but are unsure about the pipe or installation. | Check the cable label and full instructions, including outlet, overlap, and insulation rules. | Do not rely on a generic installation pattern for every cable. |
If you are comparing this job with protection for plumbing in another unheated area, How to Keep Pipes from Freezing in an Unheated Garage covers that separate setting. The same general idea—identify the exposed run and limit heat loss—still applies, but crawl spaces have their own moisture and vent conditions.
What mistakes commonly leave pipes vulnerable?
Several small oversights can undermine otherwise sound insulation. Check these points before cold weather rather than waiting until a pipe is already cold or inaccessible.
- Insulating only the easy sections: Inspect elbows, connections, and pipe runs near vents as well as straight lengths.
- Ignoring moisture: Damp fiberglass can lose insulating performance. Find leaks or water entry before enclosing the area.
- Assuming insulation creates heat: It slows heat loss; it does not warm the pipe. A line that remains exposed to prolonged cold may need a compatible active-heating solution.
- Covering heat cable without checking its instructions: CPSC warns against covering heat tape with flammable insulation and against cable overlap unless the manufacturer permits it.
- Assuming one vent rule fits every house: Vent management can reduce cold drafts, but it should be considered as part of the crawl space’s overall design rather than as a replacement for pipe-specific protection.
Make a simple fall check part of the maintenance routine: inspect the pipe insulation for gaps or damage, look for dampness, and examine any installed heat cable before the season when it will be needed. CPSC specifically recommends inspecting heat tapes and cables before winter use.
Frequently Asked Questions
Is foam insulation enough to keep crawl space pipes from freezing?
Foam slows heat loss, but it does not add heat. It may be enough for a pipe whose exposure is limited, but a line that remains vulnerable during prolonged severe cold may need draft control and a compatible heating cable as well.
Can I use fiberglass insulation around crawl space pipes?
Fiberglass can be used in some situations, including as nonflammable insulation over a heating cable when the product instructions allow it. However, AT Foam warns that damp fiberglass can absorb moisture, lose insulating value, and contribute to mold concerns, so check for moisture first.
Can I overlap heat tape on a pipe?
Do not overlap or wrap a heating cable over itself unless its manufacturer explicitly permits that arrangement. CPSC also advises using a GFCI-protected outlet and following the cable’s safety instructions.
Should I insulate the pipe or encapsulate the crawl space?
For a small number of exposed lines, pipe insulation and targeted draft control may address the immediate problem. Encapsulation is a broader approach involving a ground vapor barrier and perimeter sealing; persistent moisture should be investigated before either approach encloses the area.
When should I inspect heat tape?
Inspect it before winter use, as CPSC advises. Look for damaged insulation, bare wire, or signs of overheating, and do not use a damaged cable.
Key points to remember
For crawl space pipe freeze protection, begin with a full inspection of the exposed plumbing, then match the insulation to the pipe and moisture conditions. Reduce cold drafts where appropriate, and treat heating cable as a carefully selected extra layer—not a shortcut around insulation or safe installation.
Seasonal product instructions and local requirements can change. Check the current manufacturer directions for any insulation or heating cable you install, and use the applicable local requirements when planning a larger crawl-space project.
References
- okstate.edu
- Best Pipe Insulation for Your Home: Pros and Cons of 5 Types
- at-foam.com
- Insulation Buyer Guide 2026 : Best Options and R-Value Chart
- Inspect Heat Tapes, Cables As You Winterize Your Home | CPSC.gov
- Mr Attic — Bay Area Attic, Insulation & Rodent Specialists
- Crawl Space Encapsulation Cost 2026: $5,500 Avg | Palm Build
Information in this post was checked as of October 2026. Policies and prices may change, so please verify important details with official sources.


Comments
Post a Comment