How to Inspect and Patch Small Drywall Holes Like a Pro
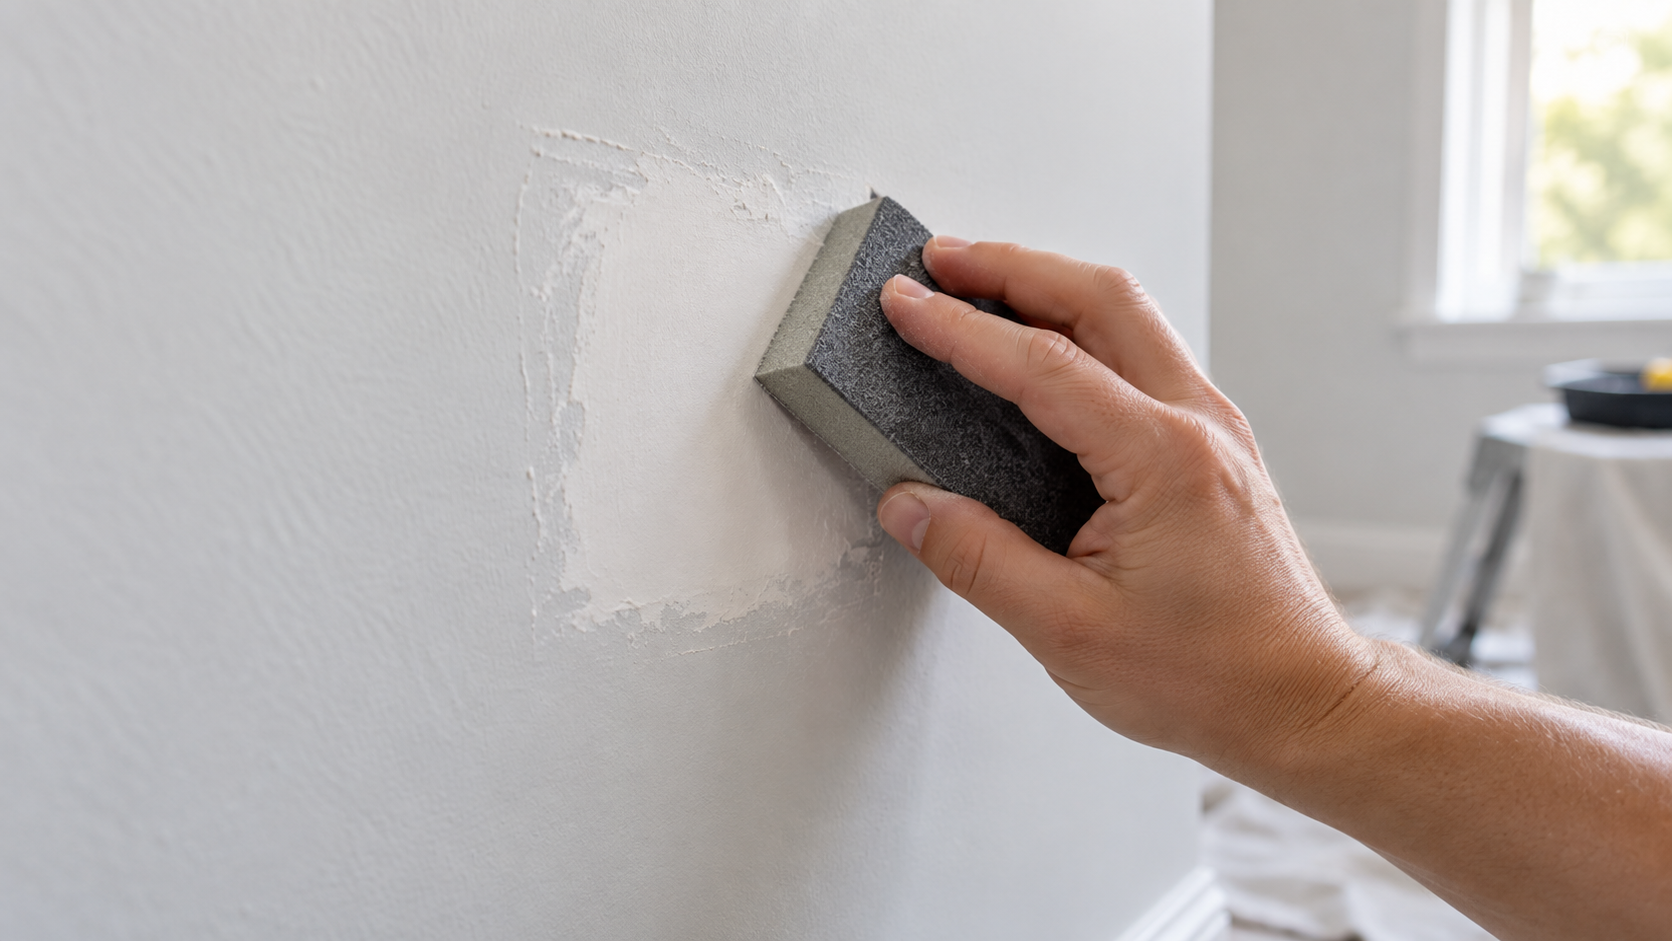
Small drywall holes can often be repaired without replacing a large section of wall, but the correct method depends on the condition and size of the damage. Tiny nail holes and shallow dents may need only patching compound, while wider openings may need a self-adhesive patch or a drywall insert rather than simply more spackle.
- Start by Inspecting the Damage, Not by Filling It
- Check for Wiring, Lead Paint, and Older Materials Before Cutting
- Gather the Right Materials for the Repair You Actually Have
- Prepare the Hole Before Applying Compound
- Fill Tiny Holes and Shallow Damage in Controlled Coats
- Use a Patch When the Opening Cannot Simply Be Filled
- Build the Finish With Additional Coats as Needed
- Sand Lightly Instead of Trying to Grind the Patch Flat
- Remove Dust, Prime the Repair, and Then Paint
- Common Drywall Patching Mistakes and How to Avoid Them
- A Practical Repair Checklist
- How to Adjust the Repair to Your Situation
- FAQ About Small Drywall Hole Repair
- Key Takeaways
The most reliable workflow is to inspect the damage, check for hidden hazards when necessary, remove loose material, fill or patch the opening, allow each coat to dry completely, sand only as much as needed, remove dust, prime, and then paint. The guidance below is based on U.S. EPA, CDC/NIOSH, USG, Lowe's, Home Depot, and paint-manufacturer information available as of September 25, 2026.
Start by Inspecting the Damage, Not by Filling It
Before reaching for spackle, look closely at what actually failed. A clean nail hole in otherwise solid drywall is a different repair from a ragged opening where the gypsum core has broken away. The condition of the surrounding drywall determines whether filling the opening is enough or whether the repair needs material that bridges the opening.
Check for loose drywall paper, crumbling gypsum, broken edges, and material that is no longer firmly attached. Georgia-Pacific repair guidance and patch-manufacturer instructions call for loose material to be removed before compound or a patch is applied. Covering unstable material may leave the new finish attached to material that was already failing.
Do not assume that every opening commonly described as a small hole has one universal repair method. Home Depot describes compound or spackling repairs for small drywall holes, while Lowe's separates larger openings into patching methods and describes a California patch method for holes up to about 6 inches wide. There is no single industry-wide measurement in the supplied sources that defines every small drywall hole.
Use the damage itself to choose the repair
| What you find | Likely approach | What to check first |
|---|---|---|
| Small nail hole, nick, or shallow surface damage | Spackling or patching compound may be sufficient | Make sure the surrounding material is firm and clean |
| Opening too wide to support compound by itself | Use an appropriate patch system rather than simply packing in more compound | Remove loose material and follow the patch manufacturer's directions |
| Opening that requires cutting drywall | A drywall insert or another supported patch method may be appropriate | Check for studs, wiring, and utilities before cutting |
| Soft, damaged, or questionable surrounding material | Do not assume it is suitable for a simple compound-only repair | Check whether the surrounding material is stable before proceeding |
| Older painted surface or material that may contain a hazardous substance | Pause before sanding or disturbing it | Consider lead and asbestos precautions described below |
The practical rule is simple: use compound for minor damage suitable for filling, and use a patch system when the opening needs to be bridged or supported. Trying to solve every opening by adding a thicker mass of spackle is not supported by the repair guidance reviewed for this article.
Check for Wiring, Lead Paint, and Older Materials Before Cutting
A cosmetic wall repair can require additional precautions once cutting or sanding begins. If the repair requires enlarging an opening or cutting out damaged drywall, Lowe's advises checking for wires and utilities, locating studs, and turning off power before cutting. Do not cut into a wall cavity without first considering what may be behind the drywall.
If you are working around electrical fixtures or have another reason to suspect an electrical problem rather than simple drywall damage, stop treating the job as a cosmetic patch. For related electrical troubleshooting, see why a circuit breaker trips and when professional help may be needed.
Special caution for pre-1978 painted surfaces
Older painted walls need additional consideration because disturbing paint can create lead-contaminated dust. According to the U.S. Environmental Protection Agency, the Renovation, Repair and Painting Rule generally addresses renovation activities that disturb painted surfaces in pre-1978 housing and certain other facilities covered by the rule.
The EPA provides a minor repair and maintenance exception that can apply when no more than 6 square feet of painted surface per room is disturbed during interior work, but that number should not be treated as blanket permission to sand any small patch. The EPA's criteria include additional conditions, and related work in the same room over a 30-day period is aggregated.
The exception also does not simply override other conditions. Window replacement, painted-surface demolition, and prohibited work practices can prevent work from qualifying as minor repair and maintenance. EPA guidance specifically identifies power sanding without a HEPA attachment as a prohibited practice in the RRP context.
If your project involves an older painted wall and you are uncertain whether lead requirements apply, check current EPA guidance before disturbing the surface. The lead-related information here reflects material available as of September 25, 2026 and is not a substitute for determining the requirements that apply to a particular property or renovation.
You cannot identify asbestos by sight
If drywall, sheetrock, or related building material is suspected of containing asbestos, do not rely on appearance to identify it. The EPA states that you cannot determine merely by looking whether drywall or sheetrock contains asbestos. Color, texture, or appearance is not a reliable visual test.
If suspect material is damaged or will be disturbed during renovation, EPA guidance recommends evaluation by an accredited asbestos professional and analysis by a qualified laboratory.
Gather the Right Materials for the Repair You Actually Have
You do not need a large collection of tools for a basic drywall patch, but you do need materials that match the repair method. Start by deciding whether you are filling a small defect, applying a manufactured patch, or installing a drywall insert. Then follow the directions for the compound or patch product you select.
- Patching compound, spackling, or joint compound: Appropriate products vary with the repair. Home Depot and USG guidance supports compound-based repairs for small holes and cracks.
- Putty or taping knife: Used to press material into the defect and spread finishing coats across the surrounding surface.
- Patch material when required: A self-adhesive patch is one option for damage that needs bridging. It still normally receives joint compound over the patch according to its instructions.
- Fine abrasive: USG patching guidance identifies 150-grit sandpaper or 220-grit abrasive mesh cloth or finer for dry sanding.
- Cleaning materials: Use them to remove loose debris before repair and sanding dust before finishing.
- Primer and matching paint: General joint-compound repairs benefit from priming before the finish coat because patched and previously painted surfaces can absorb paint differently.
Do not automatically copy a supply list from another repair if your product gives different instructions. Some patching products combine functions that are separate in traditional drywall finishing. For example, some spackling products are marketed with primer-enhanced formulations, so the manufacturer's directions should take priority over a universal rule about a separate primer.
Prepare the Hole Before Applying Compound
A clean, stable repair area gives the patching material a suitable surface for the repair. Remove material that is already loose instead of covering it with compound. The goal is to remove unstable material without unnecessarily enlarging the damage.
Clean the area as directed by the repair-product manufacturer. USG's basic sequence for small holes and cracks starts with cleaning the surface before filling it with patching compound. Self-adhesive patch instructions similarly call for loose drywall or plaster to be removed and the repair surface prepared before the patch is installed.
Before applying compound or a patch, check again for loose fragments or other material that is not firmly attached. Repair guidance reviewed for this article consistently calls for loose material to be removed before the finishing material is applied.
Fill Tiny Holes and Shallow Damage in Controlled Coats
For a small nail hole, nick, crack, or similarly minor defect that is suitable for a compound-only repair, apply patching material with a knife and work it into the damaged area. Remove unnecessary excess rather than relying on sanding to remove a large amount of dried material later.
USG's repair guidance follows a straightforward sequence: clean, fill, allow the compound to dry, apply a second coat if needed, sand, and prime. This supports building the repair in additional coats when needed rather than assuming every defect can be completed with one application.
Do not rush the drying stage
Drying time depends on the product and environmental conditions, and the next coat should not be applied until the previous coat is completely dry.
USG lists about 24 hours for a general ready-mixed joint compound under conditions of 70°F and 70% relative humidity. A separate USG patch-and-repair reference recommends about 24 hours between coats at 75°F and 50% relative humidity. These are reference conditions, not a universal countdown for every patch.
Lower temperatures and higher humidity can extend drying time, and different products may provide different instructions. Check the label or technical information for the product you are using instead of assuming that every compound is ready for sanding after the same number of hours.
Useful rule: Do not schedule the next coat by the clock alone. Follow the product instructions and allow the current coat to dry completely before continuing.
Use a Patch When the Opening Cannot Simply Be Filled
When an opening is too large for a simple compound-only repair, adding more spackle is not necessarily the answer. A patch can provide support across an opening that is not suitable for filling with compound alone.
For a self-adhesive drywall patch, Wal-Board Tools instructions described through Home Depot call for removing loose material, cleaning or sanding the surface as appropriate, removing the patch backing, placing the patch, and applying a thin layer of joint compound over the patch and surrounding area. The compound is then allowed to dry completely before sanding, with the process repeated when additional finishing is needed.
The key detail is that the patch does not eliminate the finishing stage. A self-adhesive patch provides the patch material, while joint compound is applied over the patch and surrounding area according to the product instructions.
When a drywall insert makes more sense
Lowe's April 9, 2026 drywall repair guide describes a California patch method for openings up to about 6 inches wide. Its procedure uses a drywall piece cut 2 inches larger than the existing opening in both width and height. This demonstrates why the term small hole should not be treated as one fixed repair category.
A repair that requires cutting the wall to accept an insert also changes the safety considerations. Locate studs and consider hidden wiring and utilities before cutting, and follow the electrical precautions specified for the work. If you are not confident about what is behind the wall, do not proceed with cutting until the area can be handled safely.
Build the Finish With Additional Coats as Needed
The first application does not always have to be the final coat. After it dries completely, inspect the repair. If additional finishing is needed, another coat may be applied according to the product instructions.
Apply the material needed for the next finishing coat. USG instructions specifically allow for a second coat when needed and require coats to dry completely before another coat is applied.
Careful application can also reduce unnecessary sanding. Remove unnecessary excess during application so less dried compound has to be sanded later.
Sand Lightly Instead of Trying to Grind the Patch Flat
Sanding is a finishing step, not a substitute for careful compound application. USG advises avoiding sanding when it is unnecessary and using a fine abrasive lightly when sanding is required. Excessive sanding can scuff or damage the drywall face paper around an otherwise successful repair.
For dry sanding in its patch-and-repair guidance, USG specifies 150-grit sandpaper or 220-grit abrasive mesh cloth or finer. USG also describes wet sponge sanding as an option that can reduce dust and reduce scuffing of the drywall paper.
Sand only as much as needed to finish the repaired surface. The objective is to avoid unnecessary sanding and avoid damaging the drywall face paper.
Drywall dust deserves attention
Drywall sanding dust is more than a housekeeping inconvenience. CDC/NIOSH states that sanding joint compound can generate high concentrations of dust, which may irritate the eyes, nose, throat, and respiratory tract. Some joint compounds can also contain respirable silica.
NIOSH investigations found that vacuum sanding controls reduced airborne dust exposure by approximately 80% to 97% compared with conventional dry sanding. USG also recommends HEPA-filter dust collection when power sanding and advises using a dust mask when excessive dust is produced and ventilation is not possible.
Those findings are a good reason to minimize unnecessary sanding in the first place. Apply compound carefully, use dust-control methods appropriate to the product and work area, and remove sanding dust before finishing.
Remember that ordinary drywall dust-control advice is not permission to power-sand an older painted surface. Lead-painted surfaces require separate consideration, and EPA rules specifically address power sanding without a HEPA attachment in RRP-covered work.
Remove Dust, Prime the Repair, and Then Paint
A patch can feel smooth and still become more noticeable after paint dries. One reason is that dried joint compound and the surrounding painted wall do not necessarily have the same surface porosity, meaning they can absorb a new coating differently.
Sherwin-Williams surface-preparation guidance calls for patching material to dry completely before sanding, dust removal, and priming. It also identifies spot priming as a way to address porous patches that could otherwise produce flashing, a visible difference in paint sheen.
USG similarly explains that primer helps equalize differences between drywall face paper and joint compound. This is why differences in the repaired surface can remain visible after the finish coat if surface preparation is not handled appropriately.
For a conventional joint-compound repair, priming is therefore a recommended part of the workflow. If you are using a specialized all-in-one patching product that specifies a different finishing process, follow that manufacturer's instructions rather than assuming every product requires exactly the same sequence.
Common Drywall Patching Mistakes and How to Avoid Them
| Mistake | Why it causes trouble | Better approach |
|---|---|---|
| Treating every hole as a spackle-only repair | Wider openings may require a patch or insert rather than simple filling | Inspect the opening and move to a patch or drywall insert when needed |
| Covering loose drywall material | The repair is being applied over material that is not firmly attached | Remove loose material and clean the repair area first |
| Applying another coat before the first is dry | Manufacturer guidance requires complete drying between coats | Follow the product's drying instructions and account for temperature and humidity |
| Assuming every compound dries in the same number of hours | Products and environmental conditions differ | Use manufacturer instructions instead of a universal drying time |
| Leaving unnecessary excess compound | More dried material may then need to be sanded | Apply controlled coats and remove unnecessary excess during application |
| Sanding aggressively | It can damage drywall face paper | Use a fine abrasive lightly and sand only as needed |
| Ignoring sanding dust | Joint-compound sanding can create substantial airborne dust | Minimize sanding and use appropriate dust-control methods |
| Painting conventional joint compound without considering primer | Different porosity can produce flashing or uneven sheen | Prime the repaired area before painting unless the specific product directs otherwise |
| Cutting into a wall without checking behind it | Wiring or other utilities may be hidden in the cavity | Locate studs and consider utilities before cutting |
| Sanding old painted material as though it were new drywall | Pre-1978 painted surfaces can involve lead-related hazards and requirements | Check current EPA guidance before disturbing covered pre-1978 painted surfaces |
A Practical Repair Checklist
Use this sequence as a final check before and during a typical drywall repair. Individual patch products may modify part of the process, so their instructions still take priority.
- Inspect the damage. Identify loose material, damaged paper, crumbling gypsum, and the actual extent of the opening.
- Choose the repair type. Decide whether the damage can be filled or needs a patch or drywall insert.
- Check what could be behind the wall. If cutting is required, consider studs, electrical wiring, and other utilities before making the opening larger.
- Consider the surface before disturbing it. For pre-1978 painted surfaces, review current EPA lead guidance. If building material is suspected of containing asbestos, do not rely on appearance alone.
- Remove loose material. Create a stable repair surface without unnecessarily enlarging the damage.
- Clean the repair area. Follow the patch or compound manufacturer's surface-preparation instructions.
- Fill or install the patch. Use the repair method appropriate to the opening rather than assuming every hole can be filled with compound alone.
- Allow the coat to dry completely. Use product instructions and actual conditions rather than assuming a universal drying time.
- Add another coat if needed. Follow the product instructions when additional finishing is required.
- Sand only as needed. Use a fine abrasive and avoid damaging surrounding drywall paper.
- Control and remove dust. Minimize sanding dust and clean the surface before finishing.
- Prime the conventional repair. Primer helps equalize the patched and surrounding surfaces before paint.
- Apply the finish paint. Follow the paint manufacturer's surface-preparation and application directions.
How to Adjust the Repair to Your Situation
If you only removed a picture nail
If the wall is firm and the damage is limited to a tiny nail hole, a compound-based repair may be sufficient. Clean the area, fill the defect, allow it to dry completely, apply another coat if needed, sand lightly only if necessary, and prepare it for paint according to the product instructions.
If an anchor left a ragged opening
Do not focus only on the original diameter of the anchor. Inspect how much drywall paper and gypsum came away when the anchor was removed. Loose material should be cleared, and an opening that is not suitable for compound alone may need a patch rather than simply more filler.
If the hole needs to be enlarged for a drywall insert
Treat this as a cutting project rather than a simple surface patch. Check for studs, wiring, and utilities first. Lowe's drywall repair guidance specifically calls for these checks when describing repairs that involve cutting the existing wall.
If you are also dealing with basement water management
Keep the drywall repair separate from any other home-maintenance issue that may also need attention. For a related maintenance topic, see inspecting and cleaning a sump pump to help prevent basement flooding.
If you are also checking a window area
Handle the drywall patch according to the repair method described above. For a separate seasonal window-maintenance topic, see how to inspect and reseal drafty windows before winter.
If you are working in an older home
Separate the drywall repair decision from the hazardous-material decision. The fact that an opening is physically small does not by itself determine whether disturbing painted or suspect material is appropriate. For pre-1978 painted surfaces, review current EPA lead guidance. If material is suspected of containing asbestos, remember that EPA says asbestos content in drywall or sheetrock cannot be determined by sight alone.
FAQ About Small Drywall Hole Repair
Do nail holes need a drywall patch?
Not necessarily. Home Depot and other repair guidance supports using spackling or patching compound for ordinary small nail holes and similar minor defects. A separate patch becomes more relevant when the opening is too large or unsuitable for compound alone.
Can I fill a larger hole with extra spackle?
That should not be treated as a universal solution. As openings become larger, repair guides move from simple filling to patch systems or drywall inserts. Lowe's, for example, describes a California patch method for holes up to about 6 inches wide rather than treating every opening as a compound-only repair.
How long should joint compound dry before the next coat?
Follow the specific product instructions. USG gives approximately 24 hours for ready-mixed joint compound at 70°F and 70% relative humidity, while another USG repair reference uses about 24 hours between coats at 75°F and 50% relative humidity. Lower temperatures and higher humidity can increase drying time, so 24 hours is not a universal guarantee.
What sandpaper should I use on a drywall patch?
USG patch-and-repair guidance specifies 150-grit sandpaper or 220-grit abrasive mesh cloth or finer for dry sanding. Sand lightly and only when needed so that you do not scuff the drywall face paper around the repair. Wet sponge sanding is another manufacturer-described option for reducing dust and paper scuffing.
Do I need primer before painting a drywall patch?
For a conventional joint-compound repair, priming is recommended because joint compound and the surrounding painted drywall can have different porosity. Sherwin-Williams notes that porous patches can cause paint flashing, while USG explains that primer helps equalize the surface. Some specialized patching products use primer-enhanced formulations, so follow the instructions for the exact product you use.
Key Takeaways
- Inspect before filling. Small nail holes and shallow defects may need only compound, while wider or unsupported openings may require a patch or drywall insert.
- Remove loose material first. Repair guidance calls for unstable material to be removed before compound or a patch is applied.
- Check behind the wall before cutting. Repairs involving drywall cutting require attention to studs, wiring, and other utilities.
- Let each coat dry completely. Drying time varies by product, temperature, and humidity; manufacturer instructions should control the schedule.
- Sand less, not more. Fine, light sanding reduces the risk of damaging drywall paper and limits unnecessary dust.
- Take drywall dust seriously. CDC/NIOSH identifies significant dust exposure during joint-compound sanding and reports approximately 80% to 97% reductions in airborne dust exposure with the vacuum sanding controls it investigated.
- Prime conventional patches before painting. Primer helps reduce visible sheen differences associated with the different porosity of compound and the surrounding surface.
- Use extra caution with older painted or suspect materials. Pre-1978 painted surfaces can involve lead requirements, and suspected asbestos-containing drywall or sheetrock cannot be identified by appearance alone.
A professional-looking drywall repair depends on choosing a repair method that matches the damage and following each finishing stage carefully. Inspect the wall first, remove loose material, use compound or a supported patch as appropriate, allow complete drying between coats, minimize sanding, remove dust, and prepare the finished repair correctly for paint.
References
- Repairing Small Holes in Drywall - Lumber/Building Materials - How To Videos and Tips at The Home Depot
- Lowe's
- The Home Depot
- Sheetrock® Brand All Purpose Joint Compound | USG
- USG
- 질병통제예방센터
- Why must a wall be primed with Sheetrock® Brand First Coat Primer before painting or texturing?
- How to Prep Surfaces for Painting | Sherwin-Williams
Information in this post was checked as of 2026-09-25. Policies and prices may change, so please verify important details with official sources.


Comments
Post a Comment