How to Prioritize Home Repairs When Money Is Tight
Key Takeaways
- Rank home repairs by immediate risk, continuing damage, essential function, and only then comfort or appearance.
- Fix the source of a problem before paying to restore the finish it damaged.
- Build a repair budget around labor, materials, permits, inspections, cleanup, and a reserve for surprises.
- Compare the actual scope of competing repairs instead of choosing by visibility or the lowest price alone.
- Check state and local assistance options before treating expensive borrowing as the only way to fund essential work.
Home repair priorities when money is tight: sort urgent risks, ongoing damage, essential systems, maintenance, and cosmetic work, then plan costs and assistance.
Table of Contents
- How should you prioritize home repairs when money is tight?
- A repair priority ladder for competing projects
- First priority: recognize potential safety concerns
- Second priority: stop active water and moisture damage
- Third priority: prevent one defect from damaging another system
- Fourth priority: restore essential home functions
- Fifth priority: choose preventive maintenance with a clear purpose
- When should efficiency work come before cosmetic repairs?
- Put cosmetic projects last when safety or damage control needs the cash
- Build a repair budget before requesting estimates
- Compare repair estimates by scope, not just total price
- What if the first-priority repair is unaffordable?
- Choose financing only after separating the repair from the loan
- How to choose between two repairs today
- Common mistakes that waste a limited repair budget
- A situation-by-situation repair guide
- Frequently Asked Questions
- Key takeaways
When money is tight, prioritize home repairs by risk and the damage that will continue if you wait—not by appearance or price alone. A useful sequence is to deal with immediate safety concerns, stop active damage, preserve essential home functions, then consider preventive work, efficiency, and cosmetic upgrades.
There is no single ranking that fits every house. The right order depends on what is happening, whether the problem is getting worse, and what the household can safely postpone. Curry Forest also presents repair decisions as a priority hierarchy; the approach below turns that idea into a practical way to compare competing needs without treating it as an official government ranking.

How should you prioritize home repairs when money is tight?
Home repair priorities are the order in which limited funds are assigned to problems based on risk, ongoing damage, and the home’s essential needs. Start with what could endanger people, then identify defects that are actively damaging the building or preventing a necessary home function.
This is different from sorting a to-do list by room, project size, or how noticeable a defect looks. A worn finish may be easy to see and frustrating to live with, while a less visible leak or failing system can deserve attention first. A price comparison is useful after you establish which problem should be handled; price alone does not establish urgency.
Use four questions to make the first pass:
- Could someone be harmed if this continues? If a condition appears to involve a serious safety risk, treat it as a safety issue rather than an ordinary maintenance task.
- Is the problem actively causing damage? Look for a source that is still allowing water, movement, or another damaging condition to continue.
- Does the problem interfere with an essential home function? Consider what the household cannot safely or reliably do because of the failure.
- Can the project wait without making the problem worse? A stable appearance issue is often easier to defer than a defect with a clear path to additional damage.
The answers help separate urgency from preference. Two projects can both matter while still belonging at different points in the spending order. For example, a household may value an updated bathroom and also have a damaged plumbing fixture; first determine whether the fixture is merely unattractive or whether it is causing a functional or water problem.
UW-Madison Division of Extension advises households facing a drop in income to figure out how much they can spend, track spending, identify possible cuts, explore ways to increase income, and plan to keep up with bills. It also identifies housing-related bills, car payments, and basic living expenses as common top budget priorities. Apply that same clear-eyed budgeting approach before committing repair money: know what cash is available after essential household costs, not just what a contractor’s initial estimate says.
A repair priority ladder for competing projects
The ladder below is a decision tool, not a universal rulebook. Move a repair higher when its actual condition creates a more serious risk, is causing more damage, or prevents the home from serving an essential purpose.
| Order | Type of need | How to think about spending |
|---|---|---|
| 1 | Potential immediate safety concern | Address the underlying risk before routine maintenance or optional improvements. |
| 2 | Active damage, such as continuing water entry | Stop the cause and protect affected materials before restoring finishes. |
| 3 | Failure that threatens other parts of the house | Prevent a manageable defect from spreading or undermining a neighboring system. |
| 4 | Essential home function | Consider safety, sanitation, daily use, and the household’s actual needs. |
| 5 | Preventive maintenance | Handle known defects with a credible path to a larger failure after urgent needs are controlled. |
| 6 | Efficiency or operating-cost improvement | Consider the project after prerequisite safety and moisture issues are resolved. |
| 7 | Cosmetic update or optional upgrade | Defer if funds are needed to protect people, stop damage, or maintain essential use. |
This order is intentionally based on the condition, not the name of the project. A roof repair might be urgent when water is entering, while a roof replacement planned mainly for appearance may be less urgent if the roof is functioning. Likewise, painting may be decorative in one situation and part of restoring a surface after necessary repairs in another.
Newrez’s home-maintenance guidance, published July 30, 2026, similarly places structural, safety, and mechanical issues ahead of cosmetic upgrades and recommends preparing a budget before beginning potentially expensive improvements. That supports a practical distinction: first decide what must be protected or restored, then decide what improvements the remaining budget can support.
First priority: recognize potential safety concerns
A potential safety problem belongs ahead of a decorative project, even when the decorative project is easier to price. The purpose of this first screen is not to diagnose a hazard from a checklist; it is to notice when the issue may require a different response than routine DIY work.
Pay attention to conditions that suggest a serious problem with a system the household depends on. A recurring fault, an unusual change in how equipment operates, visible damage to a system, or a condition that raises a credible concern about fire, electrical safety, or structural stability should not be budgeted as though it were simply an appearance defect. Avoid experimenting with a repair method if the work itself could expose someone to a hazard.
Make the next step concrete. Write down what happened, when it happened, which room or system is affected, and whether it is recurring or changing. This brief record can help a qualified person understand the problem and can make estimates more specific. It also keeps the household from paying for unrelated cosmetic work while the underlying issue remains unclear.
If the condition appears immediately dangerous, follow the relevant emergency guidance rather than waiting for a normal maintenance appointment. If it does not appear to be an emergency but the cause is uncertain, reserve money for an appropriate assessment before buying materials or starting demolition. The cost of an assessment may clarify whether a larger repair is necessary, what work can safely wait, and whether two quoted solutions address the same cause.
Keep this category focused on the actual hazard. It should not become a reason to label every old or imperfect component an emergency. Age, inconvenience, and appearance can be reasons to inspect or plan, but the observed condition and its likely consequence should guide the priority.
Separate a safety repair from a comfort complaint
Some problems affect comfort without presenting the same kind of risk as a potentially unsafe system. A room that feels drafty, a fixture that looks dated, and a system that may be operating unsafely should not be treated as equivalent simply because all are inconvenient.
Describe the impact in plain terms: what has stopped working, what has changed, and what the household cannot do normally. If the answer is mainly that a room is less attractive or less comfortable, compare that project with any unresolved safety or active-damage needs before spending. If the answer involves a concern about safe use, move the assessment ahead of optional improvements.
Second priority: stop active water and moisture damage
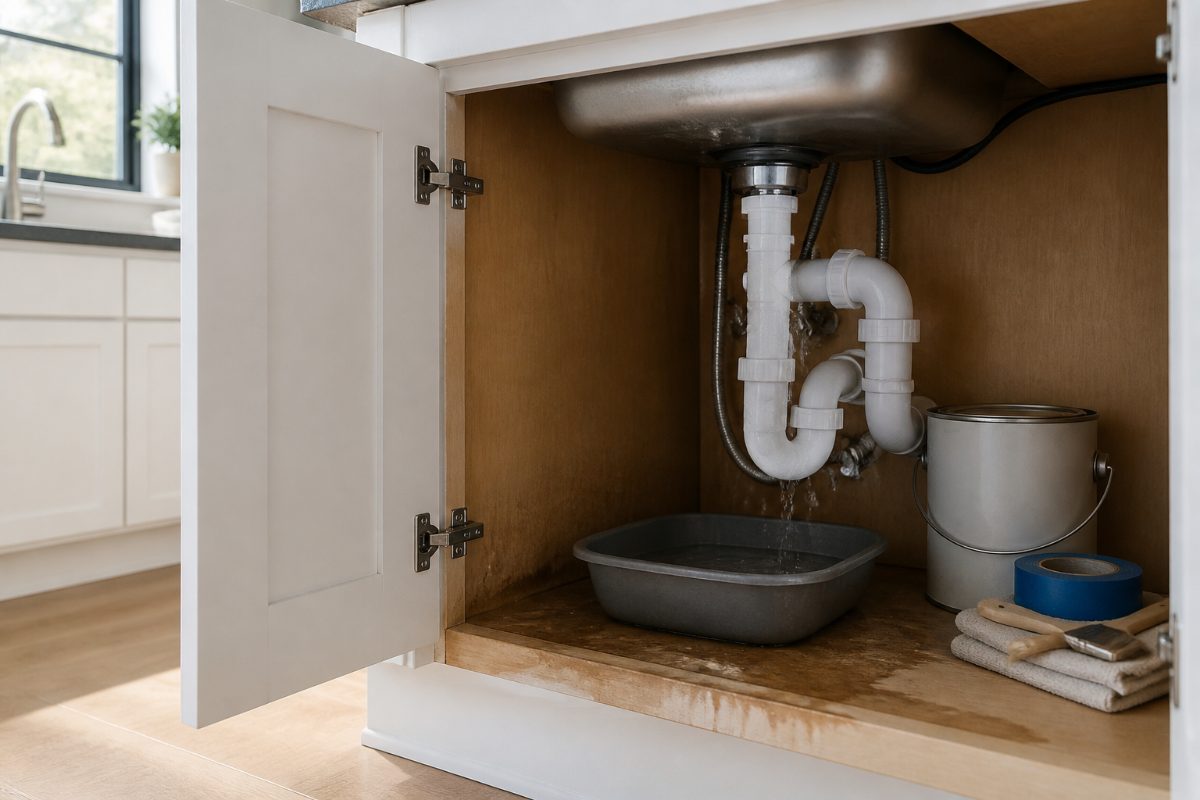
When water is still entering or a leak is still occurring, repairing the visible stain alone does not resolve the problem. Find and address the source before paying to replace finishes that may be damaged again.
A wet ceiling, swollen trim, damaged drywall, or flooring change can be a symptom rather than the cause. The source may involve a roof, plumbing, drainage, or another path by which water reaches a material. The first spending decision is therefore not necessarily “Which finish should I replace?” but “What is allowing this damage to happen?”
Use this sequence to plan the work:
- Describe the evidence. Note where the moisture appears, whether it is new or recurring, and what materials are affected.
- Identify the likely source. Separate water entering from outside, a plumbing-related issue, and moisture that appears under particular indoor conditions.
- Stop ongoing entry where it can be done safely. A temporary measure may limit further damage, but it should not be confused with a lasting repair if the source remains.
- Dry and assess affected areas. Do not close up or cover materials simply because the visible water is gone.
- Restore damaged finishes after the cause is controlled. Painting, replacing drywall, and installing flooring belong after the source has been addressed.
EPA’s guidance on indoor water problems says to act quickly and advises drying wet or damp materials and areas within 24 to 48 hours when possible to help prevent mold growth. That period is a useful reason to make a prompt plan, not a guarantee that every material will be dry or suitable for reuse by a particular time.
Moisture control also matters after the visible leak stops. EPA advises keeping indoor relative humidity below 60% where possible, with an ideal range of 30% to 50%. If condensation repeatedly appears on windows, walls, or pipes, wiping the surface addresses the visible moisture but may not address the condition that keeps producing it.
Why “repair the source first” protects a limited budget
Replacing damaged finishes before correcting the source can create two rounds of spending: one for the new material and another when the same problem reaches it. The source-first sequence avoids paying for a repair that depends on an unresolved condition staying harmless.
The same principle applies to energy work. The Department of Energy’s weatherization guidance says minor roof or wall leaks should be repaired before insulation work. Insulation is not a substitute for stopping water, and a wet or unresolved building condition can undermine the value of an improvement made downstream.
When the source cannot be corrected immediately, divide the plan into what reduces continuing damage and what restores appearance. Ask a qualified contractor to identify which items are temporary controls and which constitute the actual repair. Keep the distinction in writing so a low initial price does not conceal a scope that leaves the cause untouched.
Third priority: prevent one defect from damaging another system
After immediate safety concerns and active water entry, look for problems that can plausibly spread. The key is to identify a real connection between the defect and the next likely damage, rather than relying on a broad claim that every small repair will become expensive.
Ask what material, room, or system is exposed if the condition continues. A deteriorated exterior seal may matter because it can allow unwanted movement of air or moisture. A drainage problem may matter if water is being directed toward a part of the home that should remain dry. A defect around equipment may matter if it prevents that equipment from performing its intended function.
Write down a simple chain: current condition → what it affects → what changes if it continues. If you cannot explain the connection, the repair may still need inspection, but the budget decision is less clear. If there is a direct path to additional damage, compare it against stable cosmetic work and consider handling it first.
Newrez lists contractor labor, building materials, appliances and fixtures, permits and inspections, design services, cleanup and debris removal, and temporary housing or storage when necessary as possible home-improvement budget items. These categories help reveal why delaying a defect can complicate a project: the eventual cost may include more than the replacement part. They are planning categories, not a promise that every job will require every item.
For a small repair, ask whether the proposed work is preventive or corrective. Preventive work addresses a condition before it damages something else; corrective work restores a component after damage has occurred. The distinction helps you avoid comparing two bids that use the same project name but solve different stages of the problem.
Fourth priority: restore essential home functions
A failure that interferes with an essential home function can deserve priority even when it is not visibly damaging another surface. Consider whether the household can use the home safely and reliably, and whether the issue affects a necessary system or basic daily activity.
Do not rank all failures in a category identically. Two problems involving plumbing, heating, electrical service, or an appliance can have different consequences. One may be a limited inconvenience; another may affect safe use or sanitation. Describe the actual effect instead of relying on a broad label such as “plumbing repair” or “mechanical repair.”
For each affected system, record three things: what still works, what does not work, and what the household is doing to compensate. This can help distinguish a partial failure from a complete loss of function. It also gives a contractor a clearer basis for identifying a repair scope and helps you decide whether a temporary workaround is safe and practical.
When comparing an essential repair with a cosmetic upgrade, place the essential function first if the failure is disrupting normal use. If the function is still available and the defect is stable, the project may fit a later planning window. The priority is based on the real effect, not on an assumption that every system issue must be handled immediately.
Keep household circumstances in the decision. A repair that is manageable for one household may create a more serious daily burden for another. UW-Madison Division of Extension emphasizes that spending priorities should reflect a family’s priorities and values. Apply that idea alongside safety and damage control: assess how the failure affects the people who live in the home, rather than ranking it by resale appeal alone.
Fifth priority: choose preventive maintenance with a clear purpose
Preventive maintenance is easiest to evaluate once urgent risks and active damage have been addressed. Focus on known defects, recurring symptoms, and maintenance tasks that protect a system the home depends on. Avoid turning “preventive” into a reason to replace everything that appears old.
Condition is more useful than age by itself. A component may be old but still functioning, while a newer component may have a problem that needs attention. Use observable condition, manufacturer instructions where available, and the way the system is performing to decide whether to inspect, maintain, or replace it.
For example, HSH’s maintenance checklist suggests testing a basement sump pump by checking that its switch is on and adding water to the basin to see whether it starts; it also mentions checking a backup battery. That example is useful only for a home with a sump pump and should be carried out in a way that follows the equipment’s instructions. It illustrates a broader point: a simple maintenance check is most valuable when it is tied to equipment the house actually has and a clear function the equipment serves.
Make a short preventive list in three groups:
- Known recurring issue: a symptom returns after a temporary fix.
- Visible deterioration: a seal, finish, or component shows a change that could expose another material or reduce function.
- Routine task tied to installed equipment: an inspection or maintenance step specified for a system in the home.
Then decide whether each item requires action now, an assessment, or a future budget line. This prevents a long checklist from competing equally with a leak or essential-system failure. It also makes maintenance spending more deliberate: you know which risk or function the work is meant to protect.
When should efficiency work come before cosmetic repairs?
Efficiency improvements can be a sensible use of money after the house is safe and active moisture problems are controlled. The Department of Energy identifies caulking and weatherstripping as simple air-sealing measures and notes that they can have a quick payback, in some cases within a year.
That potential does not make every efficiency project the next repair automatically. First consider whether the proposed improvement addresses a real condition in the home and whether a prerequisite repair remains unfinished. DOE’s whole-house weatherization process evaluates health and safety conditions, and its guidance supports addressing roof or wall leaks before insulation work.
For a modest air-sealing project, identify where unwanted air movement occurs before buying materials. A door that allows drafts, for example, may call for inspection of its weatherstripping rather than a broader upgrade unrelated to the source. The related guide on inspecting and replacing exterior door weatherstripping can help with that specific maintenance task.
Think of efficiency work as a sequence, not a competing slogan. If the home has a source of damage, address that source first. If the home is stable and the project is aimed at an observed inefficiency, estimate the materials and labor and compare the expected benefit with other unresolved needs. Do not assume that a project will pay for itself on a particular schedule unless that estimate is supported by the actual home and project details.
Newrez also identifies financing options such as home equity loans and home equity lines of credit (HELOCs) as possibilities people may explore for major work. Financing can spread payments, but it does not make a project less expensive. Compare the total obligations and the household’s ability to make payments before treating a projected operating-cost reduction as money already available.
Put cosmetic projects last when safety or damage control needs the cash
Cosmetic work has a legitimate place in a home budget, but it generally does not stop an active leak or resolve an essential-system failure. If money is limited, separate projects that improve appearance from those that protect people, limit damage, or restore necessary use.
Painting a functional room for a new look, changing hardware, or replacing an intact finish mainly for style may be easier to delay than a repair that prevents ongoing damage. The category depends on why the work is being done. Painting that is part of a necessary repair is not merely cosmetic; replacing a damaged finish after its cause has been corrected may be part of restoring the home.
If a home is being prepared for sale, the calculation may change. Opendoor’s summary of market-oriented improvement advice says to begin with essential repairs such as leaky faucets, cracked tiles, and holes in walls, then consider lower-cost, high-impact updates such as fresh paint, updated hardware, and improved lighting. It also reports that NAR members recommend painting, new roofing, and bathroom renovations as priorities in that sale-preparation context.
Those recommendations do not establish a universal return or mean every seller should complete those projects. Before spending, determine whether the work addresses a buyer concern, improves an actual defect, or is simply a personal preference. If the repair budget is constrained, compare the likely sale-related purpose against any unresolved safety, water, or essential-function problem.
A useful test is to ask, “Would this work still be necessary if the home were not being photographed or shown?” If the answer is no, it may be an appearance project. That does not make it pointless; it helps you place it accurately in the spending order.
Build a repair budget before requesting estimates
Set a realistic spending limit before collecting contractor estimates. Newrez recommends preparing a budget before requesting estimates, while noting that the budget may need adjustment after contractor numbers arrive. A budget gives you a way to compare scope with available cash and to decide whether a project needs to be phased or financed.
Start with the amount the household can use without neglecting housing-related bills, car payments, and basic living expenses. UW-Madison Division of Extension identifies those as common budget priorities. Then list cash already assigned to other essential obligations, so a repair estimate is not mistaken for money the household can freely spend.
For each project, make a worksheet with these fields:
| Budget line | What to record | Why it helps |
|---|---|---|
| Labor | Work included and whether the estimate covers the full task | Shows whether bids describe comparable work. |
| Materials | Products, fixtures, and quantities included | Prevents a low price from hiding a different material scope. |
| Permits and inspections | Whether these are anticipated and who handles them | Identifies project costs beyond visible materials and labor. |
| Cleanup and debris | Removal, disposal, and site cleanup included or excluded | Clarifies whether cleanup becomes a separate expense. |
| Temporary arrangements | Possible housing or storage needs, if relevant | Accounts for disruptions that may accompany a major project. |
| Reserve | Cash held back for unexpected costs | Reduces the chance that a surprise immediately disrupts the household budget. |
Newrez specifically lists contractor labor, building materials, appliances and fixtures, permits and inspections, design services, cleanup and debris removal, and temporary housing or storage when necessary as possible budget items. It also recommends keeping extra cash reserves for unexpected costs. The appropriate reserve depends on the project and household; do not invent a fixed percentage if you do not have a basis for it.
If estimates exceed the available budget, do not automatically cut the scope that controls the underlying risk. Ask which work is necessary to stop the problem, which work restores the affected area, and which work is an optional enhancement. A phased plan is useful only if the first phase leaves the home in a safe and workable condition.
Compare repair estimates by scope, not just total price
Two estimates are comparable only when they address the same problem and describe similar work. A lower total can reflect a smaller scope, different materials, or omitted tasks rather than better value.
Ask each contractor to describe the cause they believe they are correcting, the work included, materials proposed, items excluded, and any expected permit or inspection needs. If one estimate replaces a visible finish and another investigates the source of the damage, they are not competing bids for the same job.
Use a comparison table like this:
| Comparison point | Questions to answer |
|---|---|
| Cause | Does the proposal identify and address the source, or only the visible symptom? |
| Work scope | Which tasks are included, and which remain the homeowner’s responsibility? |
| Materials | Are the proposed materials and fixtures comparable? |
| Permits and inspections | Does the estimate explain whether these are included, excluded, or still to be determined? |
| Cleanup | Does the price include removal of debris and cleanup? |
| Payment terms | Are timing, payment method, and financing terms clear in writing? |
| Uncertainty | What could change the price, and how will the contractor document a change? |
For a major remodel, the guide to scoping and comparing bids can help organize proposals around the actual work. For a smaller repair, the same idea still applies: write down the problem in a consistent way before requesting estimates, and ask each contractor to price that scope.
Keep a record of estimates, photographs, receipts, and decisions. This makes it easier to track what has been diagnosed, which work is complete, and which items remain. It also reduces the likelihood of paying twice for an assessment or repeating a repair that addressed only the visible damage.
What if the first-priority repair is unaffordable?
If a necessary repair exceeds the cash available, look for assistance before assuming that ignoring the problem or taking on expensive debt are the only choices. Availability and eligibility depend on the program and location, so treat assistance as an option to investigate rather than guaranteed funding.
USAGov says state and local governments may offer home-repair programs or loans and directs homeowners to look for the housing department on their local or state government website. It also describes government repair and renovation assistance as a way to learn about eligibility and application options. Start by identifying the exact repair need and the property location, then look for a program whose stated purpose matches the work.
The National Association for State Community Services Programs toolkit describes housing-repair programs and community-development resources that may address repair or rehabilitation needs. It notes that community development funds, including CDBG and HOME funds, can be used in many communities to address blight and unsafe living conditions, and that roof, electrical, and plumbing repairs are often covered; lead hazards are sometimes covered. Local programs set their own scope and requirements, so those examples are not a promise that a specific household or repair will qualify.
Keep a simple application folder with the property address, a short description of the problem, estimates, and any documents requested by the program. Ask whether the program handles emergency work, repairs already started, or only projects approved before work begins; do not assume that an expense will be reimbursed after the fact.
USAGov also notes that homeowners over age 62 may qualify for a reverse mortgage called a Home Equity Conversion Mortgage (HECM), the only reverse mortgage insured by the government, and that HECM funds may be used for home maintenance, repairs, or living expenses. A reverse mortgage affects home equity and household finances, so compare its terms and implications carefully and use a HUD-approved reverse mortgage advisor when considering that option.
A 2023 article in the National Library of Medicine’s PubMed Central discusses the connection between adequate housing and health and argues for greater public investment in home repairs, including accessible loan approaches. That policy discussion can provide context for why repair assistance matters; it does not establish an individual applicant’s eligibility or promise a specific funding source.
Choose financing only after separating the repair from the loan
Financing can make a large project possible, but it changes when and how the household pays rather than removing the cost. Evaluate the repair proposal and the borrowing terms as two separate decisions.
First, decide whether the work is necessary now, whether the quoted scope solves the underlying problem, and whether the project can safely be divided into phases. Then compare any financing option’s payment obligations, fees, interest, and consequences for the household’s other bills. A low initial payment does not tell you the full cost.
Newrez names home equity loans and HELOCs among financing options homeowners may explore for major repairs or improvements. USAGov describes HECM as a government-insured reverse mortgage option for homeowners over 62 who may qualify. These are different kinds of borrowing and should not be treated as interchangeable. A home equity product and a reverse mortgage can have different effects on ownership equity, repayment, and long-term plans.
Be especially careful when financing is presented as part of a contractor’s offer. Read the financing documents apart from the repair agreement, ask what happens if the project changes, and make sure you understand the total repayment obligation before signing. If the borrowing could materially affect household stability, seek qualified financial guidance rather than relying on a sales pitch or a monthly payment alone.
If the numbers do not fit, revisit the project sequence. Ask whether a smaller, safe scope can stop the damage while a complete restoration is planned. Do not remove a necessary step merely to reach a price that looks affordable if the reduced work leaves the original cause unresolved.

How to choose between two repairs today
When only one project can be funded, compare both using the same decision sheet. That keeps a familiar, irritating, or highly visible problem from winning simply because it is easier to describe.
- Write a one-sentence description of each problem. Avoid using a broad label such as “bathroom” or “roof”; describe the condition.
- Mark any safety concern. A credible risk to people moves ahead of ordinary convenience or decoration.
- Mark active damage. Identify whether the condition is still affecting materials or another system.
- Name the source and symptom separately. Decide whether the proposed work corrects the cause, restores the damage, or does both.
- Describe the effect on daily use. Note what is unavailable or difficult and who in the household is affected.
- Estimate the cost of waiting qualitatively. State what is likely to get worse, rather than inventing a dollar figure.
- Compare full scopes and funding options. Include related labor, materials, permits, cleanup, and any reserve.
- Choose the next safe action. It might be the repair, a professional assessment, a temporary damage-control step, or an assistance application.
For example, imagine one project is repainting a room and another is investigating recurring water damage. The painting may be less expensive and more satisfying in the short term, but if the water source is still active, the repair sequence should address that cause before the finish. If the room’s paint is peeling for a reason unrelated to moisture and the condition is stable, the comparison may be different.
Another example is a functional but dated bathroom competing with a failed fixture. If the fixture is creating a water problem or preventing normal use, the repair has a stronger claim on limited funds. If it still functions and the proposed renovation is primarily aesthetic, it can usually be placed later than an unresolved safety or damage-control need.
Common mistakes that waste a limited repair budget
- Choosing the most visible project first. Visibility shows what is noticeable, not what is most urgent. Check for active damage and essential-function problems before committing to appearance work.
- Choosing by price alone. A lower estimate may omit diagnosis, source repair, cleanup, or other work. Compare the included scope before comparing totals.
- Repairing a symptom but not its cause. Replacing damaged finishes while a leak remains can create repeat spending.
- Assuming all old components need immediate replacement. Age alone does not describe condition or prove a failure is imminent. Use actual performance and appropriate maintenance guidance.
- Spending on efficiency before prerequisite repairs. DOE guidance supports addressing roof or wall leaks before insulation work.
- Starting work without budgeting for more than materials. Newrez lists labor, permits, inspections, cleanup, and possible temporary housing or storage among project costs.
- Treating assistance as guaranteed. State and local programs differ, and eligibility requirements apply. Find a program whose stated coverage matches the property and work.
- Using borrowing to bypass project comparison. Financing does not establish that a scope is appropriate or that repayment fits the household budget.
- Mixing optional upgrades into a needed repair. Ask contractors to separate the essential work from enhancements so you can see what is required to resolve the problem.
- Skipping a reserve entirely. Newrez recommends keeping extra cash for unexpected costs; a plan that spends every available dollar leaves no flexibility for a project change.
These mistakes share a common pattern: they make the immediate decision look simpler while obscuring the source, the full scope, or the household’s ability to pay. A short written plan is often enough to make those missing pieces visible.
A situation-by-situation repair guide
| Situation | First question | Budget move |
|---|---|---|
| Condition may create an immediate safety risk | Does this require emergency action or qualified assessment? | Address the safety question before routine or cosmetic projects. |
| Water is actively entering or spreading | What is the source, and can further entry be stopped safely? | Control the source and dry affected materials before restoring finishes. |
| Visible damage with no obvious cause | Is the visible damage the cause or only a symptom? | Reserve funds for identifying the cause before choosing replacement materials. |
| Essential system is not working normally | What function is lost, and does it affect safe or ordinary use? | Prioritize according to the actual effect, not the system label alone. |
| House is stable but has a maintenance task | Is there a documented task for equipment installed in this home? | Plan the task after urgent risks and active damage are controlled. |
| Home is dry and functioning but has drafts | Where is the air leakage occurring? | Consider targeted caulking or weatherstripping after prerequisite repairs. |
| Room is usable but looks dated | Does the work correct a defect or mainly change appearance? | Defer it if urgent safety, damage, or essential-function work needs the cash. |
| Necessary repair exceeds available cash | Are local or state repair programs available for this type of work? | Check eligibility and application timing before committing to borrowing. |
| Major work requires financing | Do the full repayment terms fit the household budget? | Compare the loan separately from the repair scope and consider alternatives. |
Use the table as a starting point, then write down the next action specific to the home. “Look into the leak” is too broad; “identify whether the water is coming from the roof or plumbing and get the source included in the estimate” is a more useful assignment.
Frequently Asked Questions
Which home repair should I pay for first?
Start with a potential immediate safety concern, then stop active damage and protect essential home functions. After those needs are controlled, compare preventive, efficiency, and cosmetic projects against the cash available.
Should I fix a leak or replace the damaged drywall first?
Address the source of the water before restoring the drywall. EPA advises drying wet or damp materials and areas within 24 to 48 hours when possible, and the Department of Energy says roof or wall leaks should be repaired before insulation work.
How do I compare contractor estimates when money is tight?
Compare the cause each contractor identifies, the exact tasks included, materials, permits or inspections, cleanup, and exclusions. A lower total is not a better comparison if it leaves out work that another estimate includes.
Can government programs help pay for home repairs?
USAGov says state and local governments may offer home-repair programs or loans and directs homeowners to local or state housing departments. Availability and eligibility depend on the program and location, so identify the repair and property location before applying.
Should I use a home equity loan or reverse mortgage for repairs?
Those are different financing options, and neither makes a repair free. Compare repayment, fees, interest, effects on home equity, and household plans; USAGov notes that homeowners over age 62 may qualify for a HECM and can use its funds for maintenance or repairs.
Key takeaways
- Rank by consequences. Safety, active damage, and essential use generally come before appearance.
- Find the source. Restore finishes only after the condition damaging them is controlled.
- Budget for the whole project. Include labor, materials, permits, inspections, cleanup, and possible temporary arrangements.
- Compare equivalent scopes. A price is meaningful only when you know what work it includes.
- Use assistance and financing carefully. Check local eligibility and understand borrowing terms before building a plan around them.
- Defer optional work when necessary. Cosmetic upgrades have a place, but limited cash is better directed first to safety, damage control, and essential functions.
Repair costs, program availability, and financing terms can change. As of October 2, 2026, Newrez’s published guidance identifies common project-budget categories, while USAGov directs homeowners to state and local housing departments for assistance information; check the relevant program or provider for current requirements before making a spending commitment.
References
- How to Prioritize Home Repairs When Money Is Limited
- Cutting Back and Keeping Up When Money is Tight – Financial Education
- Top improvements that increase home value based on market data | Opendoor
- Home Maintenance Checklist: Prioritize Repairs & Plan Improvements | Newrez
- TOOLKIT
- Without Affordable, Accessible, and Adequate Housing, Health Has No Foundation - PMC
- Government home repair assistance programs | USAGov
- Homeowner's Maintenance Checklist | A Maintenance and Home Renovation Timeline
- Whole-House Weatherization | Department of Energy
- A Brief Guide to Mold, Moisture and Your Home | US EPA
Information in this post was checked as of October 2026. Policies and prices may change, so please verify important details with official sources.


Comments
Post a Comment