How to Stop a Dripping Kitchen Faucet Before Thanksgiving

Key Takeaways
- Identify whether water drips from the spout, handle, or a connection before choosing a repair.
- If the faucet keeps dripping, close its under-sink shutoff valves if they turn easily, then contain the remaining water.
- Replace only a washer, O-ring, or cartridge that matches the faucet’s model and design; forcing a stuck part can make the leak worse.
- After reassembly, open the valves slowly and check the faucet and cabinet for fresh moisture.
Table of Contents
- Where is the kitchen faucet leaking?
- How to stop the drip temporarily before the holiday
- What tools and replacement parts should you gather?
- How to inspect and replace a washer, O-ring, or cartridge
- How to test the faucet after reassembly
- When should you stop and call a plumber?
- Keep the sink ready for Thanksgiving cooking
- Frequently Asked Questions
- Next steps: contain, identify, repair, and retest
A dripping kitchen faucet before Thanksgiving is usually best handled in two stages: limit the water first, then repair the part that matches the leak and faucet design. Start by locating the drip, shutting off the sink’s supply valves if possible, and identifying the faucet model before buying replacement parts.
Where is the kitchen faucet leaking?
The location of the water is the first clue: a drip from the spout, water around the handle, and moisture beneath the sink point to different places to inspect. Dry the faucet and cabinet, then watch where the first new drop appears; that is more useful than guessing from the puddle after it spreads.
A faucet that drips from the spout while its handle is fully off often needs attention inside the valve assembly. Depending on the faucet, the sealing part may be a washer, O-ring, cartridge, or another internal component. A leak around the handle can also come from a worn seal or a loose part, but the faucet’s construction determines the right repair.
Water at a supply-line connection or around the faucet base is a different symptom from a spout drip. Tacoma Public Utilities lists tightening a connection or using pipe tape as possible ways to stop a leak. Those approaches apply to the connection itself—not as a substitute for replacing an internal valve seal when water continues to drip from the spout.
| Where water appears | What to inspect first | Useful next step |
|---|---|---|
| Spout with handle off | Faucet’s internal shutoff or sealing part | Identify the faucet type and model before choosing a replacement part. |
| At or around the handle | Handle assembly and seals | Look for the manufacturer’s disassembly instructions. |
| Under the sink at a fitting | Supply connection and surrounding surfaces | Dry the area and see whether moisture returns at the same connection. |
| Around the faucet base | Base and sink surface | Check whether water is running down from the handle or another higher point. |
Do not assume the nearest wet spot is the source. Water can run along a hose, cabinet wall, or countertop before it collects, so dry the area and trace the leak from the highest point that becomes wet again.
How to stop the drip temporarily before the holiday
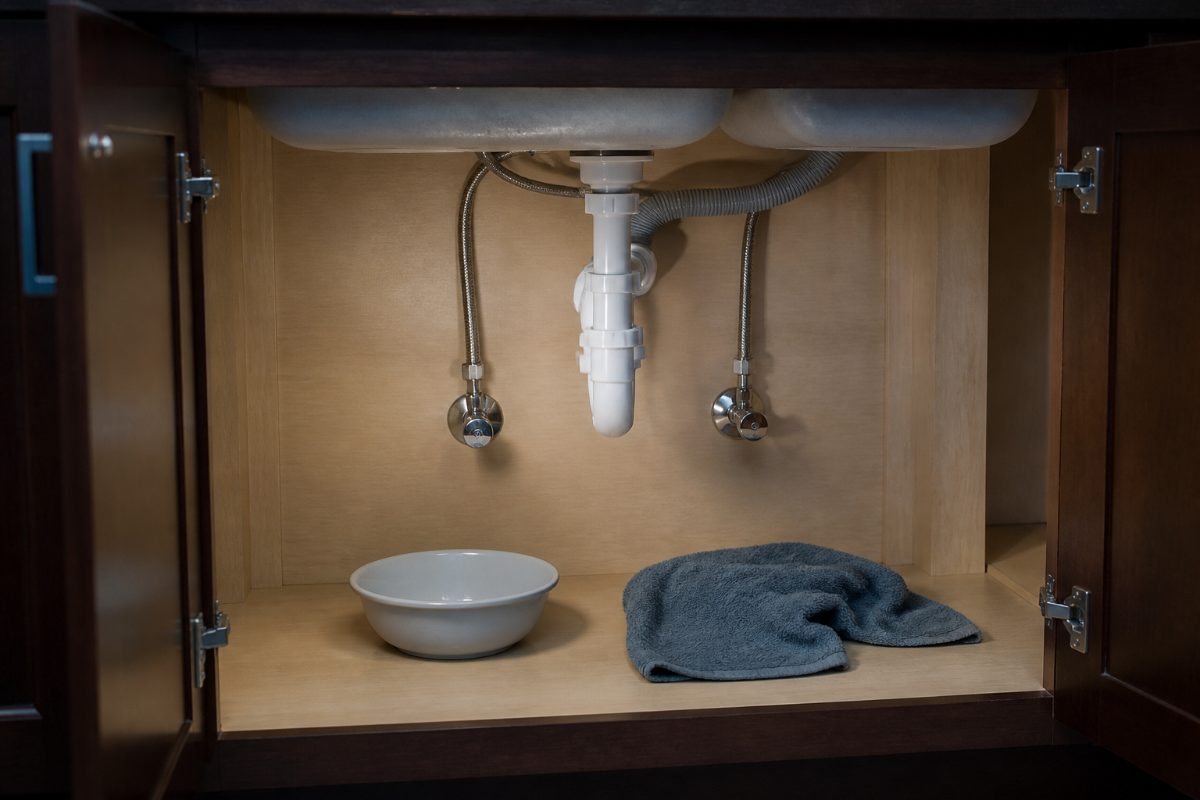
For a continuing leak, the most practical temporary step is to shut off the kitchen faucet’s supply valves under the sink, if they are accessible and turn without force. This stops water from feeding the faucet while you arrange a repair; a bowl or towel only catches water and does not fix the leak.
- Move stored items away from the valves and the cabinet floor.
- Place a towel beneath the valves, then turn each accessible valve gently toward closed. Do not force a valve that is stuck, damaged, or visibly corroded.
- Open the faucet handle to see whether the flow stops. A small amount of water already in the faucet or line may drain out.
- Put a shallow container beneath any remaining drip and keep the cabinet floor dry enough to spot new moisture.
If closing the sink valves does not stop the leak, or the valves themselves begin to leak, stop adjusting them. A bucket can limit mess while you arrange help, but a persistent supply leak needs attention beyond a faucet-handle repair.
A slow drip may look trivial, but the U.S. Geological Survey uses an estimated faucet-drop volume of one-quarter milliliter for its drip calculator and estimates 15,140 such drips per gallon. That is an illustrative calculation, not a measure of every faucet’s drops; the practical point is that a recurring drip adds up, and a container also makes the leak easier to monitor.
Do not leave the faucet running slightly as a way to repair a leak. Ypsilanti Community Utilities Authority’s winter guidance says to keep a faucet slightly open and dripping during severe winter weather. That is freeze-weather guidance, not a fix for a leaking faucet or a substitute for shutting off a faulty fixture.
What tools and replacement parts should you gather?
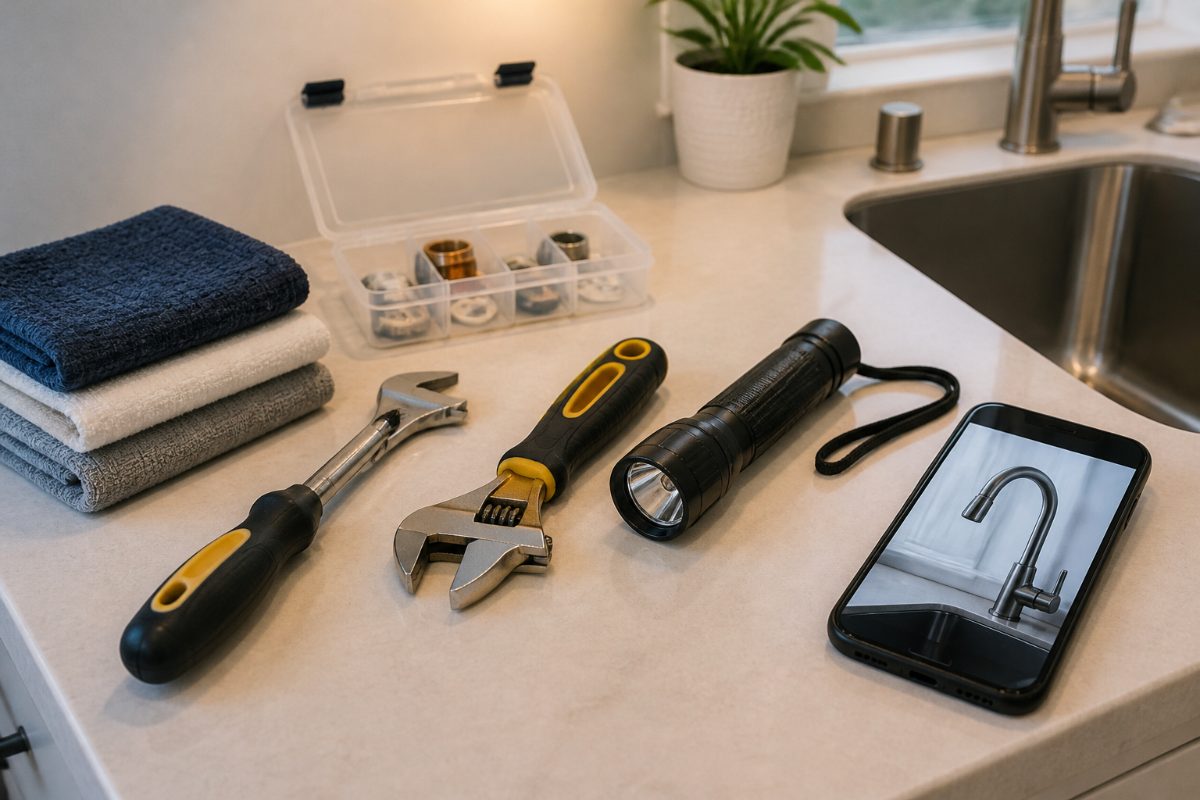
Before disassembling a faucet, gather towels, a container, a flashlight, a screwdriver, and an adjustable wrench, then confirm the faucet’s manufacturer and model. The correct replacement part depends on the faucet design; a part that looks close but does not match can prevent proper reassembly or leave the leak unchanged.
- For any inspection: towels, a small container, and a flashlight help catch drips and illuminate the cabinet.
- For handle removal: use the screwdriver or tool specified by the faucet’s instructions. Some fasteners are not visible until a small cap is removed.
- For a connection leak: a wrench may help with a connection that is intended to be tightened. Tacoma Public Utilities also mentions pipe tape as a possible aid for a leaking connection; do not wrap tape around a faucet spout or apply it where the manufacturer does not call for it.
- For internal repairs: identify whether the faucet uses a washer, O-ring, cartridge, or another assembly before buying anything. Keep removed parts together so you can compare their shape and arrangement with the replacement instructions.
Take a clear photo of the faucet, handle, and any label or model marking before removing parts. If there is no visible model information, record the faucet’s appearance and the shape of the part you remove. That gives a hardware supplier or manufacturer a concrete reference without relying on a vague description such as “the usual kitchen cartridge.”
How to inspect and replace a washer, O-ring, or cartridge
Replace an internal faucet part only after shutting off the water and confirming the faucet’s design. A washer, O-ring, and cartridge are not interchangeable names for the same component: the correct part and removal sequence depend on the particular faucet, so use its manufacturer’s instructions rather than a generic diagram.
- Shut off the supply. Close the faucet’s under-sink valves if they operate normally, then open the faucet to release water remaining in the fixture.
- Protect the work area. Put a towel in the sink to catch small parts and keep them from falling into the drain. Set a container under the cabinet in case water remains in the line.
- Remove the handle as instructed. Look for the manufacturer’s specified access point and fastener. Avoid prying against the sink or countertop, which can damage the finish.
- Inspect the exposed assembly. Note the order and orientation of parts before removing them. A phone photo can preserve the arrangement for reassembly.
- Match the replacement. Compare the replacement with the removed part and the faucet’s model instructions. Do not trim, stretch, or force a part to make it fit.
- Reassemble and restore water slowly. Follow the specified order, then open the supply valves gradually and watch for leaks.
Some faucets use a single cartridge, while others have separate components. If the assembly will not come apart with gentle, controlled effort, pause rather than applying more leverage. A stuck or unfamiliar assembly is a good reason to stop the DIY repair before a damaged handle or valve body turns a small leak into a larger job.
A common mistake is to tighten every visible screw or fitting in the hope that the drip will stop. Tightening may help a loose connection, as Tacoma Public Utilities notes, but it does not replace a worn internal sealing part. Excess force can also damage threads or fittings, so tighten only the component identified by the repair instructions.
How to test the faucet after reassembly
Test the faucet with the cabinet still accessible: open the supply valves slowly, run cold water, then close the handle and inspect the spout, handle, base, and under-sink connections. Dry surfaces before testing so that new moisture is easy to distinguish from water left over from the repair.
- Open each supply valve gradually while watching the valve and hose connections.
- Run the faucet, move the handle through its normal range, and then shut it off.
- Check whether the spout continues to drip and whether water appears around the handle or base.
- Use a dry paper towel or cloth around each under-sink connection to reveal fresh moisture.
- Recheck the cabinet after the faucet has been off for a while. A dry first inspection does not rule out a slow leak that appears later.
If the spout still drips, the replacement may be incorrect, misaligned, or not the only worn part. Shut off the supply again before reopening the faucet, and compare the installation with the model-specific instructions rather than repeatedly tightening the handle.
If water appears at a connection, dry it and identify the exact source. Tacoma Public Utilities says tightening a connection or using pipe tape may stop a leak, but the right action depends on the fitting. Do not use tape as a general-purpose sealant or apply it to a connection that is not designed for threaded tape.
When should you stop and call a plumber?
Call a plumber when the supply valves will not close safely, a valve or line leaks, the faucet assembly is damaged, or the leak continues after a correctly matched part is installed. A repair that requires force or leaves water behind the cabinet can create more work than the original drip.
For a Thanksgiving deadline, choose the next action by the leak’s behavior rather than by the calendar alone. If the sink valves close and the cabinet stays dry, you can leave the faucet out of service while sourcing the correct part. If water continues flowing, the valves leak, or you cannot identify the source, arrange professional help instead of leaving an uncontrolled leak unattended.
| Situation | Reasonable next move |
|---|---|
| Slow spout drip, supply valves close, faucet is identifiable | Use the model instructions and obtain the matching internal part. |
| Leak at a connection that can be clearly identified | Follow the fitting or faucet instructions; avoid tightening unrelated parts. |
| Valve will not turn, leaks, or looks damaged | Stop manipulating it and arrange plumbing help. |
| Water keeps flowing or the source is uncertain | Contain the water and seek help rather than leaving the cabinet unchecked. |
Keep the cabinet clear until the repair has passed the follow-up inspection. Storing paper goods, cleaning products, or holiday supplies directly beneath a leak makes it harder to notice returning moisture and can expose those items to water.
Keep the sink ready for Thanksgiving cooking
A working faucet is only one part of a kitchen that is ready for holiday food prep: keep the sink and nearby surfaces clean, and avoid rinsing raw poultry unless the turkey was brined. The University of Arkansas Cooperative Extension Service says USDA does not recommend washing a whole turkey because splashing can spread germs around the kitchen; it identifies rinsing a brined turkey as the exception.
Once the faucet repair is complete, clear the sink of tools and repair debris, wash the sink and nearby work surfaces, and keep raw poultry handling separate from the faucet repair area. If you need to handle a brined turkey, follow the Extension’s advice to rinse off the brine, while taking care to limit cross-contamination in the kitchen.
Do not use a loose aerator or a faucet part as a food-preparation workaround. If a faucet component comes off during repair, keep it out of the sink until it is clean and properly reinstalled. A repair is finished when the fixture works and the sink area is clean—not merely when the visible drip pauses.

Frequently Asked Questions
Can I stop a dripping faucet by tightening the handle?
Not necessarily. A spout drip can come from an internal sealing part, while tightening may only address a loose connection or component. Avoid forcing the handle; identify the leak location and follow the faucet’s model-specific instructions.
Can pipe tape stop water dripping from the faucet spout?
Pipe tape is intended for compatible threaded connections, not for sealing a dripping spout. Tacoma Public Utilities mentions pipe tape as a possible measure for a leak at a connection, so first locate the actual source of the water.
Should I leave the faucet dripping until Thanksgiving?
No. A continuing drip is not repaired by leaving the water on. Ypsilanti Community Utilities Authority’s advice to leave a faucet slightly dripping applies to severe winter weather, not to a faucet repair; close the sink’s supply valves if they operate safely.
What if the faucet still drips after I replace a part?
Shut off the supply before taking the assembly apart again. Check that the replacement matches the faucet model and is seated in the instructed orientation; if the leak remains or the assembly is damaged, stop and arrange professional help.
Next steps: contain, identify, repair, and retest
Start with the under-sink valves and a dry cabinet floor, then identify exactly where the faucet leaks. Photograph the faucet and any model marking, obtain only the matching part, and test every connection after restoring water. If a valve will not close, water keeps flowing, or the repair requires force, leave the fixture off if possible and arrange a plumber before holiday cooking begins.
References
- From The Director Annual Fire Hydrant Inspections
- Find & Fix Leaks - Tacoma Public Utilities
- Foodborne Illness Prevention Tips
- Drip calculator: How much water does a leaking faucet waste? USGS Water Science School
Information in this post was checked as of October 2026. Policies and prices may change, so please verify important details with official sources.


Comments
Post a Comment