How to Clean a Sump Pump Pit and Remove Debris
Key Takeaways
- Disconnect power before touching the pump, and stay out of a flooded basement until a licensed electrician says it is safe to enter.
- Lift the pump out to clear sediment from its intake screen and remove sludge and debris from the pit floor.
- Check that the float moves freely and that the check valve is clear before reinstalling the pump.
- Use a bucket test with about 5 gallons of water to confirm the pump starts and discharges.
- Set the cleaning schedule according to what the pump handles and the conditions around the pit.
Table of Contents
- Why should you deep-clean a sump pump pit?
- What safety steps come before cleaning?
- How do you remove the pump and drain the pit?
- How do you clean the pump intake and pit walls?
- What should you inspect before putting the pump back?
- How do you reinstall and test the sump pump?
- How often should you clean the pit?
- What mistakes can damage a sump pump?
- When should you stop DIY cleaning?
- Frequently Asked Questions
- Key points to remember
A clean sump pump pit gives the pump room to draw water and lets its float switch move freely. Removing silt and debris before they clog the intake or jam the impeller can reduce motor strain and help prevent a failure during a storm. The process starts with safe power isolation, then proceeds through draining, cleaning, inspection, reinstallation, and testing.
Why should you deep-clean a sump pump pit?
A sump pump pit is the basin that collects groundwater before the pump moves it away from the foundation. Sediment can cover the intake, while sludge can hold the float switch down; either problem can stop the pump from responding when water rises. Zoeller explains that a clogged intake or debris-jammed impeller can leave a running pump unable to move water.
The maintenance goal is to break the debris-to-overheating cycle. Debris can restrict water flow or obstruct the impeller, which increases strain on the motor; repeated strain can lead to overheating and motor failure. Cleaning the pit before the pump shows symptoms helps keep the intake and moving parts clear.
Look for a layer of silt, gravel, leaves, or other debris on the bottom, and watch for a float that catches against the pit wall. Orange, slimy buildup can indicate iron bacteria, which is one reason some maintenance guidance recommends more frequent cleaning in affected homes. A pump that runs without moving water also needs attention: Zoeller identifies a clogged intake screen or jammed impeller as common causes.
What safety steps come before cleaning?
Disconnect the sump pump from electricity before touching the pump, float, or water in the pit. Liberty Mutual and Zoeller recommend shutting off power at the circuit panel or unplugging the pump from its GFCI outlet; wear waterproof gloves and a face mask because pit water and sludge may contain contaminants, mold, or bacteria.
If the basement is flooded, do not enter to reach the pump. Zoeller advises contacting a licensed electrician before entering a flooded area because water and energized electrical equipment can create an electrocution hazard. Keep children and pets away from the work area while the pit is open.
- Identify the pump’s power source and switch off the correct circuit, or unplug the pump if the outlet is safely accessible.
- Put on waterproof gloves and a face mask before handling the pump or debris.
- Gather a wet/dry shop vacuum, a stiff brush, a bucket or scoop, and a mild detergent or vinegar solution.
- Stop if the water has flooded the room or you cannot safely reach the power control.
Do not begin by reaching into a powered pit to test the float. The float can start the pump automatically, and a loose connection or moving part is harder to handle safely while the unit has power. The related guide How to Inspect and Clean a Sump Pump Safely covers broader safety checks before maintenance.
How do you remove the pump and drain the pit?
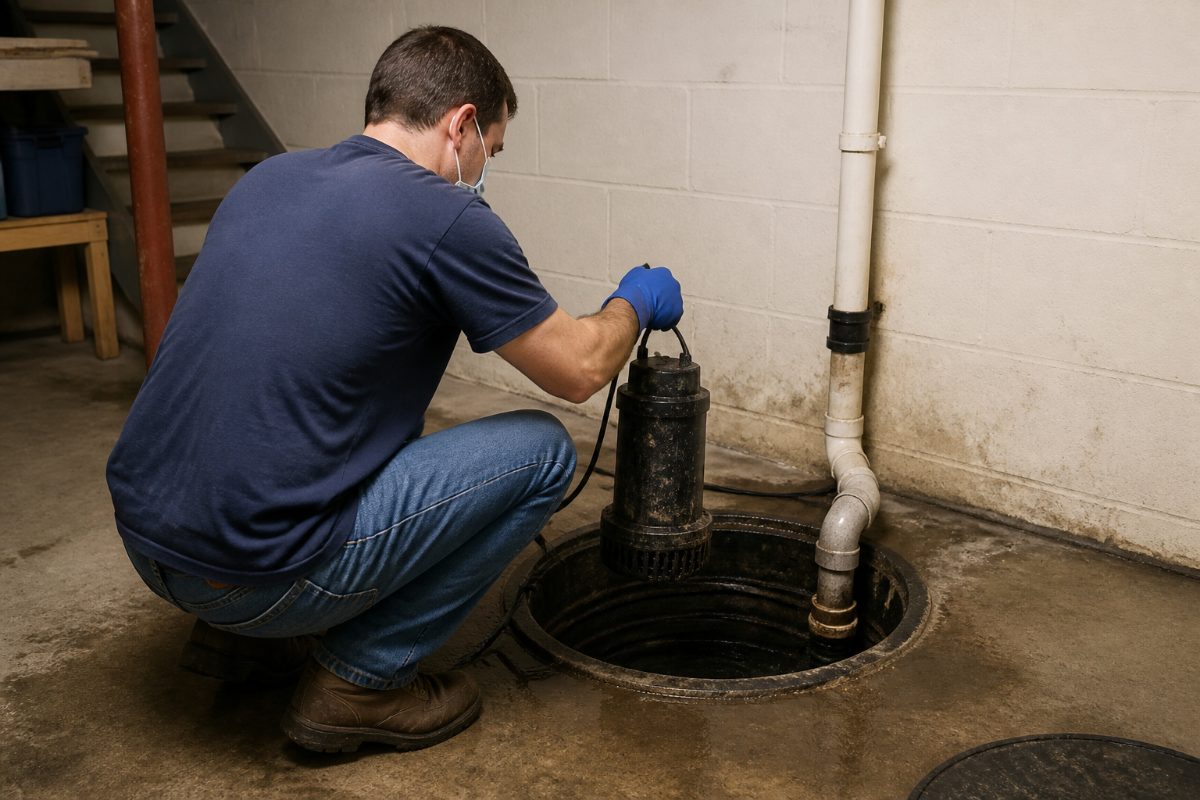
After disconnecting power, remove the pump from the pit so you can reach the sediment beneath it and clean the intake screen. Liberty Mutual describes disconnecting the discharge pipe at its threaded coupling or quick-disconnect before lifting the pump; a wet/dry shop vacuum can then remove standing water until the pit bottom is visible.
Take a moment to note how the discharge pipe and pump sit before disconnecting anything. The connection may use a threaded coupling or a quick-disconnect, so identify the joint rather than pulling on the pipe. If the pipe resists, stop and inspect the connection; forcing it can damage the piping or make reassembly difficult.
- Turn off power at the circuit panel or unplug the pump from its GFCI outlet.
- Disconnect the discharge pipe at its coupling or quick-disconnect.
- Lift the pump out carefully and set it on a stable surface where water can drain away from the electrical connection.
- Use a wet/dry shop vacuum to remove standing water from the pit until the floor and accumulated debris are visible.
Do not use the pump itself to clear sand, concrete chips, or heavy gravel. Sump pumps move water; Superior, Wisconsin’s maintenance guidance warns that hard solids can wear the impeller prematurely. Use a vacuum, scoop, or bucket to remove debris instead of sending it through the pump.
How do you clean the pump intake and pit walls?
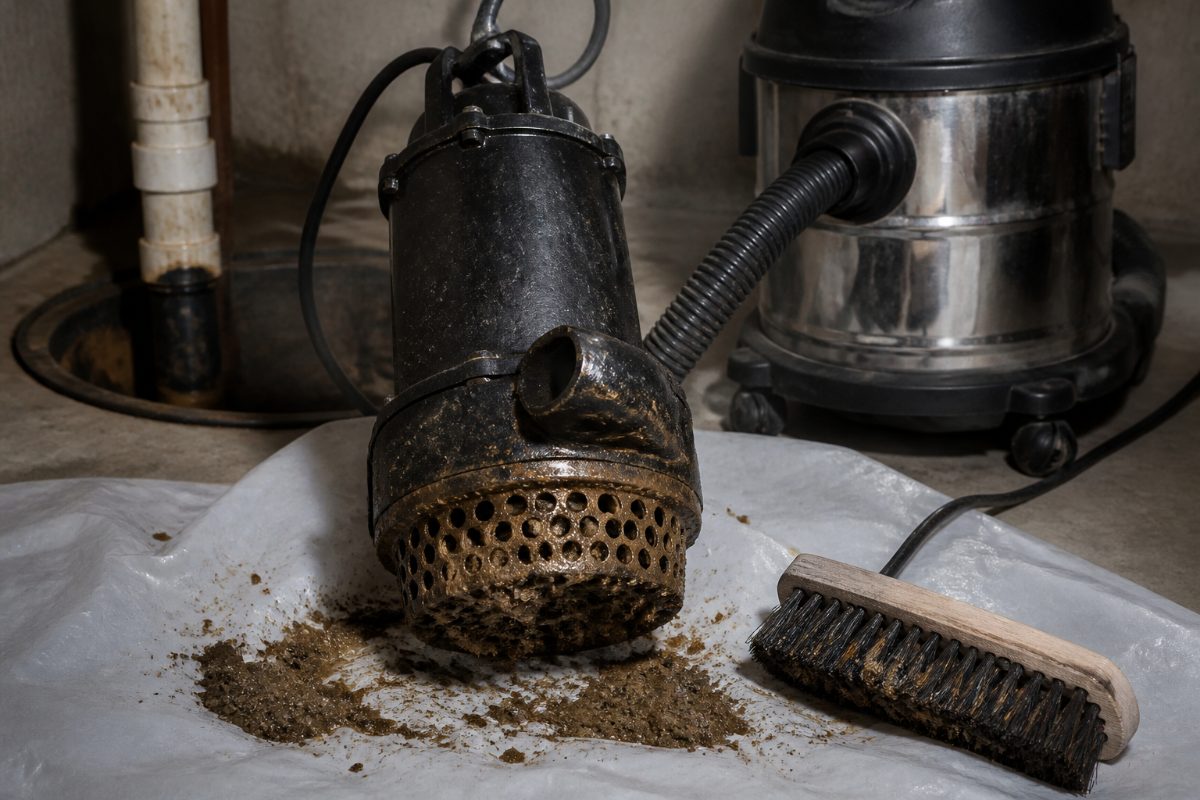
Clean the pump exterior and intake screen first, then remove the pit’s loose sediment and scrub its walls. Liberty Mutual recommends rinsing the pump exterior and brushing the intake screen or grate with a stiff brush; OnOtto and Evenflo Plumbing describe using a shop vacuum or bucket for debris and a mild detergent or vinegar solution on the pit walls.
Keep the cleaning focused on accessible surfaces. Brush sediment off the intake screen so water can reach the pump, and remove silt, gravel, and loose debris from the bottom. Use the vacuum or scoop to collect material rather than washing it down into the intake.
- Rinse the pump’s exterior with a hose, directing water away from electrical connections.
- Scrub the intake screen or grate with a stiff brush until sediment and sludge are cleared from the openings.
- Scoop or vacuum silt, gravel, and loose debris out of the pit.
- Scrub the pit walls with a stiff brush and a mild detergent or vinegar solution.
- Remove loosened residue from the basin so it does not settle back around the intake.
Cleaning-agent advice is not identical across all guidance. Fenwick Waychoff’s prefers vinegar for mineral buildup and sludge because it is gentler on pump hardware; some other cleaning guides suggest bleach for mold. To avoid exposing pump seals to an unapproved cleaner, use a mild detergent or vinegar solution and do not pour bleach into the pump or basin unless the pump manufacturer permits it.
What should you inspect before putting the pump back?
Before reinstalling the pump, confirm that the float switch can travel vertically without touching the pit wall and that debris is not blocking the check valve. Liberty Water Damage Restoration explains that a float stuck down in sludge can keep the pump from starting, while debris in a check valve can contribute to short-cycling, when the pump turns on and off too often.
Move the float gently through its full range while the pump is disconnected from power. It should not snag on the basin, discharge pipe, or loose wiring. A float that cannot rise freely may fail to call for pumping as water enters the pit.
Look over the check valve and the visible discharge connection for debris that could interfere with the valve’s flapper. The check valve keeps water in the discharge pipe from flowing back into the pit. If the valve is damaged or you cannot tell whether it opens and closes properly, avoid guessing at a repair; use the pump manufacturer’s instructions or arrange a service inspection.
Do not treat every pump that cycles frequently as a simple pit-cleaning problem. Debris in the valve can cause short-cycling, but the inspection should also confirm that the float is not obstructed and that the pump is positioned correctly. Clear, visible debris is a DIY cleanup; a component that remains stuck or damaged after cleaning needs a closer repair assessment.
How do you reinstall and test the sump pump?
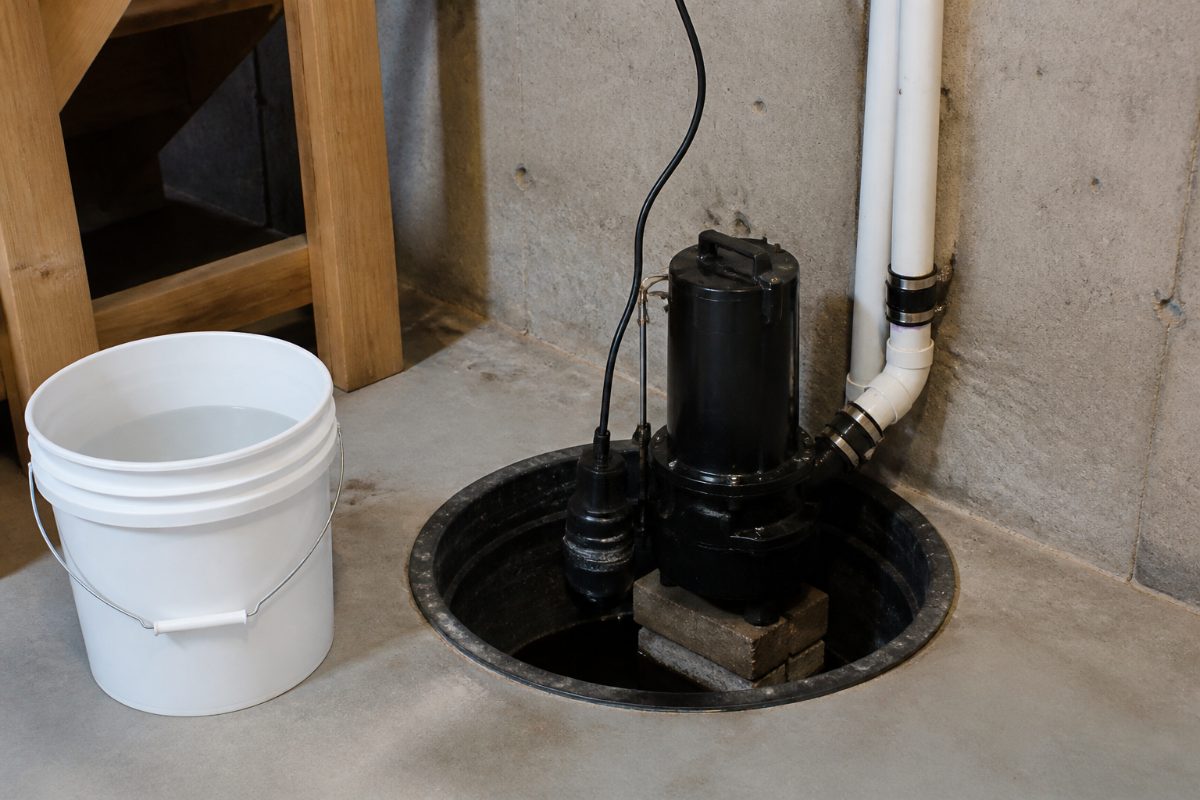
Set the clean pump back in the pit with its intake raised above the bottom sediment, reconnect the discharge pipe, and make sure the float has room to move. Superior, Wisconsin’s maintenance tips recommend placing the pump on bricks or concrete blocks to keep it above sediment; Fenwick Waychoff’s describes testing operation by adding water to the pit.
Position the pump so it sits level and stable. Arrange the float with clear space around it, then reconnect the discharge pipe without twisting or forcing the fitting. Once the mechanical connections are secure, restore power only when you are ready to test.
- Place the pump on bricks or concrete blocks if needed to keep its intake above sediment at the bottom.
- Check that the float has a full, unobstructed range of motion.
- Reconnect the discharge pipe at the original coupling or quick-disconnect.
- Restore power and slowly pour about 5 gallons of water into the pit.
- Watch for the float to rise, the pump to start, and water to discharge through the pipe.
Farmers Insurance and Fenwick Waychoff’s use approximately 5 gallons for a bucket test. The test checks the whole sequence: rising water lifts the float, the pump starts, and the discharge line carries water away. If the pump hums but does not move water, or the float does not trigger it, switch the pump off and investigate rather than letting it run without effective pumping.
How often should you clean the pit?
Match the cleaning interval to the water the pump handles and the amount of sediment entering the basin. Mitti’s maintenance guidance, dated July 16, 2026, recommends quarterly cleaning for pumps used regularly or as primary sewage disposal and monthly attention when a pump handles washing-machine water; Farmers Insurance’s guidance, dated May 15, 2026, supports annual maintenance for occasional use.
| Use or condition | Suggested cleaning interval | Reason to use this schedule |
|---|---|---|
| Washing-machine discharge | Monthly | Water from the washer can leave residue in the basin. |
| Regular use or primary sewage disposal | Quarterly | More frequent operation and material entering the pit call for closer attention. |
| Occasional use | Yearly deep clean | A yearly cleaning removes accumulated sediment and gives you a chance to inspect the pump. |
| New construction or iron-bacteria buildup | Every six months | OnOtto’s July 15, 2026 guidance identifies heavy silt in new construction and orange ochre sludge as reasons for more frequent cleaning. |
These intervals are practical starting points rather than a reason to ignore visible buildup. If the pit collects sediment quickly, the float sticks, or the pump’s intake becomes obstructed between cleanings, shorten the interval. Keep a brief maintenance note with the cleaning date, what you removed, and whether the bucket test worked; that record makes a change in buildup easier to spot.
What mistakes can damage a sump pump?
The most damaging cleanup mistake is using the pump to move solids instead of removing them by hand or vacuum. Superior, Wisconsin’s maintenance guidance says sand, concrete chips, and heavy gravel can prematurely wear the impeller; Zoeller also identifies debris-related intake blockage and impeller jams as causes of poor pumping.
- Leaving power on: Disconnect electricity before handling the pump, float, or water in the basin.
- Cleaning only the walls: Sediment at the bottom can still cover the intake, so lift the pump and clear the pit floor.
- Forcing the discharge pipe: Identify whether the joint is threaded or a quick-disconnect before removing or reconnecting it.
- Using an unsuitable cleaner: Stick to mild detergent or vinegar unless the pump maker approves another product.
- Skipping the test: A clean pit does not confirm that the float, motor, and discharge path work together. Perform the bucket test after reassembly.
A running motor does not prove water is moving. If the pump is on but the pit level does not fall, Zoeller points to a clogged intake screen or jammed impeller as possible causes. Shut off power before inspecting the pump again, and do not keep running a pump that is unable to discharge water.
When should you stop DIY cleaning?
Stop before entering a flooded basement, if the pump is connected to electrical equipment you cannot safely isolate, or if a component remains stuck or damaged after debris is removed. Zoeller advises contacting a licensed electrician before entering a flooded basement; persistent float, valve, or pump problems require a repair assessment rather than repeated cleaning attempts.
For a first-time cleaning, follow the sequence exactly and take a photo of the pump’s position and pipe connection before removal. If you already maintain the system, concentrate on the condition that changed since the last cleaning: faster sediment buildup, a restricted float, or a failed bucket test. That distinction helps identify whether routine cleaning is enough or a component needs repair.
Start with the power shutoff and a visual look at the pit. If the area is dry and safe to access, gather the gloves, face mask, shop vacuum, brush, and bucket before disconnecting the pipe. If the area is flooded or the electrical isolation is uncertain, leave the pump untouched and arrange qualified help.
Frequently Asked Questions
Can I use bleach to clean a sump pump pit?
Cleaning guidance differs: some sources suggest bleach for mold, while Fenwick Waychoff’s favors vinegar for mineral buildup and sludge because it is gentler on pump hardware. Use mild detergent or vinegar for routine pit cleaning, and do not put bleach in the pump or basin unless the manufacturer specifically allows it.
Why is my sump pump running but not moving water?
Zoeller identifies a clogged intake screen or a debris-jammed impeller as possible causes. Disconnect power before inspecting the pump, clear visible debris, and retest it with water; stop if the pump still runs without discharging.
Do I need to remove the pump to clean the pit?
Yes, removing the pump gives access to sediment beneath it and lets you clean the intake screen properly. Liberty Mutual’s cleaning steps include disconnecting the discharge pipe and lifting the pump out before clearing the pit.
How much water should I use for a bucket test?
Farmers Insurance and Fenwick Waychoff’s recommend approximately 5 gallons for a bucket test. Pour the water into the pit and observe whether the float rises, the pump starts, and water exits through the discharge pipe.
Key points to remember
- Isolate power and use gloves and a face mask before touching the pump or pit debris.
- Remove the pump to clean the intake screen and clear silt from the basin floor.
- Keep solids out of the pump, and inspect float movement and the check valve before reinstalling.
- Finish with a roughly 5-gallon bucket test, then set the next cleaning date based on use and sediment buildup.
References
- How to Clean a Sump Pump: 9 Steps & Maintenance Schedule | Fenwick | Fenwick Waychoff's
- Liberty+
- superiorwi.gov
- mitti.com
- How Often to Clean a Sump Pit (Once a Year) | OnOtto
- Sump Pump Maintenance: A Homeowners Guide | Farmers Insurance®
- Frequently Asked Questions | Zoeller at Home
Information in this post was checked as of November 2026. Policies and prices may change, so please verify important details with official sources.


Comments
Post a Comment