How to Seal Crawl Space Rim Joists Before Winter
Key Takeaways
- For a DIY rim-joist project, fitted XPS rigid foam with every edge sealed is a practical balance of cost and performance.
- Closed-cell spray foam combines insulation and air sealing in one application, while fiberglass batts alone do not stop air movement.
- Seal the whole connection—from the rim joist to the sill plate and subfloor—not just the open center of each framing bay.
- Check for moisture, pest activity, wiring, pipes, and local requirements before covering the wood with insulation.
Table of Contents
- What is a crawl space rim joist, and why seal it?
- How to inspect rim joists before adding insulation
- Which material should you choose: spray foam or rigid foam?
- What to gather before a DIY rim-joist project
- How to install XPS rigid foam and seal its edges
- How to apply closed-cell spray foam in rim-joist bays
- What building-code and moisture details should you check?
- Which approach fits your budget, experience, and crawl space?
- Common mistakes that weaken the air seal
- Frequently Asked Questions
- Key points before the first cold snap
To seal crawl space rim joists before winter, first inspect the wood and framing bays, then fit insulation that also blocks air leaks. For many DIYers, XPS rigid foam with carefully sealed edges is a manageable option; closed-cell spray foam is a strong choice when you want insulation and an air seal in one step.
What is a crawl space rim joist, and why seal it?
A rim joist, also called a band joist, is the perimeter framing member where the floor system meets the foundation wall. It sits at the edge of the floor above the crawl space, and gaps around framing joints, pipes, and wires can let outdoor air move into the house.
That leakage can make floors feel cold and increase heat loss. The stack effect helps explain why: warm air rises and escapes through upper parts of a house, creating lower-level pressure that can draw cold, damp outdoor air through gaps around the rim joist. Sealing those paths reduces air movement; insulation slows heat transfer through the wood and framing cavity.
The U.S. Department of Energy’s rim-joist guidance treats the rim area as part of the building air barrier. In practical terms, a piece of insulation in the middle of a bay is not enough if air can still pass around its edges or through the sill-plate and subfloor joints.
How to inspect rim joists before adding insulation
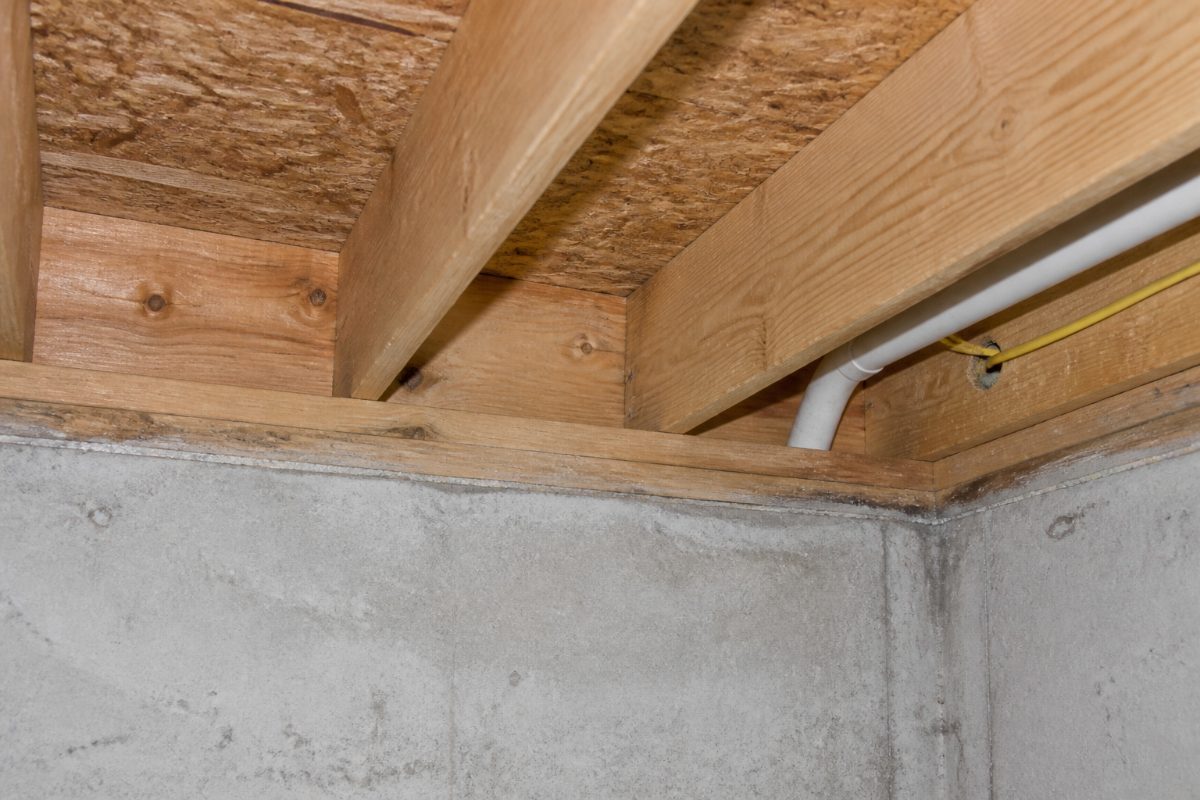
Inspect the entire accessible perimeter before choosing a material. Look for damp or stained wood, visible mold, decay, insect activity, loose debris, and gaps around plumbing or wiring; insulation can hide conditions that should be addressed first.
- Use a bright light. Scan each framing bay and the junction where the foundation, sill plate, rim joist, and subfloor meet.
- Check the wood. Look for discoloration, soft or crumbling areas, and signs of recurring dampness. Do not cover wet or damaged framing with foam or a board.
- Trace penetrations. Note pipes, cables, and wires that pass through the rim area. The seal needs to close the gap around them without damaging or pinching them.
- Plan the full boundary. Mark where the air seal must meet the sill plate and subfloor as well as the sides of each bay.
Do not treat insulation as a fix for water entry. If the area is actively wet, find and address the source before sealing it in. This inspection also helps you estimate how many foam-board pieces or how much spray foam the job will require.
Which material should you choose: spray foam or rigid foam?
Closed-cell spray foam is the higher-performance all-in-one option for air sealing and insulation. XPS rigid foam board can be a cost-conscious DIY alternative, but only when the board fits closely and its perimeter is sealed; the InsulationHelper material comparison lists closed-cell foam at about R-6.5 to R-7 per inch and XPS at about R-5 per inch.
| Material | What it does well | Trade-off to consider |
|---|---|---|
| Closed-cell spray foam | Insulates and blocks air movement in one application; resists moisture. | Requires careful application. For larger areas, compare a DIY kit with professional installation. |
| XPS rigid foam board plus sealant | Allows a DIYer to cut and fit individual pieces; the board itself provides insulation. | Gaps around the board remain air leaks unless the perimeter and nearby joints are sealed. |
| Open-cell spray foam | Provides insulation, at a lower R-value per inch than closed-cell foam. | The research cited by InsulationHelper warns against using it in vented crawl spaces where it can absorb moisture from outdoor air. |
| Fiberglass batts alone | Can be less expensive as a material. | Air passes through the batt, and moisture can collect against cold wood; it is not a substitute for an air seal. |
Fiberglass is a common false economy at a rim joist. It may fill the cavity, but it does not stop warm, humid indoor air from reaching a cold wood surface. If that air condenses, a batt can hold moisture against the framing, increasing the risk of mold or rot.
What to gather before a DIY rim-joist project
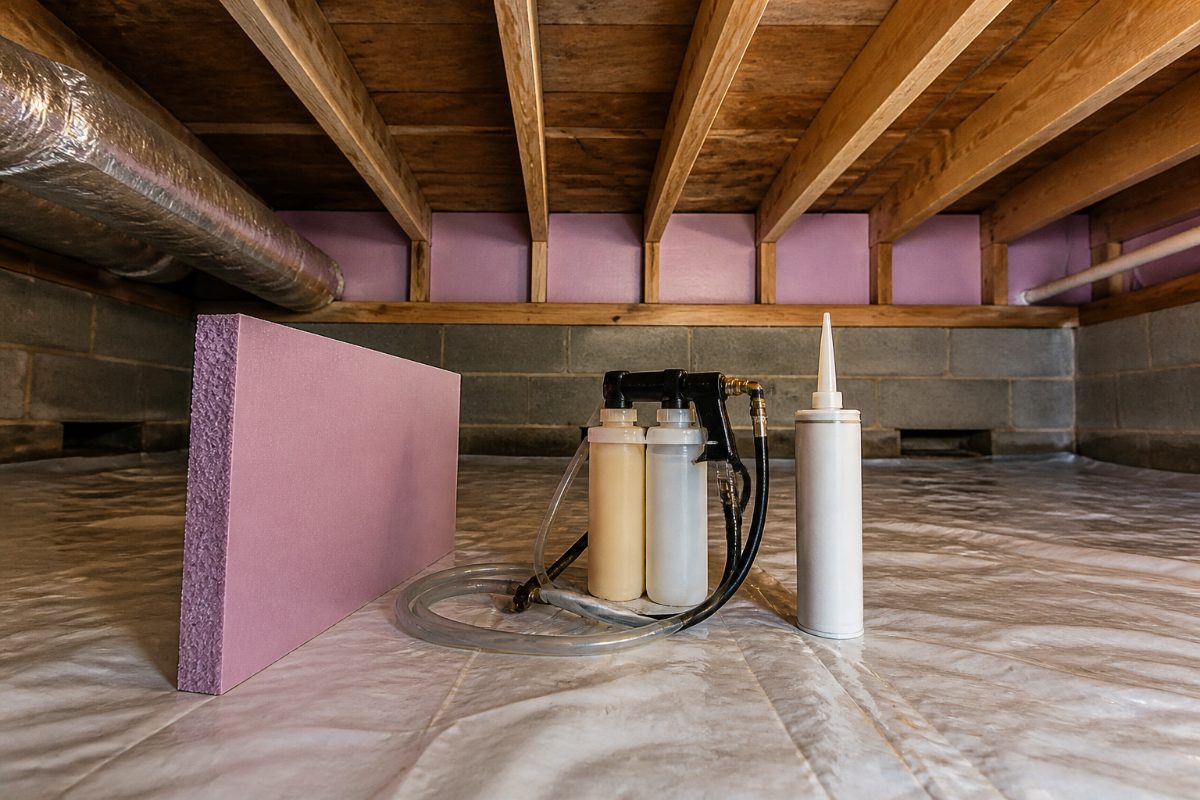
For the rigid-foam method, plan on XPS board, a measuring tool, a way to cut the board, and compatible spray foam or caulk for sealing the edges. You will also need lighting and suitable protective equipment for the products you choose; follow each product’s label for handling and application instructions.
Measure each bay individually rather than assuming every opening is identical. Framing can vary around corners, plumbing, wiring, and repairs, so a snug piece is easier to seal than an oversized board forced into place or a short piece surrounded by a wide gap.
As of October 9, 2026, the estimates compiled by Northpoint Construction put a small DIY rigid-foam project as low as about $100, while professional spray-foam work limited to rim joists is commonly estimated at $300–$800. These are planning figures, not quotes; the actual scope, access, and local labor affect the price. A broader professional crawl-space service has been estimated at $2,100–$2,800, so compare bids that describe the same work rather than comparing unlike project scopes.
How to install XPS rigid foam and seal its edges
Rigid foam works as an air barrier only when its edges and the surrounding joints are sealed. Cut each piece to fit the bay, place it against the intended boundary, and close the perimeter with compatible sealant so air cannot bypass the board.
- Measure one bay at a time. Record the opening dimensions and note obstructions. Repeat for each bay instead of cutting a large batch to a single assumed size.
- Cut a snug insert. The piece should fit without being forced out of shape. A clean, close fit reduces the amount of sealant needed to close the perimeter.
- Place the board at the rim area. Keep the piece aligned with the cavity and make sure it does not leave an open path at the top, bottom, or sides.
- Seal the perimeter. Apply compatible spray foam or caulk around the board’s edges, including the connection toward the sill plate and subfloor. Seal around penetrations as well.
- Check the finished boundary. Inspect each joint from more than one angle. A visible open seam is a bypass path even if the center of the bay is covered.
Do not add rigid board with vapor-barrier facings on both sides without considering how the assembly will dry. Northpoint Construction’s moisture guidance warns that trapping moisture against wood can accelerate damage. The aim is a continuous air seal with materials suited to the crawl space, not simply adding more impermeable layers.
How to apply closed-cell spray foam in rim-joist bays
Closed-cell spray foam can fill the cavity and seal its edges, but application thickness and coverage matter. The installation guidance summarized by the U.S. Department of Energy recommends applying spray foam in multiple layers of about 1/2 inch at a time, allowing expansion and avoiding overheating from a single thick pass.
- Read the kit instructions first. Confirm that the product is intended for the location and application, and follow its directions for setup, protective equipment, and curing.
- Prepare the bay. Make sure the wood is dry and accessible. Protect nearby surfaces and keep foam away from items or openings that the product instructions say to avoid.
- Apply thin passes. Work in layers rather than trying to fill a deep cavity at once. Let each pass expand as directed before adding more.
- Cover the air-leak paths. Pay attention to the rim-to-sill and rim-to-subfloor joints and the edges around penetrations, not just the center of the framing bay.
- Inspect after application. Look for missed seams and areas where the foam did not reach the intended boundary. Follow the kit directions for any trimming or additional coverage.
A small can of single-component foam is useful for limited gaps, but it is not equivalent to a two-part closed-cell kit for filling whole joist bays. InsulationHelper distinguishes small-gap cans from two-part kits, which are intended for broader insulation and air-sealing work. Use a can for appropriate detail work, not as a shortcut for a full-cavity application.
What building-code and moisture details should you check?
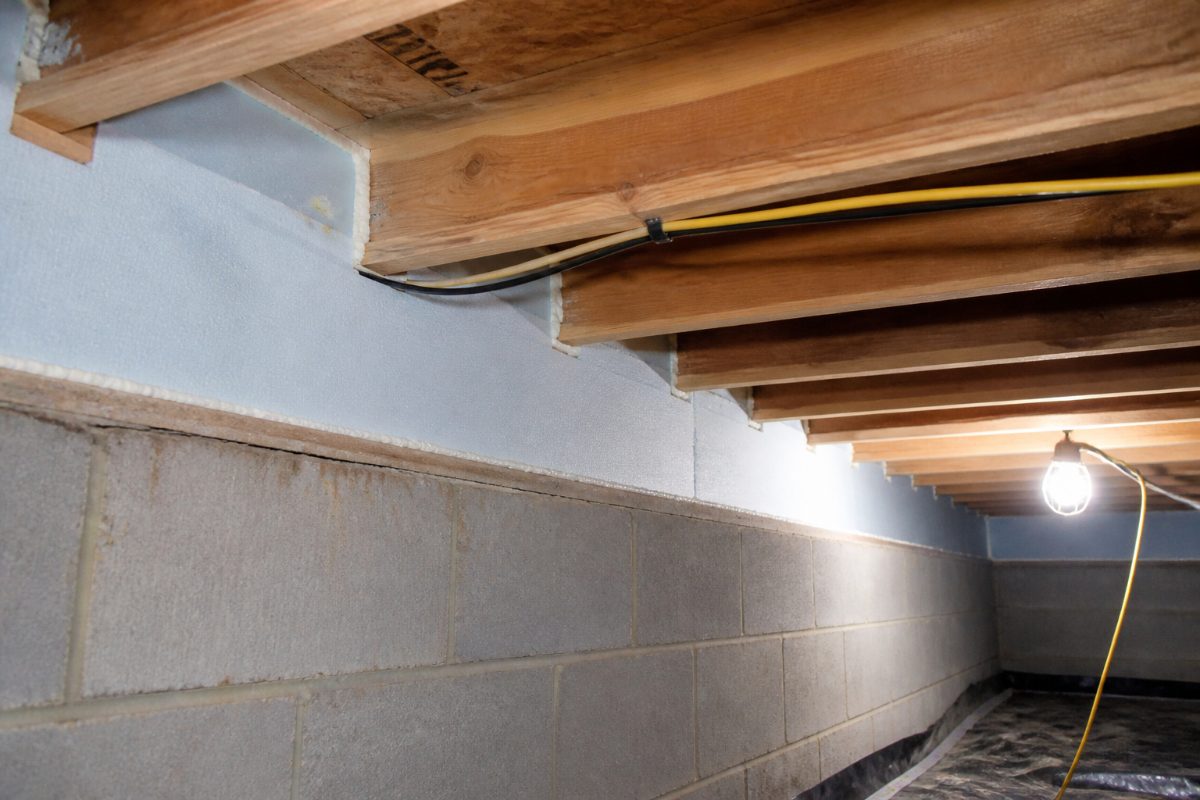
The 2021 International Energy Conservation Code (IECC) says rim joists are part of the air barrier, including the junction among the exterior air barrier, rim board, and sill plate. The U.S. Department of Energy’s guidance also describes thickness thresholds for foam to qualify as an air barrier: at least 1.5 inches for closed-cell foam and at least 5.5 inches for open-cell foam.
These are code and air-barrier references, not a universal instruction to apply a particular thickness in every house. Local code adoption and requirements can differ. Before covering the rim area, check the applicable local building requirements, especially if the project involves foam thickness, a crawl space with different ventilation conditions, or a required termite inspection area.
- Termite inspection: In high-pressure termite regions, the guidance summarized by Northpoint Construction notes a 3-inch inspection gap from the top of the insulation to the bottom of the wood. Confirm the local rule before installing insulation that could hide the inspection area.
- Thermal barrier: The same guidance says foam insulation thicker than 3.25 inches, or foam in a permanently habitable space, must be covered by a thermal barrier such as 1/2-inch gypsum board. Applicability depends on the local code and project conditions.
- Humidity: InsulationHelper’s moisture guidance recommends keeping indoor relative humidity below 60% to reduce condensation risk. Sealing the rim joist addresses air movement at that location, but it does not replace managing indoor moisture.
One frequent mistake is sealing the joist bay but leaving the sill-plate connection open. The U.S. Department of Energy guidance identifies the junction as part of the air barrier, so trace the seal across the whole transition rather than stopping at the edge of the board.
Which approach fits your budget, experience, and crawl space?
Choose based on how much area you need to cover, your comfort with the application, and whether the crawl space is vented or has a moisture concern. There is no benefit in choosing the fastest material if you cannot install it continuously or if it hides a problem that needs attention first.
| Your situation | Practical choice | Why it fits |
|---|---|---|
| First DIY project, small accessible area | XPS board with sealed edges | Each piece can be measured and checked before moving to the next bay. |
| Experienced applicator seeking one-step coverage | Closed-cell spray foam | It combines insulation and air sealing, but requires careful layering and coverage. |
| Very small isolated gaps | Appropriate gap foam or caulk | Small cans are suited to detail sealing, not filling entire bays. |
| Wet framing, suspected rot, or unclear pest conditions | Pause insulation work and address the underlying condition | Covering the area can conceal ongoing moisture or damage. |
| Vented crawl space with concern about outdoor moisture | Avoid open-cell foam; compare closed-cell foam or properly sealed rigid board | Open-cell foam can absorb moisture from outdoor air in a vented crawl space. |
If your priority is a lower material cost, the rigid-foam route is often the more approachable DIY plan, provided you can seal every edge. If you prefer a continuous fill and have the right application experience, closed-cell foam can reduce the number of separate joints. A professional estimate is useful when access is difficult or the job includes more than the rim joists; compare the described scope with the price.
Common mistakes that weaken the air seal
Most failures come from treating insulation and air sealing as the same task. A batt or board can cover the cavity while leaving gaps that continue to carry air and moisture.
- Installing fiberglass alone: It is air-permeable and can hold condensation against cold framing. Choose an air-sealing strategy rather than relying on the batt to stop drafts.
- Leaving the sill plate out of the plan: Seal the connection to the sill plate and subfloor, not only the center of the rim-joist bay.
- Using a single-component can for a full bay: Small-gap foam does not provide the same coverage or performance as a two-part system designed for broader application.
- Sealing over damp or damaged wood: Fix the moisture or repair concern before installing insulation so the condition is not hidden.
- Creating a moisture trap: Avoid adding vapor-barrier layers on both sides of framing without a sound assembly plan; trapped moisture can damage wood.
- Ignoring local inspection and fire-protection rules: Termite inspection gaps and thermal-barrier requirements can apply depending on location and assembly. Check the local code before covering the work.
Frequently Asked Questions
Can I use fiberglass batts because they cost less?
Fiberglass batts alone do not stop air movement through the rim-joist area. Warm, humid indoor air can reach cold wood and condense, while the batt can hold moisture against the framing; an air-sealing layer is needed.
Is spray foam too expensive for a DIY project?
Not always. Two-part DIY foam kits are available, while a small rigid-foam project may cost less; estimates compiled by Northpoint Construction place small DIY rigid-foam work as low as about $100 and professional rim-joist spray foam at about $300–$800. Compare the material, project size, and work included before choosing.
Will sealing rim joists cause mold?
A properly installed air seal can reduce the movement of humid air that contributes to condensation at a cold rim joist. Mold risk can rise if moisture is trapped or existing wet wood is covered, so inspect first, use an appropriate assembly, and address water sources.
Can I use open-cell foam in a vented crawl space?
InsulationHelper warns that open-cell foam can absorb moisture from outdoor air in a vented crawl space. Compare closed-cell foam or carefully sealed rigid foam for that situation, and check local requirements before installation.
Key points before the first cold snap
Start by checking the wood and finding every path between the crawl space and the floor system. Choose closed-cell spray foam for a combined insulation-and-air-seal approach, or use XPS board only when you can seal its full perimeter and the adjoining sill-plate and subfloor joints.
Keep the work within the local rules for air barriers, termite inspection, and thermal protection. Material prices and code requirements can change by project and location; the cost estimates here reflect information available as of October 9, 2026, so confirm current prices and local requirements before buying materials.
References
- Rim Joist Insulation | Air Sealing, Materials & Options
- Best Way to Insulate Rim Joist: The Proven Guide | Northpoint Construction
- at-foam.com
- energy.gov
Information in this post was checked as of October 2026. Policies and prices may change, so please verify important details with official sources.


Comments
Post a Comment