How to Check a Crawl Space Vapor Barrier for Gaps
Key Takeaways
- Check the perimeter, seams, utility penetrations, support piers, and the plastic itself for openings, loose tape, tears, or sagging.
- The U.S. Department of Energy’s June 2024 job aid uses a 12-inch minimum seam overlap and a 6-inch extension up foundation walls, columns, and footings as inspection benchmarks.
- Standing water, musty odors, damp insulation, and soft wood can point to moisture problems that a floor liner alone will not fix.
- Measure suspect seams and wood rather than relying only on appearance, and do not disturb visible mold during a DIY inspection.
Table of Contents
- What a crawl space vapor barrier does—and what it cannot do
- What measurements should you use when checking for gaps?
- How to prepare for a crawl space inspection
- Where should you look for vapor barrier gaps?
- What moisture warning signs should you check?
- How to decide whether a gap is a DIY patch or a bigger problem
- What should first-time and experienced homeowners do differently?
- Common mistakes that hide a failed barrier
- Frequently Asked Questions
- Key points to remember
A crawl space vapor barrier can look intact from the access hatch while gaps remain at seams, walls, piers, or plumbing penetrations. To check it, inspect those transition points systematically, compare overlaps and wall extensions with Department of Energy benchmarks, and look for moisture clues that suggest the problem extends beyond a small tear.
What a crawl space vapor barrier does—and what it cannot do
A vapor barrier is a sheet material installed over the soil to slow water vapor moving from damp ground into the crawl space. Water vapor naturally moves from areas with more moisture toward areas with less, so an unbroken ground covering helps limit that movement.
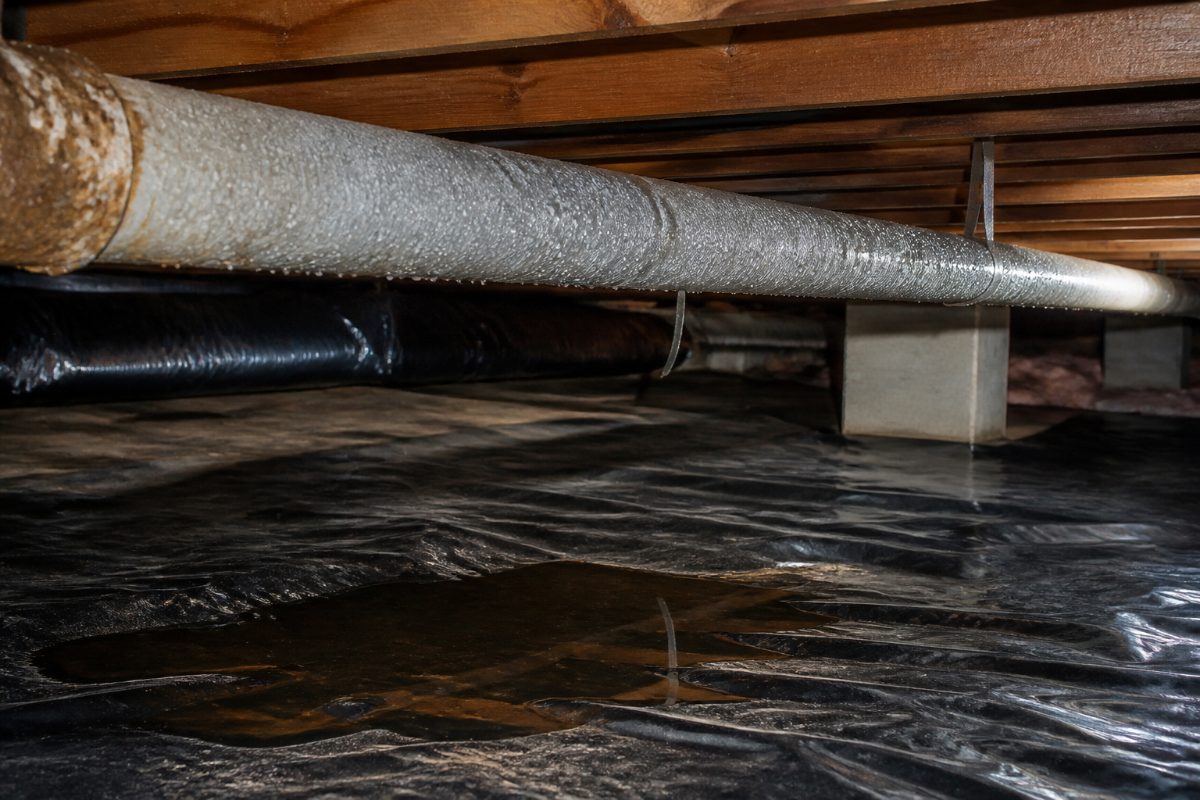
The barrier is not the same as a flood-control system. Crawl Space Ninja warns that plastic should not be treated as waterproofing: standing water on top of the liner points to a drainage or water-entry issue, not simply a need to tape another seam. The plastic also cannot stop moisture that bypasses it through exposed soil, unsealed edges, or damp foundation surfaces.
Air movement can carry crawl-space moisture into the home, too. The stack effect describes how rising warm air can leave upper parts of a house and draw replacement air from lower areas, including a crawl space. That is one reason a musty odor upstairs can be a useful clue, even when the floor covering looks mostly complete.
What measurements should you use when checking for gaps?
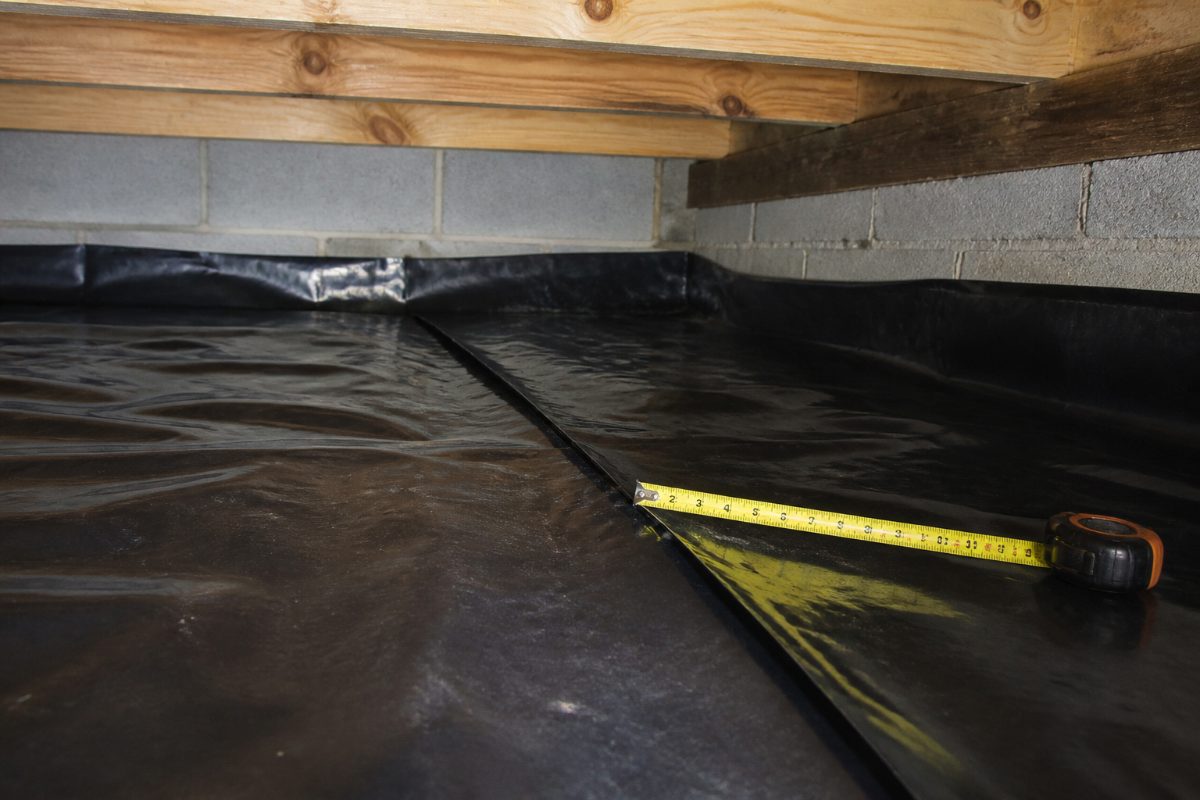
Use the U.S. Department of Energy’s June 2024 crawl-space vapor-retarder job aid as a practical visual benchmark: seams should overlap by at least 12 inches, and the material should extend at least 6 inches up foundation walls, columns, and footings. DOE also describes taped seams and edges sealed to the foundation with mastic or acoustical sealant.
The 2024 International Residential Code (IRC) includes a Class I vapor-retarder requirement for unvented crawl spaces. Code requirements depend on the applicable code and conditions, so treat the DOE measurements as inspection benchmarks and check local requirements before changing an existing assembly.
| Inspection point | Benchmark | What to look for |
|---|---|---|
| Seams | At least 12 inches of overlap | Measure the overlap and check whether tape is lifted, missing, or damaged. |
| Walls, columns, and footings | At least 6 inches of extension | Look for a continuous upturn rather than a liner ending at the soil line. |
| Material thickness | 6-mil minimum cited by DOE | Check product markings or installation records if thickness is unknown. |
| Sealing | Seams taped; edges sealed to the foundation | Look for loose edges, gaps, or missing sealant. |
DOE identifies 6-mil polyethylene as a standard minimum in its June 2024 material. Croc Coatings describes 10- to 20-mil reinforced liners as a heavier-duty option; a thicker liner can be more resistant to punctures, but thickness alone does not correct a poorly sealed edge or active water intrusion.
How to prepare for a crawl space inspection
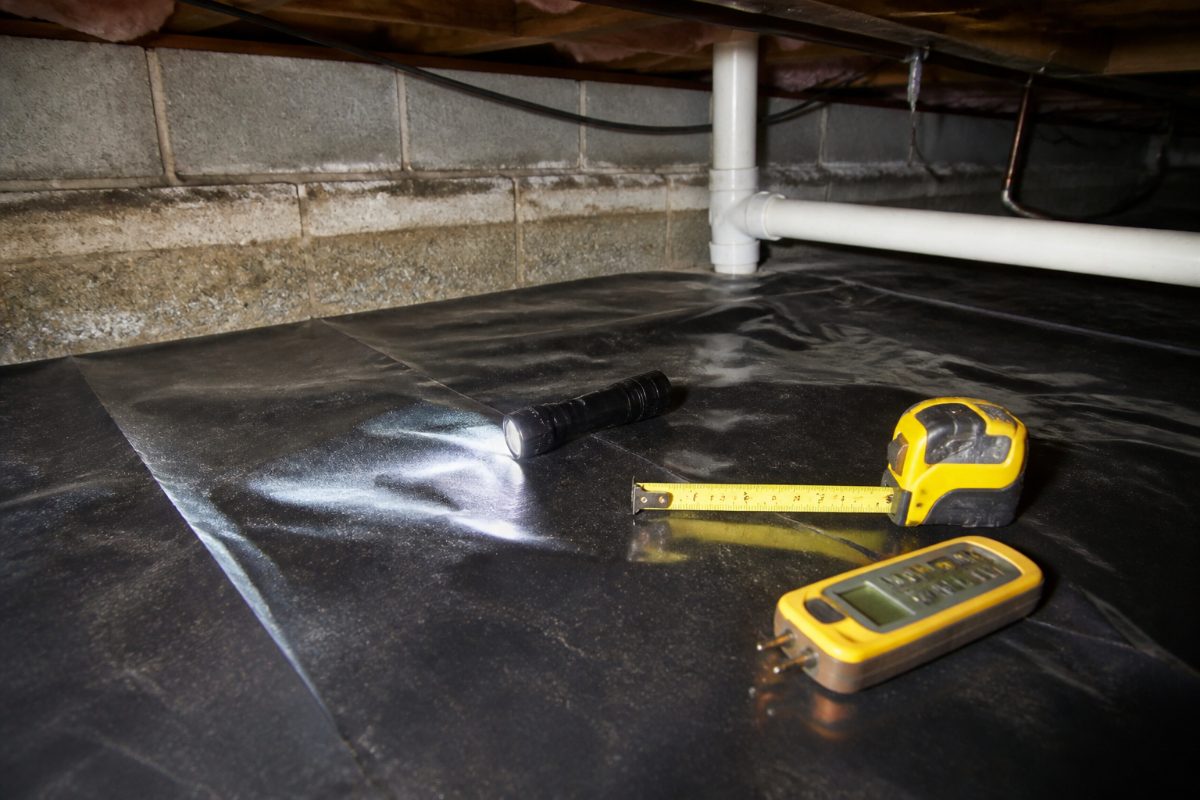
Gather a bright flashlight or headlamp, a tape measure, and a wood moisture meter. The tape measure lets you check whether a seam is actually 12 inches wide; a moisture meter helps compare suspect wood with nearby wood rather than judging dampness by touch alone.
Before entering, look from the access point and decide whether the space is safe to inspect. If you see standing water, extensive visible mold, damaged wiring, or wood that appears unstable, do not crawl through the affected area. Palm Build advises against scrubbing or disturbing visible mold without appropriate containment, because disturbance can spread material into the living area.
Wear clothing that covers your skin and avoid kneeling or dragging tools across the liner. Keep the inspection visual and deliberate: a rushed crawl can create new punctures, obscure the original condition, or put you in contact with damp or damaged materials.
- Take a photo of the access area before moving around, so you can compare conditions later.
- Use the flashlight to scan the nearest perimeter and the route you plan to follow.
- Measure questionable seams and wall extensions instead of estimating by eye.
- Record the location of each issue, such as “north wall, near pipe bundle,” and photograph it from a safe position.
Where should you look for vapor barrier gaps?
Inspect in a repeatable route: perimeter first, then seams, penetrations, support piers, and finally the open field of the liner. These transitions are where sheets meet other surfaces or where people and equipment may have disturbed the material.
1. Perimeter and foundation walls
Follow the plastic where it meets the foundation. Look for sections that stop short, pull away from the wall, or have detached sealant. Check whether the liner turns up at least 6 inches on the foundation, columns, and footings, as in DOE’s June 2024 benchmark.
A gap at the perimeter can leave soil exposed even if the center of the crawl space is covered. Moisture can also move through concrete or along wooden supports; a liner that ends at the floor-wall junction may leave those paths unaddressed.
2. Seams and tape
Measure several overlaps, especially near the access route and any visibly loose tape. DOE’s benchmark is at least 12 inches, not 6 inches. If tape is peeling, check whether the underlying sheets still overlap and whether the material is torn or contaminated.
A seam that looks taped from above can still have a lifted edge or a channel beneath it. Photograph the full seam and a close view of the defect so that the location and extent are clear.
3. Pipes, ducts, and support piers
Look around plumbing pipes, HVAC ducts, and support piers for open rings or slits that were cut too broadly. The liner should meet these obstacles without leaving a visible gap, and the cut should not be so tight that the material is stretched or tearing.
Check both the top and the accessible sides of a pier. A sheet may be sealed to the soil nearby but fail to continue neatly around the support, leaving exposed ground at its base.
4. Tears, punctures, and sagging edges
Scan for sharp punctures, long tears, displaced sheets, and sections that sag because they have pulled away from a wall. Walder Foundation and Better Basements identify physical damage and detached or sagging material as inspection concerns. A small hole may be patchable; widespread damage or repeated detachment calls for a broader assessment.
What moisture warning signs should you check?
A vapor barrier gap is only one possible cause of crawl-space moisture. Stego Industries and Foundation Restoration identify standing water on the liner, condensation on pipes or joists, mold or mildew on wood or insulation, and white powdery deposits on concrete as warning signs to investigate.
Also pay attention to persistent musty or earthy odors in the crawl space or on the first floor. Crawl Space Ninja notes that odors can remain when edges or seams are unsealed, and Palm Build describes the stack effect as a route by which crawl-space air can be drawn into the home.
| Clue | What it may suggest | Useful next check |
|---|---|---|
| Water sitting on top of the plastic | Water is entering or collecting above the liner; the barrier is not a drainage system. | Trace the wet area and look for a water source or drainage concern. |
| Condensation on pipes or joists | Moisture is present in the crawl-space air or on cool surfaces. | Check nearby seams, edges, and other visible moisture indicators. |
| White powder on concrete | Efflorescence, a powdery mineral residue associated with moisture movement. | Inspect the adjacent wall and floor edge for dampness or gaps. |
| Sagging fiberglass insulation | Insulation may have absorbed moisture, according to Palm Build. | Look above the affected area for damp wood, condensation, or water entry. |
| Soft or rotting wood | Possible prolonged moisture damage to joists or sill plates. | Use a moisture meter on accessible wood and avoid loading damaged areas. |
A wood moisture meter can add context to a visual check. Palm Build lists 12%–16% as healthy wood, above 19% as a decay risk, and above 28% as a level where active decay is likely. These readings are screening clues, not a substitute for assessing the location, extent, and condition of the wood.
How to decide whether a gap is a DIY patch or a bigger problem
A small, isolated tear in otherwise sound material is different from a failed perimeter, repeated open seams, or water across a broad area. Palm Build describes targeted patches using compatible vapor-barrier tape or material as common for minor tears, while widespread failure calls for replacement rather than a collection of scattered patches.
For a minor repair, first make sure the surrounding sheet is intact and that the patch material is compatible with the liner. Cover the damaged area with a patch that extends onto sound material, then press the adhesive according to the product instructions. Do not use a patch to cover standing water, a soft structural member, or a recurring source of dampness.
| Condition found | Practical response |
|---|---|
| One small puncture; surrounding liner is sound | Use compatible vapor-barrier material or tape for a targeted patch. |
| Several separated tears or peeling seams | Map and photograph the defects; determine whether the liner has widespread failure. |
| Open perimeter or missing wall extension | Assess the full edge, not only the most visible gap, and plan a continuous repair. |
| Standing water, soft wood, or broad mold growth | Address the moisture or structural condition before treating the liner as the only problem. |
Do not assume that sealing every vent or opening is automatically the next step. Better Basements cautions that sealing a crawl space without active dehumidification can trap moisture. A vapor-retarder inspection is not the same as a full encapsulation plan, which may involve drainage and moisture management.
What should first-time and experienced homeowners do differently?
If this is your first inspection, focus on documenting what you can see rather than trying to repair every defect in one visit. Start at the access point, follow the perimeter, measure a few representative seams, and record moisture clues. That gives you a clear map and helps distinguish one isolated hole from a pattern.
If you have inspected the space before, compare new photos with earlier ones. Changes such as newly lifted tape, expanding damp areas, a fresh odor, or a new tear can show that a condition is progressing. Keep measurements and photos tied to a fixed location, such as a wall or pier, so the comparison is useful.
- New homeowner: Use the DOE 12-inch seam and 6-inch wall-extension benchmarks as a checklist, and avoid entering areas with visible hazards.
- Experienced DIYer: Recheck known weak points after water intrusion or work that involved pipes, ducts, or support areas.
- Anyone who finds mold or structural damage: Do not disturb the growth or rely on a surface patch to resolve the underlying moisture condition.
Common mistakes that hide a failed barrier
One common mistake is checking only the center of the floor. The perimeter, seams, penetrations, and pier bases are more revealing because that is where the liner must join another surface or fit around an obstruction.
Another is accepting a narrow overlap because it has tape on it. DOE’s June 2024 benchmark is 12 inches; tape does not make an undersized overlap meet that measurement. A third mistake is treating a vapor barrier as flood protection. If water is standing on top of the liner, identify the water problem rather than simply adding more plastic.
Finally, do not seal a crawl space completely without considering moisture control. Better Basements warns that sealing without active dehumidification can trap moisture and contribute to mold growth on floor framing. The right response depends on the moisture source and the crawl-space design, not just on whether the plastic appears intact.
Frequently Asked Questions
How often should I check a crawl space vapor barrier?
Make a periodic visual check, and take another look after a significant rain or a known water event. Building America recommends at least an annual inspection, ideally in spring or fall after significant rain; check current guidance and local conditions when setting a maintenance schedule.
Can I patch a small hole in a crawl space vapor barrier?
Yes. Palm Build describes compatible vapor-barrier tape or material as a common option for a minor, isolated tear. If damage is widespread, the liner repeatedly pulls loose, or water is present, a small patch will not address the larger condition.
Is 6-mil plastic thick enough for a crawl space?
DOE identifies 6-mil polyethylene as a standard minimum, while Croc Coatings describes 10- to 20-mil reinforced liners for heavier-duty use. A thicker liner may better resist punctures, but it still needs continuous coverage and properly treated seams and edges.
Why does my house smell musty if it has a vapor barrier?
The liner may have gaps at its edges, seams, or penetrations, or moisture may be entering by another route. Palm Build and Crawl Space Ninja describe how crawl-space air can move toward the living space and how unsealed areas can contribute to odors.
Does a vapor barrier stop standing water?
No. A vapor barrier slows moisture vapor moving from the soil; it is not a flood barrier or drainage system. Standing water on top of the plastic needs investigation of the water source and drainage conditions.
Key points to remember
- Inspect edges, seams, penetrations, piers, and the liner surface—not just the center of the floor.
- Use DOE’s June 2024 benchmarks: at least 12 inches of seam overlap and 6 inches up walls, columns, and footings.
- Look for water, condensation, musty odors, efflorescence, damp insulation, and soft wood as signs that the issue may be larger than a gap.
- Patch isolated damage with compatible material, but treat widespread failure, standing water, and visible mold as broader moisture concerns.
Repair details and code requirements can depend on the crawl-space design and local rules. For a repair involving widespread moisture, mold, or damaged framing, address the underlying condition as well as the liner.
References
- Digital Codes
- energy.gov
- Vapor Barrier Failures: Causes And Solutions - Concrete Coatings & Garage Floor Coating North Idaho And Easter
- The Must-Have Crawl Space Inspection Checklist for Summer
- DIY Crawl Space Inspection Checklist | Palm Build
- The Crawl Space Standards Every Homeowner Should Understand in 2026 – Crawl Space Ninja Store
Information in this post was checked as of October 2026. Policies and prices may change, so please verify important details with official sources.


Comments
Post a Comment