How to Find a Hidden Water Leak Before Opening a Wall
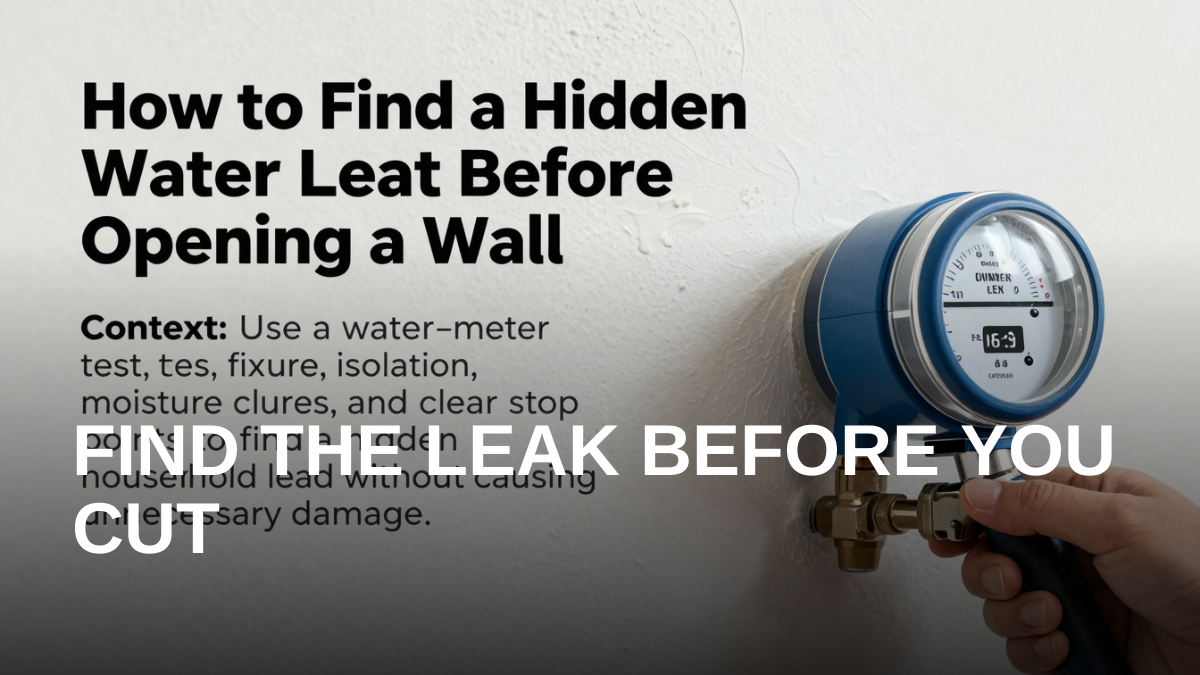
Before opening a wall, first confirm that water is actually being lost and narrow down where it may be coming from. The U.S. Environmental Protection Agency (EPA) recommends checking the water meter after a period with no water use, while moisture meters and thermal imaging can help map a suspicious area without immediate demolition. A moving meter, damp wall, or thermal pattern is evidence to investigate—not proof that a pipe is leaking directly behind the visible spot.
- Stop Active Water Damage Before Diagnosing the Wall
- Step 1: Use the Water Meter to Confirm Unexplained Water Use
- Step 2: Rule Out Toilets and Visible Fixtures First
- Step 3: Read the Wall Clues Without Assuming the Source
- Step 4: Map the Area With a Moisture Meter
- Step 5: Understand What a Thermal Camera Can and Cannot See
- Step 6: Consider Pressure Testing When the Source Stays Hidden
- How to Combine the Evidence Before Opening the Wall
- When Smart Leak Detection Can Help
- Common Mistakes That Lead to Unnecessary Wall Damage
- When to Stop DIY Diagnosis and Call a Professional
- After You Find the Leak: Stop the Source and Start Drying
- A Practical Before-You-Open-the-Wall Checklist
- FAQ: Hidden Water Leaks Behind Walls
- Key Takeaways
- Official Sources
The most useful sequence is simple: confirm unexplained water use, rule out toilets and exposed fixtures, inspect the wall for moisture clues, compare moisture readings across several locations, and use thermal imaging only as an additional way to narrow the search. Open the wall only after the evidence points to a reasonably limited area.
Stop Active Water Damage Before Diagnosing the Wall
If water is actively escaping, stopping the water source safely takes priority over tracing its exact path through the building. If you cannot safely stop or isolate the source, use a qualified professional. If you need to prepare for future plumbing problems, find and test your main water shutoff before an emergency makes the task more difficult.
Once the immediate flow has been stopped, avoid cutting the wall simply because one section looks wet. Water can travel through building assemblies before appearing as a stain, so the visible damage may be some distance from the actual source.
Step 1: Use the Water Meter to Confirm Unexplained Water Use
EPA WaterSense recommends a straightforward whole-house check. Stop water use both inside and outside the home, record the water-meter reading, and check it again after two hours. If the reading changes while no water should have been used, EPA says a leak is likely.
For this test to be meaningful, water use needs to remain stopped during the test period. Consider anything that could intentionally use water when interpreting a changed reading.
A positive meter test does not tell you that the leak is inside a wall. EPA identifies common household leak sources that include toilets, faucets, valves, hot- and cold-water connections, and irrigation systems. Those easier-to-access sources should be investigated before demolition.
Key distinction: A changed meter reading can provide strong evidence that unexplained water use is occurring. It cannot identify which fixture, pipe, connection, or part of the property is responsible.
Water-use history can provide another clue. EPA notes that during winter, when outdoor water use is low, a four-person household using more than 12,000 gallons, or about 16 CCF, in a month could have a serious leak. This is a screening clue rather than a universal diagnostic threshold because normal household water use varies.
As of September 25, 2026, EPA's current Fix a Leak Week information says leaks in an average household can waste more than 9,300 gallons of water each year, and repairing easily corrected household leaks can reduce water bills by about 10%. Older EPA material contains different leak statistics, so those older figures should not be mixed with the current values.
Step 2: Rule Out Toilets and Visible Fixtures First
Start with plumbing you can inspect without damaging the house. Check faucets, exposed supply connections, valves, hot- and cold-water connections, and other accessible plumbing for visible leakage or moisture.
Toilets deserve particular attention because a tank can leak quietly into the bowl. EPA recommends putting a few drops of food coloring into the toilet tank, waiting about 10 minutes without flushing, and checking whether color appears in the bowl. If it does, leakage around the flapper or flush-valve seal is a likely explanation. Flush immediately after the test to prevent staining.
If a running or leaking toilet is suspected, these four toilet checks before calling a plumber can help isolate a fixture problem before you assume the water is disappearing inside a wall.
Next, inspect accessible plumbing connections for visible moisture. The goal at this stage is not to disassemble every fixture; it is to eliminate obvious, accessible sources that could explain a positive meter test.
What to Check Before Suspecting a Wall Leak
| Area | What to Look For | What It Tells You |
|---|---|---|
| Toilet | Color entering the bowl during the EPA dye test | A tank-to-bowl leak may explain water use |
| Faucets and valves | Visible dripping or wet connections | An exposed fixture may be the source |
| Visible pipe connections | Localized wetness | Investigate the accessible connection before the wall |
| Irrigation system | Unexpected water use or visible leakage | The meter change may originate outdoors |
| Wall or ceiling | Stains, water rings, damaged paint, soft drywall, or musty odor | Moisture damage is possible, but the source still needs confirmation |
Step 3: Read the Wall Clues Without Assuming the Source
Once accessible plumbing has been checked, examine the suspicious wall or ceiling carefully. Water rings, discoloration, bubbling or flaking paint, softened drywall, and a musty odor can indicate moisture damage. These symptoms help identify where further testing is worthwhile, but none identifies a pipe failure by itself.
The location of a stain can be misleading. Water may travel through building materials before becoming visible. That means cutting directly behind the darkest stain can miss the original entry point and create unnecessary damage.
Think about when the symptom changes as well as where it appears. If a wall becomes damp during rain but the water meter remains stable during a controlled no-use test, the evidence does not by itself establish a pressurized plumbing leak. Rain intrusion, condensation, and other moisture sources may need to be considered.
Likewise, a high moisture reading is not automatically proof of a broken pipe. FLIR guidance notes that building moisture can have different causes, including plumbing leakage, humidity, condensation, and rain or snow intrusion. The diagnostic task is therefore to combine several observations rather than treating one clue as a verdict.
Step 4: Map the Area With a Moisture Meter
A moisture meter is one of the more practical tools for narrowing a suspicious area before opening a wall. Pinless meters can inspect without inserting probes into the surface, while pin-type meters use probes that enter the material. Manufacturers including FLIR/Extech provide moisture meters intended for investigating building materials such as drywall, wallboard, plaster, and concrete.
Do not take one reading on the stain and immediately interpret it as proof of a hidden plumbing leak. A better approach is comparative: measure the suspicious area, then compare it with nearby areas that appear normal. Take readings at multiple locations so you can see whether the pattern is isolated, widespread, or changing across the surface.
Record the locations and dates of readings if you are monitoring the area over time. This Old House recommends taking multiple measurements and interpreting them according to the instructions for the particular meter. The research for this article did not identify a universal drywall moisture percentage that proves a hidden pipe leak.
A claim such as “a reading above a particular percentage means there is a pipe leak” would therefore be misleading without material- and meter-specific guidance. Use the manufacturer's instructions for your device rather than applying an arbitrary threshold from an unrelated example.
A Simple Moisture-Mapping Method
- Choose an apparently dry area of similar wall material as a comparison point.
- Measure several points around the visible stain or suspected area.
- Extend the measurements around the visible symptom to understand the moisture pattern.
- Record each location so the pattern can be compared rather than relying on memory.
- Interpret the readings using the meter manufacturer's instructions.
- If the pattern remains unexplained, combine the results with meter testing, visual evidence, and professional diagnosis rather than cutting immediately.
This process is more useful than searching for a single universal percentage. What matters is whether multiple pieces of evidence point toward the same limited area.
Step 5: Understand What a Thermal Camera Can and Cannot See
Thermal imaging can help narrow the search further, but its limitations are especially easy to misunderstand. A thermal camera does not see water or pipes through a wall like an X-ray. FLIR explains that the camera detects temperature differences and patterns at the wall surface.
A concealed moisture problem can sometimes influence the surface-temperature pattern. However, a temperature difference is not proof of moisture, because conditions other than moisture can affect thermal patterns. Weather and indoor humidity are among the factors that may affect interpretation.
For that reason, a cold-looking or otherwise unusual thermal area is not confirmation of water. FLIR recommends using thermal imaging to locate suspicious patterns and then confirming those areas with a moisture meter.
Use thermal imaging to narrow the search, not to declare the diagnosis. The useful question is not “What color means a leak?” but whether the unusual temperature pattern corresponds with independently confirmed moisture.
No official universal thermal-image color rule for identifying a hidden leak was established in the research for this article. The surface-temperature pattern, rather than a particular displayed color, should be evaluated and then checked with moisture measurements.
Step 6: Consider Pressure Testing When the Source Stays Hidden
EPA's more stringent WaterSense procedure for new homes includes a pressure-loss test. The procedure involves connecting a pressure gauge to a washing-machine cold-water faucet or hose bibb, measuring water pressure, shutting off the home's main water supply, and observing the pressure.
EPA states that the pressure should remain constant for 5 to 10 minutes; a pressure drop indicates a leak. This provides another method of checking for leakage, but homeowners who are not comfortable performing the procedure should use a qualified professional rather than improvising an unfamiliar plumbing test.
If you cannot confidently perform the test, provide your meter and moisture observations to a plumber instead. The objective is to reduce unnecessary demolition, not to turn every homeowner into a leak-detection technician.
How to Combine the Evidence Before Opening the Wall
No single clue should carry more weight than it deserves. The strongest case for opening a particular area comes from several independent observations pointing in the same direction.
| Finding | Reasonable Interpretation | Next Step |
|---|---|---|
| Meter changes during the EPA no-use test | A leak is likely | Check toilets, fixtures, valves, connections, and irrigation before the wall |
| Meter changes and toilet dye test is positive | The toilet may explain some or all unexplained use | Address the toilet and check whether unexplained use continues |
| Visible wall stain but meter is stable | A pressurized plumbing leak is not established by the stain alone | Investigate other moisture sources and timing |
| Moisture meter shows a localized pattern | The area deserves closer investigation | Compare more points and combine with other evidence |
| Thermal anomaly matches moisture-meter findings | The suspected area has been narrowed further | Consider professional confirmation before demolition |
| Accessible sources are ruled out but unexplained water use continues | A concealed source becomes more plausible | Consider professional leak isolation |
Keep notes as you work. Record meter readings, test times, moisture-meter locations, when stains change, and which fixtures were checked. These observations can give a plumber or restoration professional useful information before deciding where a wall needs to be opened.
When Smart Leak Detection Can Help
As of September 25, 2026, EPA's leak-detection guidance describes two broad approaches: moisture detection and flow monitoring. Moisture detectors can identify unexpected wetness, while flow-monitoring devices analyze water flow and usage patterns to identify possible leaks or unusual water use.
EPA also notes that some systems can operate a shutoff valve to help limit additional water loss. These devices can therefore provide earlier warning of unexpected moisture or unusual flow.
They do not change the basic diagnostic principle. A moisture alarm indicates moisture near the sensor, while abnormal flow indicates unusual water movement or use. The actual source still needs to be identified and corrected.
Common Mistakes That Lead to Unnecessary Wall Damage
- Cutting directly behind a stain: Water can travel before becoming visible, so the stain may not mark the source.
- Assuming a moving meter means a wall leak: Toilets, faucets, valves, pipe connections, and irrigation can also cause unexplained use.
- Treating thermal imaging like X-ray vision: A thermal camera measures surface temperature patterns; it does not see water directly through a wall.
- Calling one cold thermal spot proof: Confirm suspicious thermal patterns with a moisture meter and other evidence.
- Using a universal moisture percentage: Meter interpretation can depend on the device and material, so follow the manufacturer's instructions.
- Covering the symptom: Painting or caulking over a moisture or mold problem does not correct its water source.
- Waiting several days to begin drying: Current EPA and CDC guidance recommends drying or removing wet materials as quickly as possible, ideally within 24 to 48 hours.
When to Stop DIY Diagnosis and Call a Professional
Professional leak isolation is a reasonable next step when the meter indicates unexplained water use but accessible sources do not reveal the cause, when moisture continues to appear without an identified source, or when determining the cause would require opening a wall without a well-defined target.
If you cannot safely identify or stop the water source, use an appropriate qualified professional. The purpose of the meter, moisture, and thermal checks is to narrow the investigation before demolition, not to require a homeowner to perform work beyond what can be done safely.
If the evidence points toward the water heater area, inspect only what is safely accessible. Maintenance of a conventional tank is covered separately in how to inspect and maintain a water heater anode rod, but an anode inspection should not be used as a substitute for diagnosing an active concealed leak.
After You Find the Leak: Stop the Source and Start Drying
Finding the leak is only half of the job. Once the water source has been stopped, wet materials need prompt attention. EPA and CDC guidance recommends drying wet or damp materials, or removing materials that cannot be adequately dried, as quickly as possible—ideally within 24 to 48 hours—to reduce the risk of mold growth.
Do not simply paint over a water stain or suspected mold. CDC guidance says the water problem should be completely corrected and mold cleaned up before painting or caulking. Otherwise, the cosmetic repair can leave an unresolved moisture problem underneath.
After the source has been repaired, repeating the controlled no-use water-meter test can help determine whether unexplained water use is still occurring. Apply the same EPA test conditions: stop water use and compare the meter reading after the two-hour no-use period.
Continue checking the previously damp area as it dries. If moisture remains or visible symptoms continue, further investigation may be necessary even after the suspected source has been repaired.
A Practical Before-You-Open-the-Wall Checklist
- Stop the active water source if it can be done safely.
- If you cannot safely identify or stop the source, use a qualified professional.
- Stop indoor and outdoor water use for the meter test.
- Record the water meter and check it again after the EPA-recommended two-hour no-use period.
- Check toilets, including the EPA food-coloring test for silent tank leaks.
- Inspect faucets, valves, exposed connections, and irrigation for accessible leaks.
- Look for wall stains, water rings, damaged paint, soft drywall, and musty odors.
- Consider rain, humidity, condensation, and other possible non-plumbing moisture sources when the evidence does not point clearly to plumbing.
- Compare several moisture-meter readings rather than relying on one number.
- Use thermal imaging only to identify suspicious surface-temperature patterns.
- Confirm thermal anomalies with moisture measurements.
- Document the evidence before deciding whether and where demolition is justified.
- Once the source is stopped, begin drying wet materials promptly.
FAQ: Hidden Water Leaks Behind Walls
Can I tell whether I have a leak without opening the wall?
You can often establish whether unexplained water use is occurring and narrow the suspected area before demolition. EPA recommends comparing water-meter readings over a two-hour period with no water use. Moisture mapping and thermal imaging can then provide additional clues, but none of these tests alone identifies the exact failed pipe or fitting.
If the water meter moves, does that mean a pipe is leaking inside the wall?
No. A changed meter reading during a valid no-use test indicates a likely leak, but EPA lists toilets, faucets, valves, pipe connections, and irrigation among common leak sources. Check accessible sources first.
Can a thermal camera see a leaking pipe through drywall?
No. FLIR explains that thermal cameras measure surface temperature differences rather than seeing through walls. A concealed moisture problem may influence a surface-temperature pattern, but the image should be confirmed with a moisture meter and other evidence.
Does a cold spot on a thermal image prove there is water?
No. Temperature differences can have causes other than moisture. FLIR recommends using thermal imaging to locate suspicious areas and moisture measurement to help verify them.
How quickly should wet materials be dried after the leak is stopped?
EPA and CDC recommend drying wet or damp materials, or removing materials that cannot be adequately dried, as quickly as possible, ideally within 24 to 48 hours. Do not postpone addressing the moisture source while concentrating only on the visible stain.
Key Takeaways
The most evidence-based way to investigate a hidden water leak before opening a wall is to move from broad evidence to increasingly focused evidence. Start with the water meter, eliminate toilets and exposed fixtures, inspect visible moisture clues, map the area with a moisture meter, and use thermal imaging as a supporting tool when needed.
Do not assume that a wall stain marks the origin of the leak, that a thermal camera can see through drywall, or that one moisture reading proves a pipe failure. When several tests point toward the same limited area, the decision about whether and where the wall needs to be opened can be made with better evidence.
Once the source is found and stopped, shift promptly from detection to drying. Current EPA and CDC guidance supports drying or removing wet materials as quickly as possible, ideally within 24 to 48 hours.
Official Sources
- U.S. EPA WaterSense: Home Maintenance
- U.S. EPA WaterSense: Fix a Leak Week
- U.S. EPA: Leak Detection and Flow Monitoring Devices
Guidance and changing information in this article were reviewed as of September 25, 2026. Plumbing layouts, meter designs, building materials, and local requirements vary. Follow the instructions for your specific equipment and use a qualified professional when the source cannot be safely identified.
References
- Home Maintenance | US EPA
- Free of Water Leaks Technical Sheet
- I Have Water Damage In My Wall, What Do I Do? | SERVPRO
- Water Intrusion Repair Guide | SERVPRO
- 플리어
- How To Use a Moisture Meter for Basement Issues - This Old House
- 플리어
- CDC Dry Off Wet Items
Information in this post was checked as of 2026-09-25. Policies and prices may change, so please verify important details with official sources.


Comments
Post a Comment