How to Winterize an Outdoor Faucet Before the First Freeze
Key Takeaways
- Disconnect every hose and attachment before freezing weather; a connected hose can trap water even on a frost-free faucet.
- For a standard faucet, shut off its indoor supply valve, open the outdoor faucet, and drain the line.
- Use an insulated cover as an added layer of protection, not as a substitute for shutting off and draining the water.
- Winterize before the first hard freeze; begin watching overnight lows when they consistently fall below 40°F.
Table of Contents
- When should you winterize an outdoor faucet?
- How to winterize a standard outdoor faucet
- Do frost-free faucets need winterizing?
- Are a faucet cover or dripping water enough?
- What if you cannot find the indoor shut-off valve?
- What should you check when winter ends?
- Common winterizing mistakes to avoid
- Frequently Asked Questions
- Quick winterizing checklist
To winterize an outdoor faucet before the first freeze, remove the hose, shut off the faucet’s indoor water supply if it has a dedicated valve, and drain the exposed line. These steps reduce the amount of water that can freeze and expand inside the plumbing; insulation adds protection but does not replace draining.
When should you winterize an outdoor faucet?
Winterize before the first hard freeze, rather than waiting for the first morning with ice. A useful planning signal is a forecast of overnight lows consistently below 40°F; the research also identifies temperatures below 28°F for three hours or more as a freeze threshold. Check the extended forecast so you can finish the work before temperatures fall.
Water expands by about 9% when it freezes. In a pipe, that expansion can create enough pressure to crack or burst it. A leak may not become visible outside: a damaged section behind an exterior wall can start leaking indoors when the ice thaws.
- New to winterizing: Locate the indoor shut-off valve before cold weather arrives, while there is time to trace the pipe without rushing.
- Already familiar with the valve: Add the outdoor faucet and any connected irrigation or exposed plumbing to the same seasonal checklist.
- Warm daytime, cold nights: Use overnight lows and the extended forecast to plan; a mild afternoon does not tell you whether the line will be exposed to freezing temperatures overnight.
How to winterize a standard outdoor faucet
A standard hose bib or spigot is an outdoor faucet whose water supply is not shut off deep inside a heated wall. For this type, the goal is to shut off the indoor supply and let gravity drain the water left in the pipe leading to the faucet.
- Disconnect the hose and attachments. Remove garden hoses, splitters, timers, and other fittings. Drain the hose and store it indoors, such as in a garage or shed. A connected hose can hold water in the faucet and supply line, so removing it is essential even if you plan to use a cover.
- Find the dedicated indoor shut-off valve. Check the basement, crawl space, utility room, or the area near where the main water line enters the home. Use a flashlight to trace the pipe from the outdoor faucet if needed. A gate valve closes by turning clockwise; a ball valve closes when its handle sits perpendicular to the pipe.
- Open the outdoor faucet. After closing the indoor valve, go outside and turn on the faucet. Let water drain from the section between the shut-off valve and the exterior opening.
- Drain the bleeder, if the valve has one. Some indoor shut-off valves include a small bleeder cap or drain. Put a small container underneath, open it to release trapped water, and replace the cap after draining. This can help the line empty fully.
- Decide whether to leave the outdoor handle open. Some guidance recommends leaving it open through winter so any remaining moisture has room to expand; other guidance does not make this a required step. The critical action is draining the line. Leaving the handle open is an added precaution, not a substitute for shutting off the supply.
West Bend Insurance and Golden Rule’s winterization guidance both emphasize removing hoses and draining outdoor plumbing before freezing conditions. If the valve is damaged, difficult to operate, or controls more than the outdoor faucet, do not force it; a plumbing professional can help identify a safe repair.
Tools to gather: a flashlight, a towel or small container for draining water, and—if needed—an insulated faucet cover and caulk or expanding foam for gaps around the pipe entry.
Do frost-free faucets need winterizing?
Yes. A frost-free faucet, also called a sillcock, has a longer stem that places its shut-off point inside the heated part of the home. When the faucet is turned off, the exposed section is designed to drain, which reduces the chance of water freezing at the exterior.
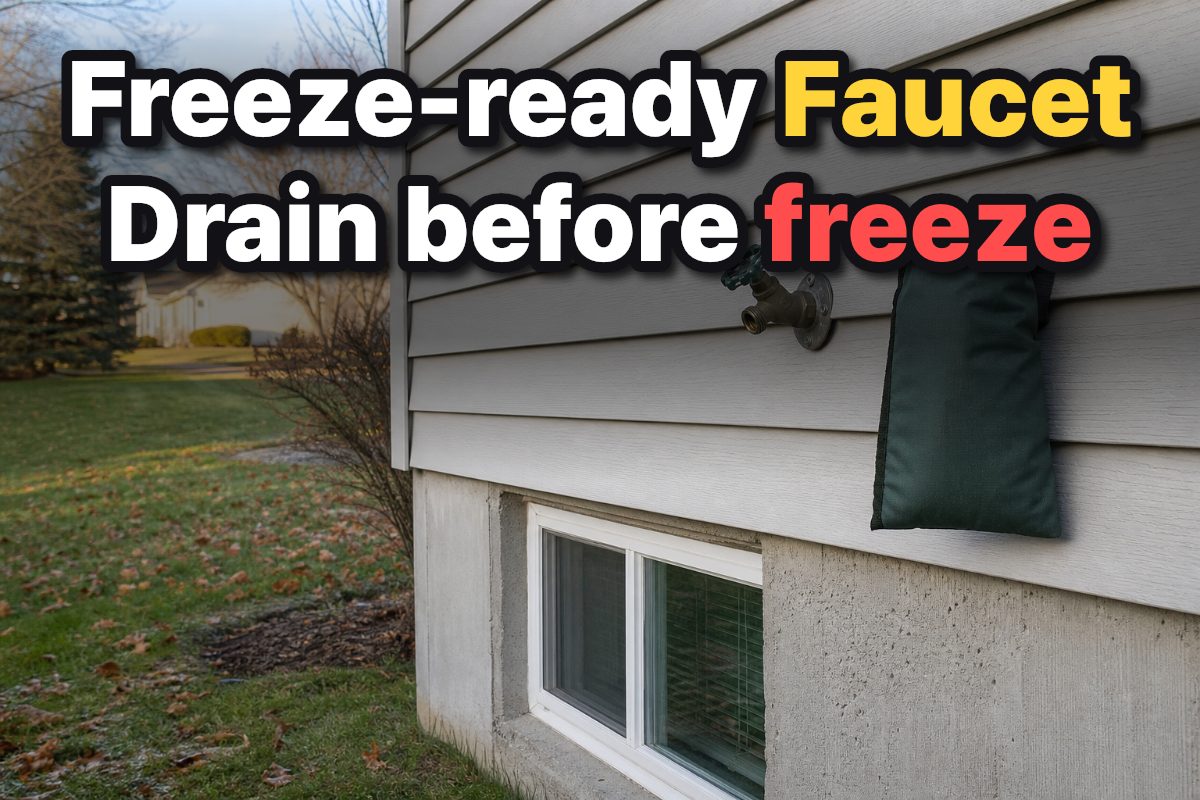
That design can be defeated by a hose left attached. The hose can retain water and keep the faucet from draining as intended, so remove and drain it just as you would on a standard faucet. In a very cold climate, an insulated cover can provide an extra layer of protection, but it does not make a connected hose safe.
| Faucet type | Winter steps | What to watch for |
|---|---|---|
| Standard faucet | Remove attachments, close its indoor shut-off valve, open the outdoor faucet, and drain the line. | Find the correct valve and check for a bleeder cap. |
| Frost-free faucet | Remove and drain the hose; consider a cover in very cold conditions. | A hose left attached can trap water and undermine the faucet’s draining design. |
Are a faucet cover or dripping water enough?
No. A faucet cover provides insulation, but it does not shut off the water supply or drain the pipe. Use a foam or fabric cover after the line has been shut off and drained, and make sure the cover sits securely against the exterior wall to limit cold air around the faucet.
Dripping is not a reliable replacement for winterizing. It can waste water, raise the water bill, and create ice on the ground; it may also fail to protect a line during prolonged extreme cold. Shut off and drain the faucet when possible instead of relying on a steady drip.
Also check the point where the pipe enters the home. Seal gaps or cracks around the opening with caulk or expanding foam to reduce cold air reaching the pipe inside the wall. This is a separate layer of protection: it does not remove water from the plumbing.
What if you cannot find the indoor shut-off valve?
Do not guess which valve controls the faucet. Trace the pipe from the exterior wall into the basement, crawl space, or utility area, using a flashlight and checking near the main water line. If you still cannot identify a dedicated valve, insulate the faucet and exposed pipes thoroughly while arranging a proper solution.
A plumber can install a dedicated shut-off valve or assess whether a frost-free faucet is appropriate. This is especially useful when the plumbing is complex, the valve is damaged, or outdoor faucets share a system with irrigation. Avoid turning an unidentified valve that could interrupt another part of the home’s water supply.
What should you check when winter ends?
Before reconnecting a hose for regular use, inspect the faucet and hose for visible damage. Then reopen the indoor shut-off valve slowly and check both the indoor and outdoor connections for leaks. A crack may become apparent only after water returns to the line.
- Keep the outdoor faucet closed while reopening the indoor valve slowly.
- Look and feel around the indoor valve and nearby pipe joints for moisture.
- Check the exterior faucet and the wall around the pipe entry for drips or dampness.
- Replace damaged parts before reconnecting the hose or using the faucet routinely.
If the faucet froze during winter, close the home’s main water shut-off valve first. Open the frozen faucet and warm the spigot and pipe gently with hot towels or a hair dryer; never use a blowtorch or open flame. After thawing, briefly restore the water supply and check for leaks.
Common winterizing mistakes to avoid
The most consequential mistake is leaving a hose attached because the faucet is labeled frost-free. The faucet’s design depends on draining the exposed section, and a hose can trap water and interfere with that process.
- Relying only on a cover: A cover insulates; it does not drain the line or release pressure from trapped water.
- Forgetting splitters or timers: Remove every attachment, not only the garden hose, so water is not held at the faucet connection.
- Assuming a closed indoor valve means the line is empty: Open the outdoor faucet and drain the pipe section; use the bleeder cap if the valve has one.
- Using flame to thaw a frozen pipe: Open flames can cause a fire or damage plumbing. Use gentle heat instead.
- Ignoring an indoor wall: Frozen-faucet damage can show up as a hidden leak inside the wall after thawing, so inspect the interior pipe and nearby area during spring checks.
Frequently Asked Questions
When should I winterize my outdoor faucets?
Finish before the first hard freeze. Begin planning when overnight lows consistently drop below 40°F, and pay attention to forecasts for temperatures below 28°F for three hours or more.
Can I leave a garden hose connected during winter?
No. Remove and drain the hose, along with splitters or other attachments. A connected hose can trap water and prevent even a frost-free faucet from draining as intended.
Is an outdoor faucet cover enough to prevent freezing?
No. A cover adds insulation but does not shut off the water or drain the pipe. For a standard faucet, shut off the indoor supply and drain the line first, then use the cover as extra protection.
What should I do if an outdoor faucet freezes?
Close the home’s main water shut-off valve, open the faucet, and apply gentle heat with hot towels or a hair dryer. Never use an open flame; once the pipe thaws, restore water briefly and check for leaks.
Quick winterizing checklist
- Remove and drain hoses, splitters, and attachments.
- For a standard faucet, close its dedicated indoor valve and drain the outdoor line.
- Open the bleeder cap if the shut-off valve has one, then replace it after draining.
- Use an insulated cover and seal gaps at the wall as additional protection.
- In spring, reopen the valve slowly and inspect the indoor and outdoor connections for leaks.
Outdoor faucet winterization works by removing water from plumbing exposed to freezing temperatures. Check the seasonal forecast, complete the steps before a hard freeze, and treat covers as an extra layer—not the main protection.
References
- How to winterize outdoor faucets and garden hoses
- Winterize Outdoor Faucets & Hoses – Quick 5-Min Fix - Golden Rule
- How to Winterize Your Plumbing System Before the First Freeze | Cold is on the Right
- How To Prevent Your Outdoor Faucets From Freezing | Maddox Management
- A Portland Homeowner's Guide to Winterizing Outdoor Faucets
Information in this post was checked as of 2026-09-27. Policies and prices may change, so please verify important details with official sources.


Comments
Post a Comment