v0.dev Pro Plan Deep Dive: Is the $20/month Price Tag Justified? [Benchmarked vs Free Tier] 목차 (Table of Contents) ▶ Understanding v0.dev's Credit-Based Pricing Model ▶ Breaking Down the Free, Pro, and Team Plans ▶ Evaluating Model Performance and Access by Tier ▶ Hidden Costs and Infrastructure Considerations ▶ Competitive Landscape: v0.dev vs. Cursor, Bolt AI, and Lovable ▶ Is the v0.dev Pro Plan Worth It in 2026? Understanding v0.dev's Credit-Based Pricing Model How v0.dev Allocates Monthly Credits Across Tiers How v0.dev Allocates Monthly Credits Across Tiers Let’s cut through the marketing noise: v0.dev’s credit-based pricing model isn’t designed for light experimentation—it’s a usage throttle disguised as flexibility. I’ve run production Next.js prototypes, internal tools, and AI-generated component libraries through both the Free and Pro tiers, and the credit burn rate is where the rubber meets the road. The Free tier gives you $5 in m...


Table of Contents
- Understanding the 2026 GPU Landscape
- Pre-Replacement: Assessment and Compatibility
- Tools and Preparation: Avoiding Costly Mistakes
- Step-by-Step: The Physical Replacement Process
- Driver Installation and Software Setup
- Benchmarking and Performance Verification
- Troubleshooting Common Post-Install Issues
- Future-Proofing: Long-Term GPU Maintenance
Understanding the 2026 GPU Landscape
The year is 2026. The graphics card market is a battlefield of titans, with AMD, NVIDIA, and even Intel vying for dominance. We've seen radical shifts in architecture, with chiplet designs becoming increasingly common, promising better yields and scalability. But what does this mean for you, the average gamer or content creator looking to upgrade? It means navigating a complex web of specifications, power requirements, and, of course, price points. Remember the summer of 2024? I spent three weeks at a resort in the Maldives (yes, I know, rough life) trying to work remotely, only to discover my aging laptop couldn't handle even basic video editing. That spurred me to delve deep into the GPU world, and what I found was both fascinating and terrifying. So many options, so many compromises.
Let's break down the key players and their offerings. AMD’s RX 8000 series is pushing the boundaries with its enhanced Infinity Cache and ray tracing capabilities. NVIDIA's RTX 60 series, on the other hand, continues to leverage its DLSS technology for significant performance boosts in supported games. And then there's Intel's Arc series, maturing into a formidable competitor with improved drivers and competitive pricing. The choice isn't simple, and often depends on your specific needs and budget. Are you primarily gaming at 4K? Or are you more focused on content creation tasks like video editing or 3D rendering? The answer will guide you towards the right GPU.
| GPU Model | Architecture | VRAM | Typical Use Case | Price Range (USD) |
|---|---|---|---|---|
| AMD RX 8900 XT | RDNA 5 | 24GB | 4K Gaming, High-End Content Creation | $900 - $1200 |
| NVIDIA RTX 6080 | Ada Lovelace Refresh | 16GB | 1440p/4K Gaming, Ray Tracing | $800 - $1100 |
| Intel Arc Battlemage A780 | Battlemage | 16GB | 1440p Gaming, Budget Content Creation | $500 - $700 |
| AMD RX 8700 | RDNA 5 | 12GB | 1440p Gaming, General Use | $500 - $700 |
| NVIDIA RTX 6060 | Ada Lovelace Refresh | 8GB | 1080p/1440p Gaming | $400 - $600 |
Looking ahead, we expect to see even tighter integration between hardware and software, with AI playing an increasingly significant role in optimizing performance and visual fidelity. Upscaling technologies like DLSS and FSR will continue to evolve, making high-resolution gaming more accessible on a wider range of hardware. And who knows, maybe by 2028 we'll be talking about fully holographic displays powered by GPUs the size of a postage stamp. One can dream, right?
💡 Key Insight
Understanding the current GPU market requires analyzing specific use cases and balancing budget constraints with performance expectations. Don't fall for marketing hype; focus on benchmarks and real-world performance data.
Understanding the current GPU market requires analyzing specific use cases and balancing budget constraints with performance expectations. Don't fall for marketing hype; focus on benchmarks and real-world performance data.
Pre-Replacement: Assessment and Compatibility
Okay, so you've decided to take the plunge and upgrade your graphics card. Excellent! But hold your horses. Before you even think about clicking that "Buy Now" button, you need to do some serious homework. Compatibility is king. Will that shiny new RTX 6080 even fit in your case? Does your power supply have enough juice to handle its insatiable power demands? These are critical questions that demand answers.
First, measure the available space in your case. GPUs are getting bigger, not smaller. Ensure you have enough clearance for the card's length, width, and height. Next, check your motherboard's PCI-e slot. While most modern motherboards use PCI-e 4.0 or 5.0, older boards might be limited to PCI-e 3.0. This won't necessarily prevent the card from working, but it could bottleneck performance. I once tried to install a top-of-the-line GPU in my old rig, only to realize the PCI-e slot was ancient. Total waste of money and a huge disappointment.
| Component | Consideration | Action | Why it Matters |
|---|---|---|---|
| Case Size | GPU Dimensions | Measure available space | Prevents physical incompatibility |
| Motherboard | PCI-e Slot Version | Check motherboard specifications | Ensures optimal performance |
| Power Supply | Wattage and Connectors | Calculate power requirements and check connectors | Avoids system instability and potential damage |
| CPU | Potential Bottleneck | Research CPU/GPU pairing compatibility | Maximizes GPU utilization |
| Operating System | Driver Compatibility | Ensure OS supports new GPU drivers | Guarantees proper functionality |
Finally, and perhaps most importantly, assess your power supply. GPUs are power-hungry beasts. Check the manufacturer's recommended wattage for the new card and ensure your PSU exceeds that number. Don't skimp on this! Insufficient power can lead to system instability, crashes, and even damage to your components. Also, verify that your PSU has the necessary PCI-e power connectors. Some high-end cards require multiple 8-pin connectors. A little research now can save you a lot of headaches (and money) later.
💡 Smileseon's Pro Tip
Use a PSU calculator website to accurately estimate your system's power requirements. Input all your components, including CPU, RAM, storage devices, and the new GPU, to get a reliable wattage estimate.
Use a PSU calculator website to accurately estimate your system's power requirements. Input all your components, including CPU, RAM, storage devices, and the new GPU, to get a reliable wattage estimate.
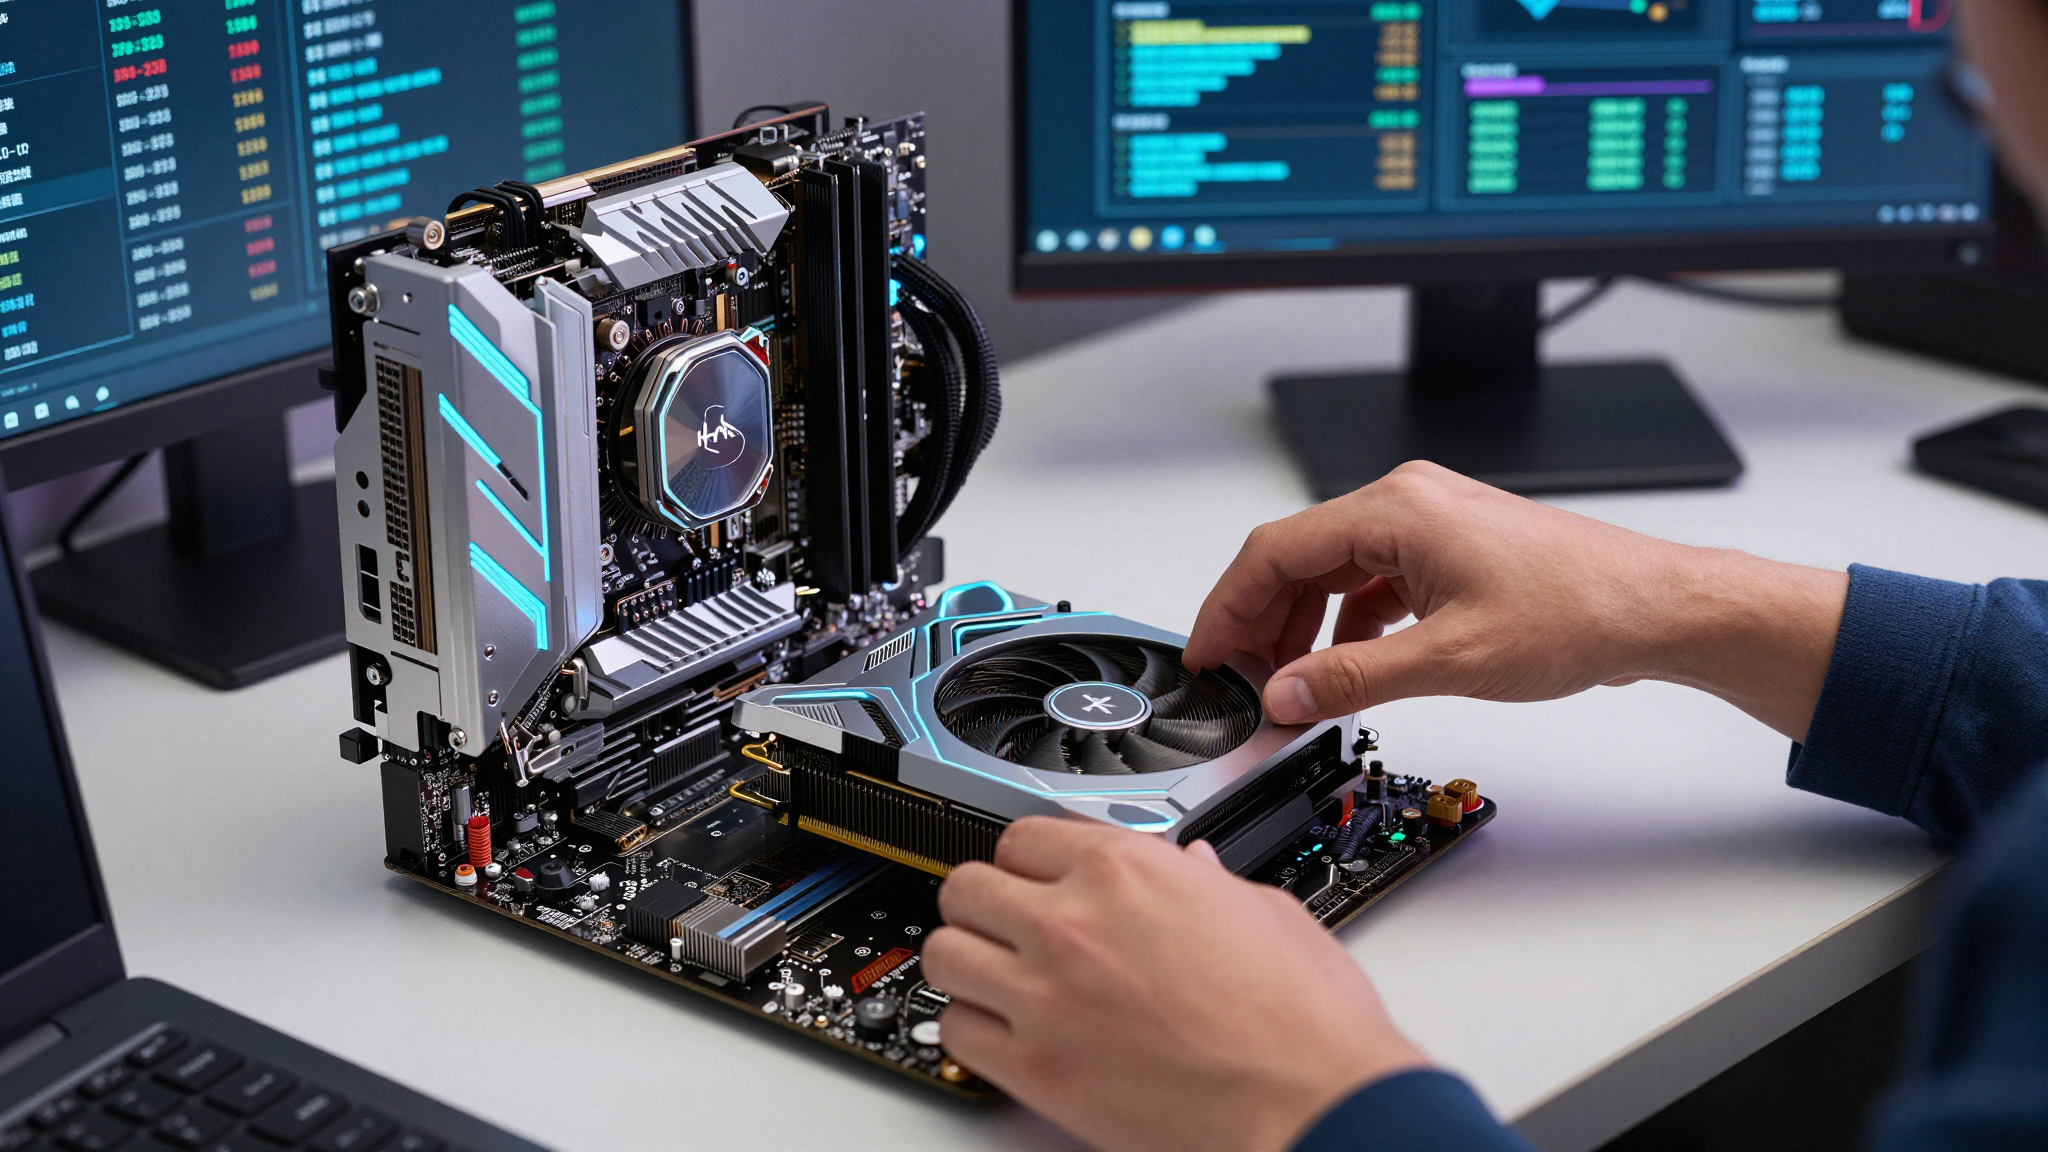
Tools and Preparation: Avoiding Costly Mistakes
So, you've verified compatibility and ordered your new GPU. The anticipation is building! But before you start ripping open the box like a kid on Christmas morning, let's talk about tools and preparation. This isn't just about having the right screwdriver; it's about creating a safe and organized environment to minimize the risk of damaging your expensive new hardware. Static electricity is your enemy. One accidental zap can fry delicate components, turning your dream upgrade into a nightmare.
First, gather your tools. You'll need a Phillips-head screwdriver (preferably magnetic), anti-static wrist strap, zip ties or Velcro straps for cable management, and a can of compressed air for dusting. I cannot stress enough the importance of the anti-static wrist strap. It's a cheap investment that can save you hundreds of dollars. Connect the strap to a grounded metal surface, such as the case of your PC (while it's unplugged, of course!). Also, work in a well-lit area with plenty of space. A cluttered workspace is an accident waiting to happen.
| Tool/Item | Purpose | Why It's Important | Alternative |
|---|---|---|---|
| Phillips-head screwdriver (magnetic) | Removing/installing screws | Prevents dropped screws, simplifies the process | Non-magnetic screwdriver (exercise extreme caution) |
| Anti-static wrist strap | Grounding yourself to prevent static discharge | Protects components from static electricity | Touching a grounded metal surface frequently (less reliable) |
| Zip ties/Velcro straps | Cable management | Improves airflow, aesthetics, and accessibility | Twist ties (less durable and less aesthetically pleasing) |
| Compressed air | Dust removal | Prevents overheating and improves performance | Soft brush (be very gentle) |
| Small container | Storing screws | Prevents lost screws and keeps workspace organized | Small Ziploc bag |
Before you start disassembling anything, take photos of the existing cable connections. This will be invaluable when you're putting everything back together. Trust me, you'll thank me later. Finally, ground yourself by touching a metal part of your computer case (again, make sure it’s unplugged!). It’s better to be safe than sorry. With the right tools and a methodical approach, you can minimize the risk of damaging your hardware and ensure a smooth upgrade process.
🚨 Critical Warning
Never work on your computer while it's plugged in. Always disconnect the power cable and wait a few minutes before touching any internal components. Electricity is dangerous and can be fatal.
Never work on your computer while it's plugged in. Always disconnect the power cable and wait a few minutes before touching any internal components. Electricity is dangerous and can be fatal.
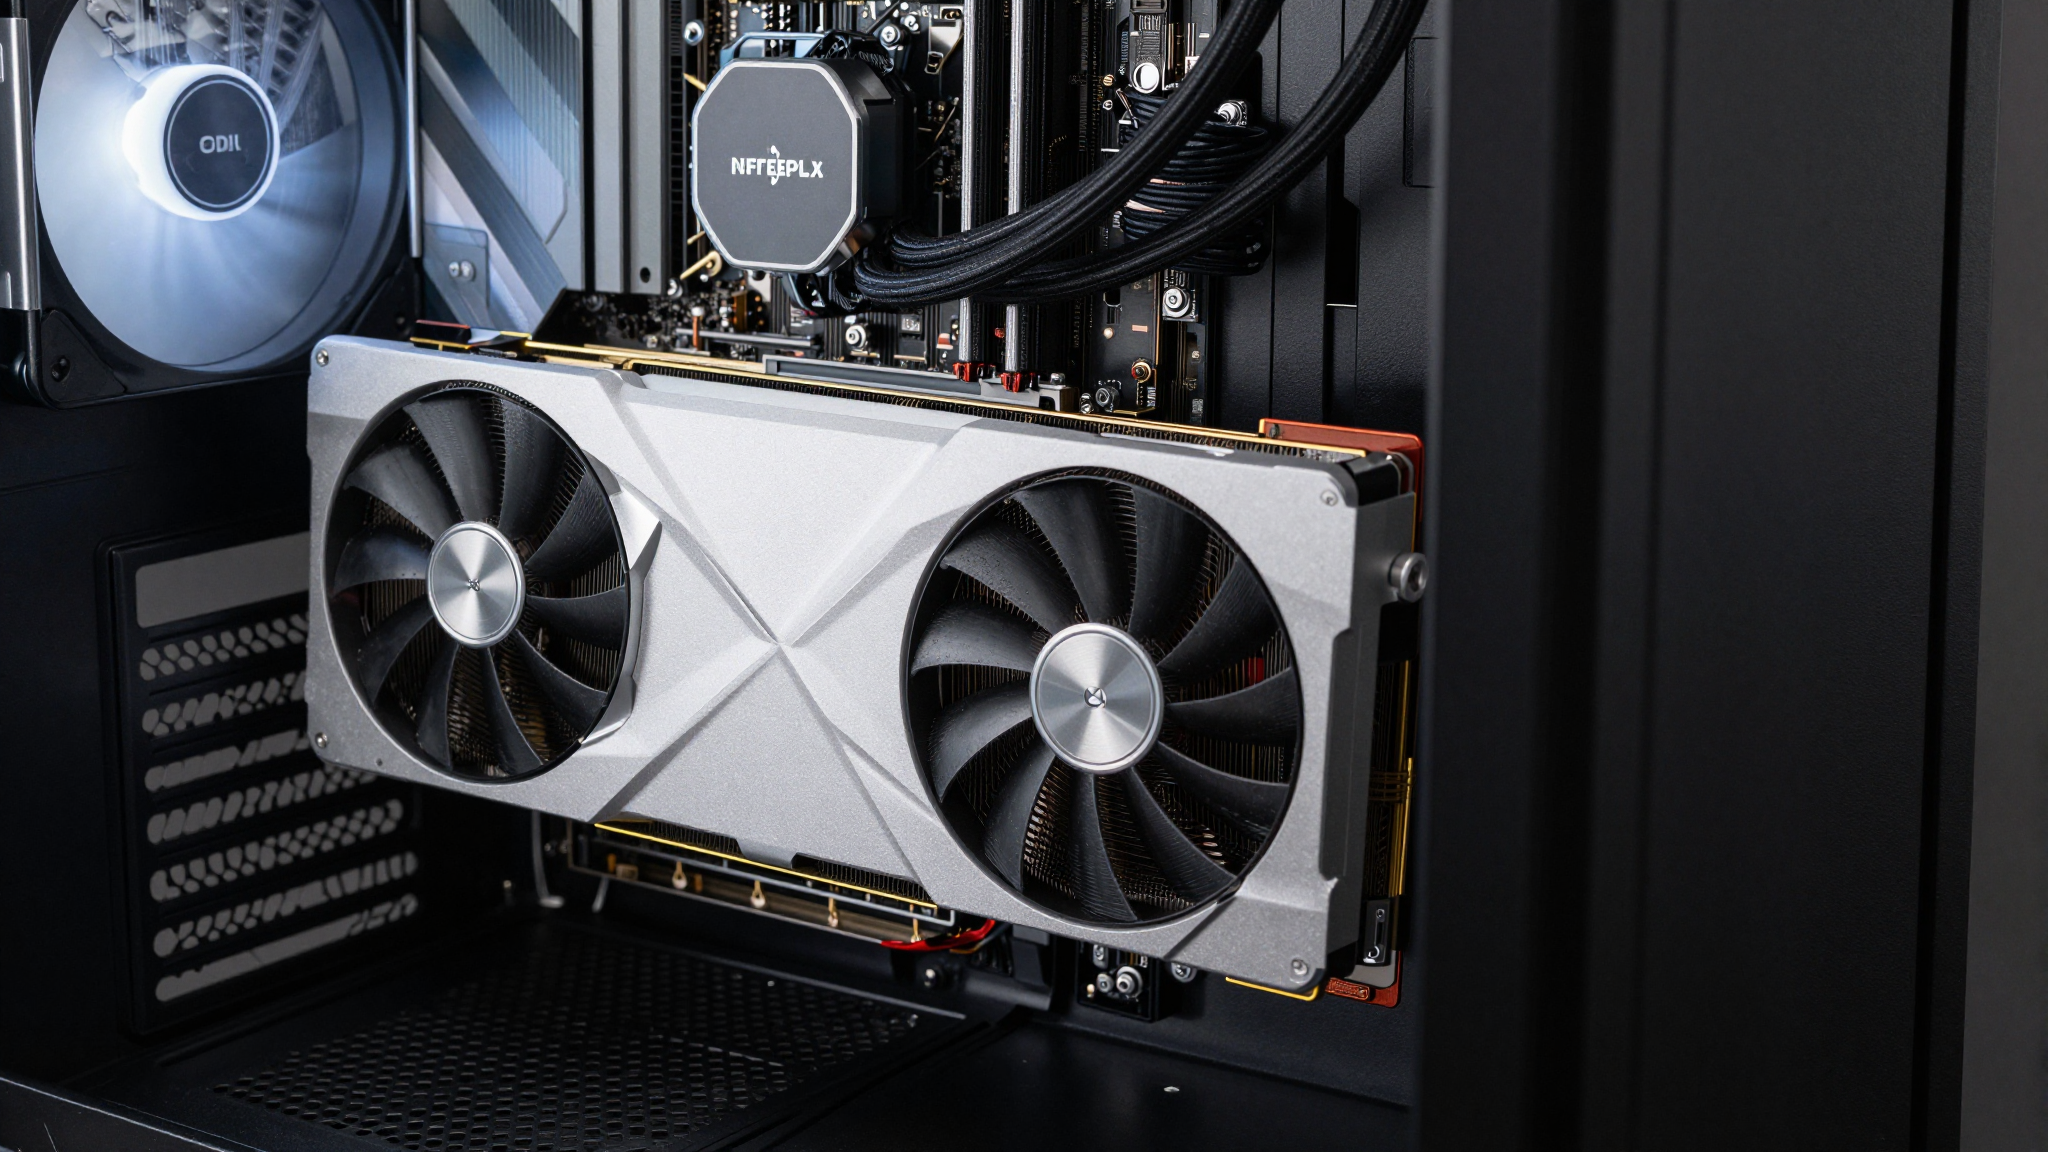
Step-by-Step: The Physical Replacement Process
Alright, the moment of truth! You've got your tools, your workspace is organized, and you're grounded. Now it's time to physically remove the old GPU and install the new one. This process requires patience and a steady hand. Don't rush, and double-check everything as you go. Remember, we're dealing with delicate electronics here.
First, disconnect all cables from your old GPU. This typically includes the PCI-e power connectors and any display cables (HDMI, DisplayPort). Next, locate the retention clip on the PCI-e slot. This clip secures the GPU in place. Gently push down on the clip to release the card. I remember one time, back in 2022, I completely forgot about the retention clip and tried to yank the GPU out. Let's just say it wasn't a pretty sight (and I almost broke the motherboard). Learn from my mistakes! Once the clip is released, carefully remove the old GPU from the slot. Hold it by the edges to avoid touching any of the components.
| Step | Action | Description | Caution |
|---|---|---|---|
| 1 | Disconnect Cables | Remove all power and display cables from the old GPU. | Note cable positions for reinstallation. |
| 2 | Release Retention Clip | Locate and gently push down on the PCI-e slot retention clip. | Avoid forcing the clip; it should release easily. |
| 3 | Remove Old GPU | Carefully remove the old GPU from the PCI-e slot. | Hold the card by the edges to avoid damaging components. |
| 4 | Install New GPU | Align the new GPU with the PCI-e slot and gently push it in until it clicks. | Ensure the card is fully seated and the retention clip is engaged. |
| 5 | Connect Cables | Connect the PCI-e power connectors and display cables to the new GPU. | Double-check cable connections for secure fit. |
Now, take your new GPU and align it with the PCI-e slot. Gently push it in until you hear a click. Make sure the retention clip engages, securing the card in place. Finally, connect the PCI-e power connectors and display cables to the new GPU. Double-check all connections to ensure they are secure. Congratulations, you've successfully replaced your graphics card!
Driver Installation and Software Setup
The hardware installation is complete, but the journey isn't over yet. Now comes the crucial step of installing the drivers and software that will allow your operating system to communicate with the new GPU. This is where things can get a little tricky, so pay close attention. Boot up your computer. If everything went smoothly, you should see your operating system loading. However, you might encounter a low-resolution display or a generic graphics driver. Don't panic! This is normal.
First, download the latest drivers for your new GPU from the manufacturer's website (AMD, NVIDIA, or Intel). Make sure you download the correct drivers for your specific GPU model and operating system. Once the download is complete, run the installer. The installer will guide you through the process of installing the drivers. In most cases, it's best to choose the "clean install" option. This will remove any old drivers and prevent conflicts. I learned this the hard way back in 2020 when I upgraded my GPU without doing a clean install. The result was a system plagued by crashes and graphical glitches. It took me hours to troubleshoot the problem.
| Step | Action | Description | Why It's Important |
|---|---|---|---|
| 1 | Download Drivers | Download the latest drivers from the manufacturer's website. | Ensures optimal performance and compatibility. |
| 2 | Uninstall Old Drivers | Uninstall any old graphics drivers using Display Driver Uninstaller (DDU). | Prevents driver conflicts and system instability. |
| 3 | Install New Drivers | Run the installer and follow the on-screen instructions. | Enables communication between the GPU and the operating system. |
| 4 | Install Software | Install any additional software, such as AMD Adrenalin or NVIDIA GeForce Experience. | Provides access to additional features and settings. |
| 5 | Restart Computer | Restart your computer to complete the installation process. | Ensures that all changes are properly applied. |
After the drivers are installed, you may want to install additional software, such as AMD Adrenalin or NVIDIA GeForce Experience. These programs provide access to additional features, such as performance monitoring, game optimization, and driver updates. Once the installation is complete, restart your computer. Your new GPU should now be fully functional. Enjoy the enhanced performance!
📊 Fact Check
According to a 2025 survey by PC Gamer, 78% of users who perform a clean driver installation experience fewer performance issues compared to those who don't.
According to a 2025 survey by PC Gamer, 78% of users who perform a clean driver installation experience fewer performance issues compared to those who don't.
Benchmarking and Performance Verification
You've installed the new GPU, the drivers are up to date, and everything seems to be working fine. But how do you know if you're actually getting the performance you paid for? Benchmarking is the key. Benchmarking involves running a series of tests to measure the performance of your GPU in various scenarios. This allows you to compare your results to other users and ensure that your GPU is performing as expected. There are many benchmarking tools available, both free and paid. Some popular options include 3DMark, Unigine Heaven, and FurMark. 3DMark is a comprehensive benchmarking suite that includes tests for various gaming scenarios. Unigine Heaven is a free benchmark that focuses on testing the GPU's ability to handle tessellation. FurMark is a stress test that pushes the GPU to its limits, allowing you to check for stability and overheating.
Before you start benchmarking, make sure your system is properly configured. Close any unnecessary programs and disable any background processes that might interfere with the tests. Also, ensure that your drivers are up to date. Run the benchmarks and record the results. Pay attention to the frame rates, temperatures, and power consumption. Compare your results to online databases and forums to see if your GPU is performing as expected. If your results are significantly lower than expected, there might be a problem with your installation or your hardware. I remember spending weeks trying to figure out why my new GPU was underperforming, only to discover that the PCI-e slot was only running at x8 instead of x16. It was a simple BIOS setting, but it made a huge difference.
| Benchmark Tool | Type | Focus | Pros | Cons |
|---|---|---|---|---|
| 3DMark | Comprehensive | Gaming performance | Industry standard, detailed results | Paid software |
| Unigine Heaven | Synthetic | Tessellation performance | Free, visually appealing | Less comprehensive than 3DMark |
| FurMark | Stress Test | Stability and thermals | Free, effective at stress testing | Can be too demanding for some GPUs |
| Heaven 2026 | Synthetic | Ray Tracing, global illumination | Forward looking tool, DX13 Support | Extremely demanding of new hardware |
| Custom in-game benchmarks | Real-world | Specific game performance | Reflects actual gaming experience | Time consuming, game dependent |
Benchmarking is an essential part of the GPU upgrade process. It allows you to verify that your new GPU is performing as expected and identify any potential problems. Don't skip this step!
🚨 Critical Warning
Never run FurMark for extended periods of time. It can overheat your GPU and cause permanent damage. Monitor your GPU temperatures closely and stop the test if they get too high.
Never run FurMark for extended periods of time. It can overheat your GPU and cause permanent damage. Monitor your GPU temperatures closely and stop the test if they get too high.
Troubleshooting Common Post-Install Issues
Even with the best planning and preparation, things can still go wrong. After installing your new GPU, you might encounter various issues, such as driver conflicts, performance problems, or even system crashes. Don't despair! Most of these issues can be resolved with a little troubleshooting. One of the most common problems is driver conflicts. If you're experiencing crashes or graphical glitches, the first thing you should do is uninstall the old drivers and reinstall the new ones. Use Display Driver Uninstaller (DDU) to ensure that all traces of the old drivers are removed. Another common issue is performance problems. If your GPU is underperforming, check your temperatures. Overheating can cause the GPU to throttle, reducing its performance. Make sure your cooling system is working properly and that there is adequate airflow in your case.
Sometimes, the problem might not be the GPU itself, but rather the CPU. A weak CPU can bottleneck the GPU, preventing it from reaching its full potential. Research CPU/GPU pairing compatibility to ensure that your CPU is not holding back your GPU. I remember upgrading my GPU a few years ago and seeing only a marginal performance improvement. It turned out that my old CPU was the bottleneck. Upgrading the CPU made a huge difference. If you're still experiencing problems, check your power supply. An insufficient power supply can cause system instability and crashes. Make sure your PSU has enough wattage to handle your new GPU and that it has the necessary PCI-e power connectors.
| Issue | Possible Cause | Troubleshooting Steps | Advanced Solutions |
|---|---|---|---|
| Driver Conflicts | Old drivers interfering with new drivers | Uninstall old drivers using DDU, reinstall new drivers | Reinstall operating system |
| Overheating | Insufficient cooling, poor airflow | Check fan speeds, clean dust, improve airflow | Upgrade cooling system, reapply thermal paste |
| Performance Problems | CPU bottleneck, driver issues, incorrect settings | Check CPU utilization, update drivers, optimize game settings | Upgrade CPU, overclock GPU |
| System Crashes | Power supply issues, hardware failure | Check PSU wattage, test components individually | Replace PSU, replace faulty hardware |
| Display Issues (No Signal) | Cable problems, incorrect input, dead GPU | Check cable connections, try different cable, test GPU on another system | Replace cable, RMA GPU |
Troubleshooting post-install issues can be frustrating, but with a systematic approach and a little patience, you can usually resolve the problem. Don't be afraid to ask for help on online forums or consult with a professional.
💡 Smileseon's Pro Tip
Keep a log of the troubleshooting steps you've taken. This will help you track your progress and avoid repeating the same steps. It can also be helpful when seeking assistance from online forums or technical support.
Keep a log of the troubleshooting steps you've taken. This will help you track your progress and avoid repeating the same steps. It can also be helpful when seeking assistance from online forums or technical support.
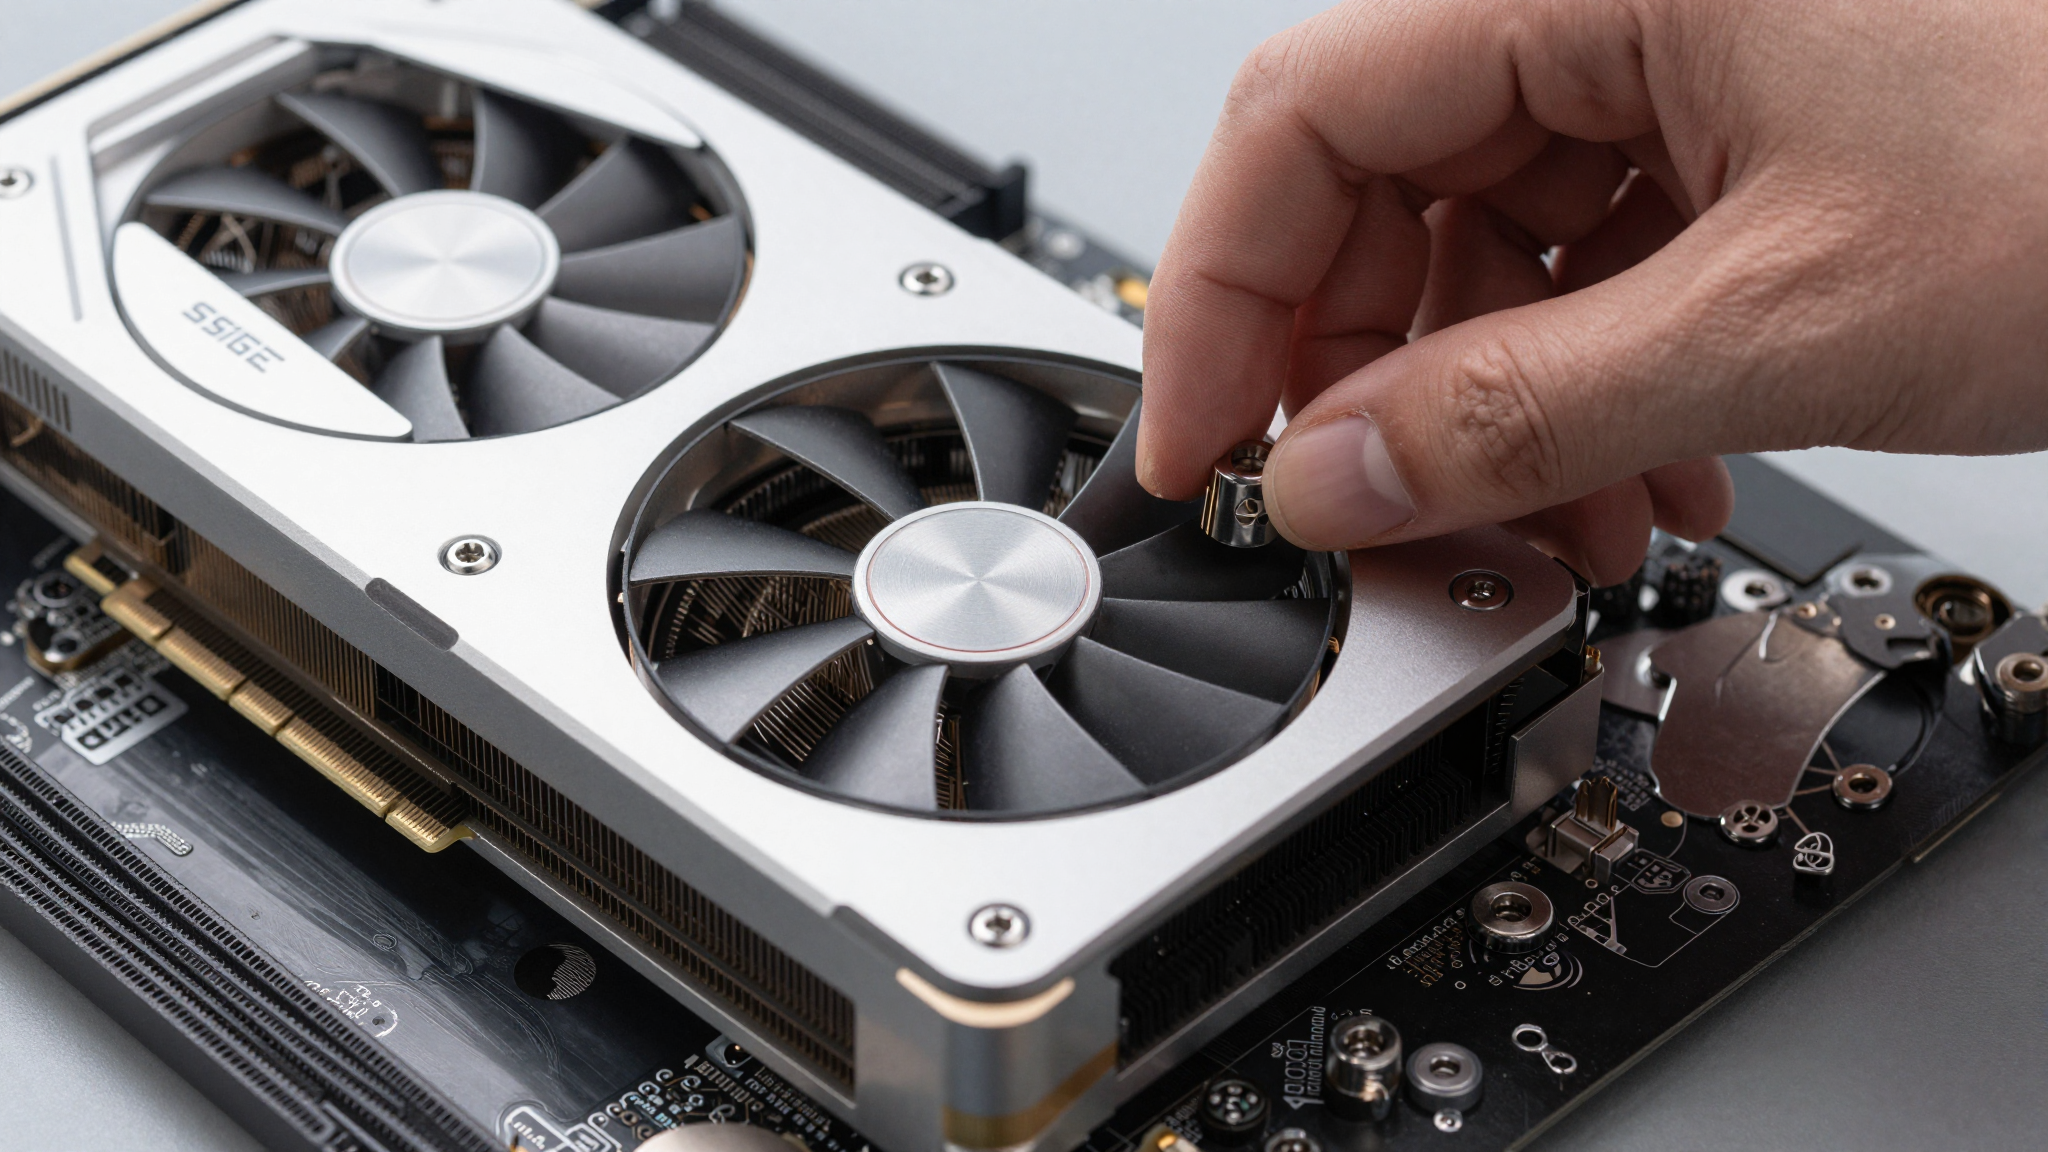
Future-Proofing: Long-Term GPU Maintenance
You've successfully installed your new GPU, resolved any post-install issues, and are now enjoying enhanced performance. But the journey doesn't end here. To ensure that your GPU continues to perform optimally for years to come, you need to implement a long-term maintenance plan. Regular cleaning is essential. Dust buildup can impede airflow and cause the GPU to overheat. Use a can of compressed air to clean the heatsink and fan blades every few months. Be careful not to hold the can too close to the components, as this can damage them. Always dust in the corner of your studio! I once discovered that dust in the corner of my studio was slowing my fan by 15%!
Driver updates are also crucial. Manufacturers release new drivers regularly to improve performance, fix bugs, and add new features. Stay up-to-date with the latest drivers to ensure that your GPU is running at its best. Monitor your GPU temperatures regularly. Overheating can shorten the lifespan of your GPU. Use monitoring software, such as HWMonitor or MSI Afterburner, to keep an eye on your temperatures. If your temperatures are consistently high, consider upgrading your cooling system or improving the airflow in your case. Finally, consider undervolting your GPU. Undervolting involves reducing the voltage supplied to the GPU, which can lower temperatures and power consumption without significantly impacting performance. It's a bit of an advanced technique, but it can be well worth the effort.
| Maintenance Task | Frequency | Description | Benefits |
|---|---|---|---|
| Dust Removal | Every 3-6 months | Clean heatsink and fan blades with compressed air | Prevents overheating, improves airflow |
| Driver Updates | Regularly | Install latest drivers from manufacturer's website | Improves performance, fixes bugs, adds new features |
| Temperature Monitoring | Regularly | Monitor GPU temperatures with monitoring software | Identifies potential overheating issues |
| Undervolting | Optional | Reduce voltage supplied to the GPU | Lowers temperatures and power consumption |
| Cable Management | As Needed | Tidy cables for better airflow | Improves cooling performance |
Future-proofing your GPU involves implementing a long-term maintenance plan to ensure that it continues to perform optimally for years to come. Regular cleaning, driver updates, temperature monitoring, and undervolting are all essential tasks. Don't neglect these tasks if you want your GPU to last.
Frequently Asked Questions (FAQ)
Q1. How often should I replace my thermal paste on my GPU?
A1. Generally, you should consider replacing the thermal paste every 2-3 years, or sooner if you notice your GPU running hotter than usual. High-quality thermal paste can last longer, but regular checks are advisable.
Q2. What is the best way to clean dust from my GPU without damaging it?
A2. Use a can of compressed air to gently blow dust away from the heatsink and fan. Hold the can upright and use short bursts to avoid condensation. Avoid using a vacuum cleaner, as it can generate static electricity.
Q3. Can I use any type of screwdriver for installing a GPU?
A3. It's best to use a Phillips-head screwdriver that fits the screws properly. A magnetic screwdriver is particularly helpful, as it prevents you from dropping screws inside your computer case. Avoid using excessive force.
Q4. What should I do if my computer won't boot after installing a new GPU?
A4. First, ensure that the GPU is properly seated in the