v0.dev Pro Plan Deep Dive: Is the $20/month Price Tag Justified? [Benchmarked vs Free Tier] 목차 (Table of Contents) ▶ Understanding v0.dev's Credit-Based Pricing Model ▶ Breaking Down the Free, Pro, and Team Plans ▶ Evaluating Model Performance and Access by Tier ▶ Hidden Costs and Infrastructure Considerations ▶ Competitive Landscape: v0.dev vs. Cursor, Bolt AI, and Lovable ▶ Is the v0.dev Pro Plan Worth It in 2026? Understanding v0.dev's Credit-Based Pricing Model How v0.dev Allocates Monthly Credits Across Tiers How v0.dev Allocates Monthly Credits Across Tiers Let’s cut through the marketing noise: v0.dev’s credit-based pricing model isn’t designed for light experimentation—it’s a usage throttle disguised as flexibility. I’ve run production Next.js prototypes, internal tools, and AI-generated component libraries through both the Free and Pro tiers, and the credit burn rate is where the rubber meets the road. The Free tier gives you $5 in m...


Table of Contents
- The Silent Killer: Why GPU Fan Failure is More Common Than You Think
- Decoding GPU Fan Types: Ball Bearing vs. Sleeve Bearing – Which is Right for You?
- Pre-Swap Prep: Essential Tools and Anti-Static Measures for a Smooth Operation
- The Nitty-Gritty: A Step-by-Step Guide to Safely Removing and Replacing Your GPU Fan
- Connector Chaos: Identifying and Matching Fan Connectors to Avoid Voltage Nightmares
- Thermal Paste Tango: Application Techniques for Optimal Heat Transfer (and Avoiding Disaster)
- Post-Swap Sanity Check: Monitoring Temperatures and Performance to Ensure Success
- When to Call a Pro: Recognizing Unsolvable Issues and Seeking Expert Help
The Silent Killer: Why GPU Fan Failure is More Common Than You Think
It happened to me in the summer of '24. Picture this: I'm finally rendering that massive 8K landscape scene in Unreal Engine, pushing my RTX 4090 to its absolute limit. The deadlines looming, the air conditioner sputtering, and then… silence. Not the blissful silence of a finished render, but the ominous silence of a GPU fan that had decided to stage a walkout. A puff of acrid smoke later, and I was staring at a rapidly climbing temperature graph and the very real possibility of a bricked graphics card. GPU fan failure isn't some obscure, hypothetical problem; it’s a ticking time bomb in any rig that sees heavy use, and frankly, most modern gaming PCs and workstations qualify.
Several factors contribute to this elevated risk. First, modern GPUs are power-hungry beasts. They churn out more heat than ever before, placing immense stress on the cooling system. Second, manufacturers are constantly pushing the envelope with thinner, lighter designs, which often means smaller, less robust fans. Third, dust. Oh, glorious, heat-trapping dust. That fine layer of particulate matter coating every component acts like an insulator, forcing the fans to work even harder, further accelerating wear and tear.
| Factor | Impact on GPU Fan Failure Rate | Severity | Mitigation Strategies |
|---|---|---|---|
| High GPU Temperatures | Directly increases stress on fan components, especially bearings. | Critical | Improved case airflow, aftermarket cooling solutions, undervolting. |
| Dust Accumulation | Reduces fan efficiency, leading to higher operating temperatures and increased wear. | High | Regular cleaning with compressed air, dust filters on case intakes. |
| Fan Bearing Type (Sleeve vs. Ball) | Sleeve bearings are generally less durable and prone to failure than ball bearings. | Medium | Choose GPUs with ball bearing fans, replace sleeve bearing fans with ball bearing alternatives. |
| Aggressive Fan Curves | Constant high RPM operation accelerates wear on fan motors and bearings. | Medium | Optimize fan curves for quieter operation at lower temperatures, use custom fan control software. |
| Poor Case Airflow | Traps heat inside the case, forcing GPU fans to work harder to dissipate it. | High | Improve case airflow by adding more fans, optimizing fan placement, and managing cables. |
The manufacturers *know* this. They're betting on the fact that most users will upgrade their cards before the fan actually fails completely. But for those of us who want to squeeze every last ounce of performance out of our investment, proactive fan maintenance or replacement is a necessity, not a luxury. Neglecting this can easily lead to overheating, performance throttling, and ultimately, catastrophic failure of your precious GPU. Learn from my mistakes, folks. Don't wait for the smoke to clear before taking action.
💡 Key Insight
GPU fan failure is a common problem exacerbated by high temperatures, dust accumulation, and aggressive fan curves. Proactive maintenance and timely fan replacement are crucial for extending the lifespan of your graphics card.
GPU fan failure is a common problem exacerbated by high temperatures, dust accumulation, and aggressive fan curves. Proactive maintenance and timely fan replacement are crucial for extending the lifespan of your graphics card.
Decoding GPU Fan Types: Ball Bearing vs. Sleeve Bearing – Which is Right for You?
Okay, so your fan is making a noise that sounds suspiciously like a dying mosquito, or maybe it's just stopped spinning altogether. Time for a replacement. But before you blindly click "buy now" on the first vaguely-matching fan you see, it’s crucial to understand the fundamental differences between the two main types of GPU fan bearings: ball bearing and sleeve bearing. This isn’t just nerdy trivia; it directly impacts the lifespan, noise level, and overall reliability of your cooling solution.
Sleeve bearing fans are the budget option. They're simpler in design, relying on a thin layer of lubricant between the rotating shaft and the bearing surface. This makes them cheaper to manufacture, but also more prone to wear and tear. Over time, the lubricant can dry out, leading to increased friction, noise, and eventually, failure. They’re also sensitive to orientation; mounting them horizontally (as they typically are in a GPU) can accelerate wear. The downside is significant—expect a lifespan of around 30,000 to 40,000 hours, at best.
| Feature | Sleeve Bearing Fans | Ball Bearing Fans | Fluid Dynamic Bearing (FDB) Fans |
|---|---|---|---|
| Lifespan | 30,000 - 40,000 hours | 50,000 - 70,000 hours | 60,000 - 80,000 hours |
| Noise Level | Quieter when new, but noise increases as lubricant degrades | Slightly louder than sleeve bearing when new, but noise remains consistent | Very quiet, especially at lower RPMs |
| Cost | Lowest | Medium | Highest |
| Durability | Lowest, sensitive to orientation | High, less sensitive to orientation | High, excellent durability |
| Performance | Acceptable for basic cooling needs | Good, suitable for high-performance applications | Excellent, optimized for quiet and efficient cooling |
Ball bearing fans, on the other hand, use tiny ball bearings to reduce friction. This results in a significantly longer lifespan (50,000 to 70,000 hours), greater durability, and less sensitivity to orientation. They tend to be slightly louder than sleeve bearing fans when new, but the noise level remains more consistent over time. The downside? They're more expensive. But in my book, the extra cost is well worth the peace of mind, especially if you plan on keeping your GPU for several years.
There’s also a third option gaining traction: fluid dynamic bearing (FDB) fans. These are more sophisticated than both sleeve and ball bearing designs, using a thin layer of fluid to separate the bearing surfaces. This results in extremely quiet operation and excellent lifespan, often exceeding 60,000 hours. However, they typically come with a premium price tag and are less commonly found as direct replacements for GPU fans. When you are buying a new fan for your GPU, prioritizing for a FDB model will give you the best overall performance.
💡 Smileseon's Pro Tip
If you're unsure what type of bearing your current fan uses, check the manufacturer's specifications or look closely at the fan hub. Ball bearing fans often have small indentations or markings indicating the presence of ball bearings. When in doubt, opt for a ball bearing or FDB replacement – you won't regret it.
If you're unsure what type of bearing your current fan uses, check the manufacturer's specifications or look closely at the fan hub. Ball bearing fans often have small indentations or markings indicating the presence of ball bearings. When in doubt, opt for a ball bearing or FDB replacement – you won't regret it.
Pre-Swap Prep: Essential Tools and Anti-Static Measures for a Smooth Operation
Alright, you've chosen your replacement fan. Now comes the critical phase: preparation. Rushing into a GPU fan swap without the right tools and precautions is like performing surgery with a butter knife – messy, dangerous, and likely to end in disaster. Trust me, I learned this the hard way when I once tried to pry off a stubborn fan shroud with a flathead screwdriver and ended up gouging the PCB. Not my proudest moment.
First, gather your tools. You'll need a set of precision screwdrivers (Phillips head, typically), a small container to hold the screws (magnetic is ideal), a can of compressed air, isopropyl alcohol (90% or higher), cotton swabs or microfiber cloths, thermal paste (more on this later), and optionally, a plastic spudger or opening tool. Do not cheap out on these tools. Good quality screwdrivers are essential.
| Tool | Purpose | Importance | Alternative |
|---|---|---|---|
| Precision Screwdriver Set | Removing and installing screws on the GPU and fan assembly. | Critical | Standard screwdriver set (but risk of stripping screws is higher) |
| Anti-Static Wrist Strap | Grounding yourself to prevent electrostatic discharge (ESD) damage to the GPU. | Critical | Touching a grounded metal object frequently (less reliable) |
| Compressed Air | Cleaning dust and debris from the GPU heatsink and fan assembly. | High | Soft brush (less effective for removing embedded dust) |
| Isopropyl Alcohol (90%+) | Cleaning old thermal paste from the GPU die and heatsink. | High | Thermal paste remover (specialized but not always necessary) |
| Thermal Paste | Applying a fresh layer of thermal paste to ensure optimal heat transfer between the GPU die and heatsink. | Critical | Pre-applied thermal pads (less effective than high-quality thermal paste) |
But the most important tool of all? An anti-static wrist strap. I cannot stress this enough. Electrostatic discharge (ESD) is the silent killer of electronic components. One tiny zap can fry your GPU, rendering all your efforts (and your expensive graphics card) completely useless. Connect the wrist strap to a grounded metal object (like your computer case) and wear it throughout the entire process. If you don't have a wrist strap, at least touch a grounded metal object frequently to discharge any static buildup. Better safe than sorry, folks.
Finally, prepare your workspace. Clear a well-lit, uncluttered area and lay down an anti-static mat or a piece of cardboard. This will prevent screws from rolling away and provide a safe surface to work on. Once you've gathered your tools and taken the necessary precautions, you're ready to move on to the next step: the actual fan swap. But remember, patience and attention to detail are key. Don't rush, and double-check everything before proceeding. Your GPU will thank you for it.
🚨 Critical Warning
Always use an anti-static wrist strap when working with electronic components. ESD can cause irreversible damage to your GPU. Do not skip this step!
Always use an anti-static wrist strap when working with electronic components. ESD can cause irreversible damage to your GPU. Do not skip this step!
The Nitty-Gritty: A Step-by-Step Guide to Safely Removing and Replacing Your GPU Fan
Okay, deep breaths. This is where the rubber meets the road. You've got your tools, you're grounded, and you're ready to tackle the fan swap. But before you start tearing things apart, remember this mantra: patience, precision, and pictures. Take photos of each step of the disassembly process. It's an invaluable reference when you're putting everything back together, especially if you encounter any unexpected surprises (and trust me, you probably will).
First, power down your computer and disconnect it from the power outlet. Remove the GPU from your case and place it on your anti-static mat. Now, carefully examine the fan assembly. Most GPU fans are attached to a shroud, which is then secured to the heatsink with screws. Identify the screws holding the shroud in place and use your precision screwdriver to remove them. Store the screws in your magnetic container to prevent them from getting lost.
| Step | Description | Image Reference (Hypothetical) | Tips and Warnings |
|---|---|---|---|
| 1. Power Down and Disconnect | Turn off your PC, unplug it, and wait for a few minutes. | Always disconnect the power supply to prevent electrical hazards. | |
| 2. Remove GPU from Case | Carefully unscrew and remove the GPU from the PCI-e slot. | 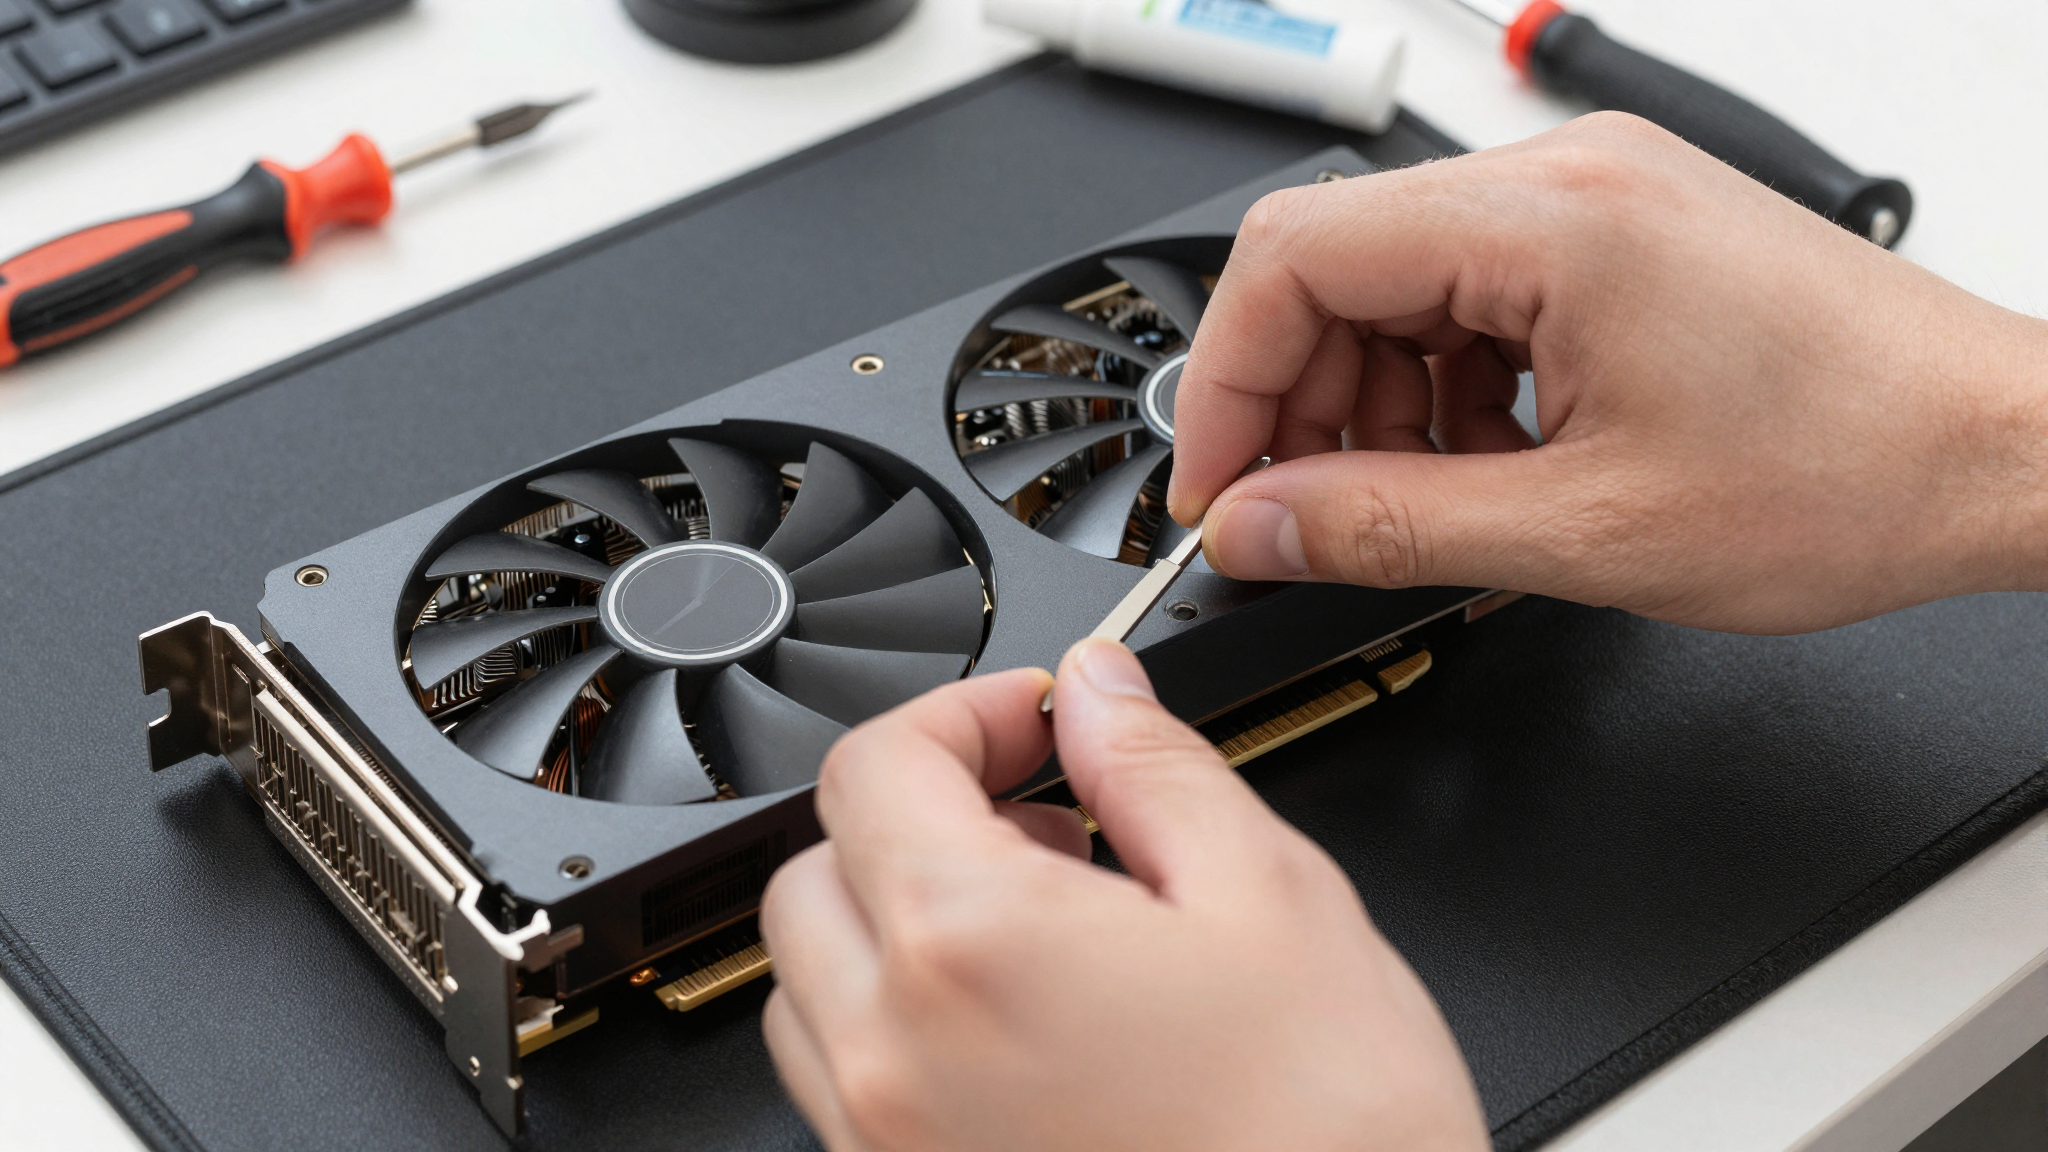 |
Support the GPU while removing it to avoid bending or damaging the slot. |
| 3. Disassemble Fan Shroud | Identify and remove screws attaching the fan shroud to the heatsink. | 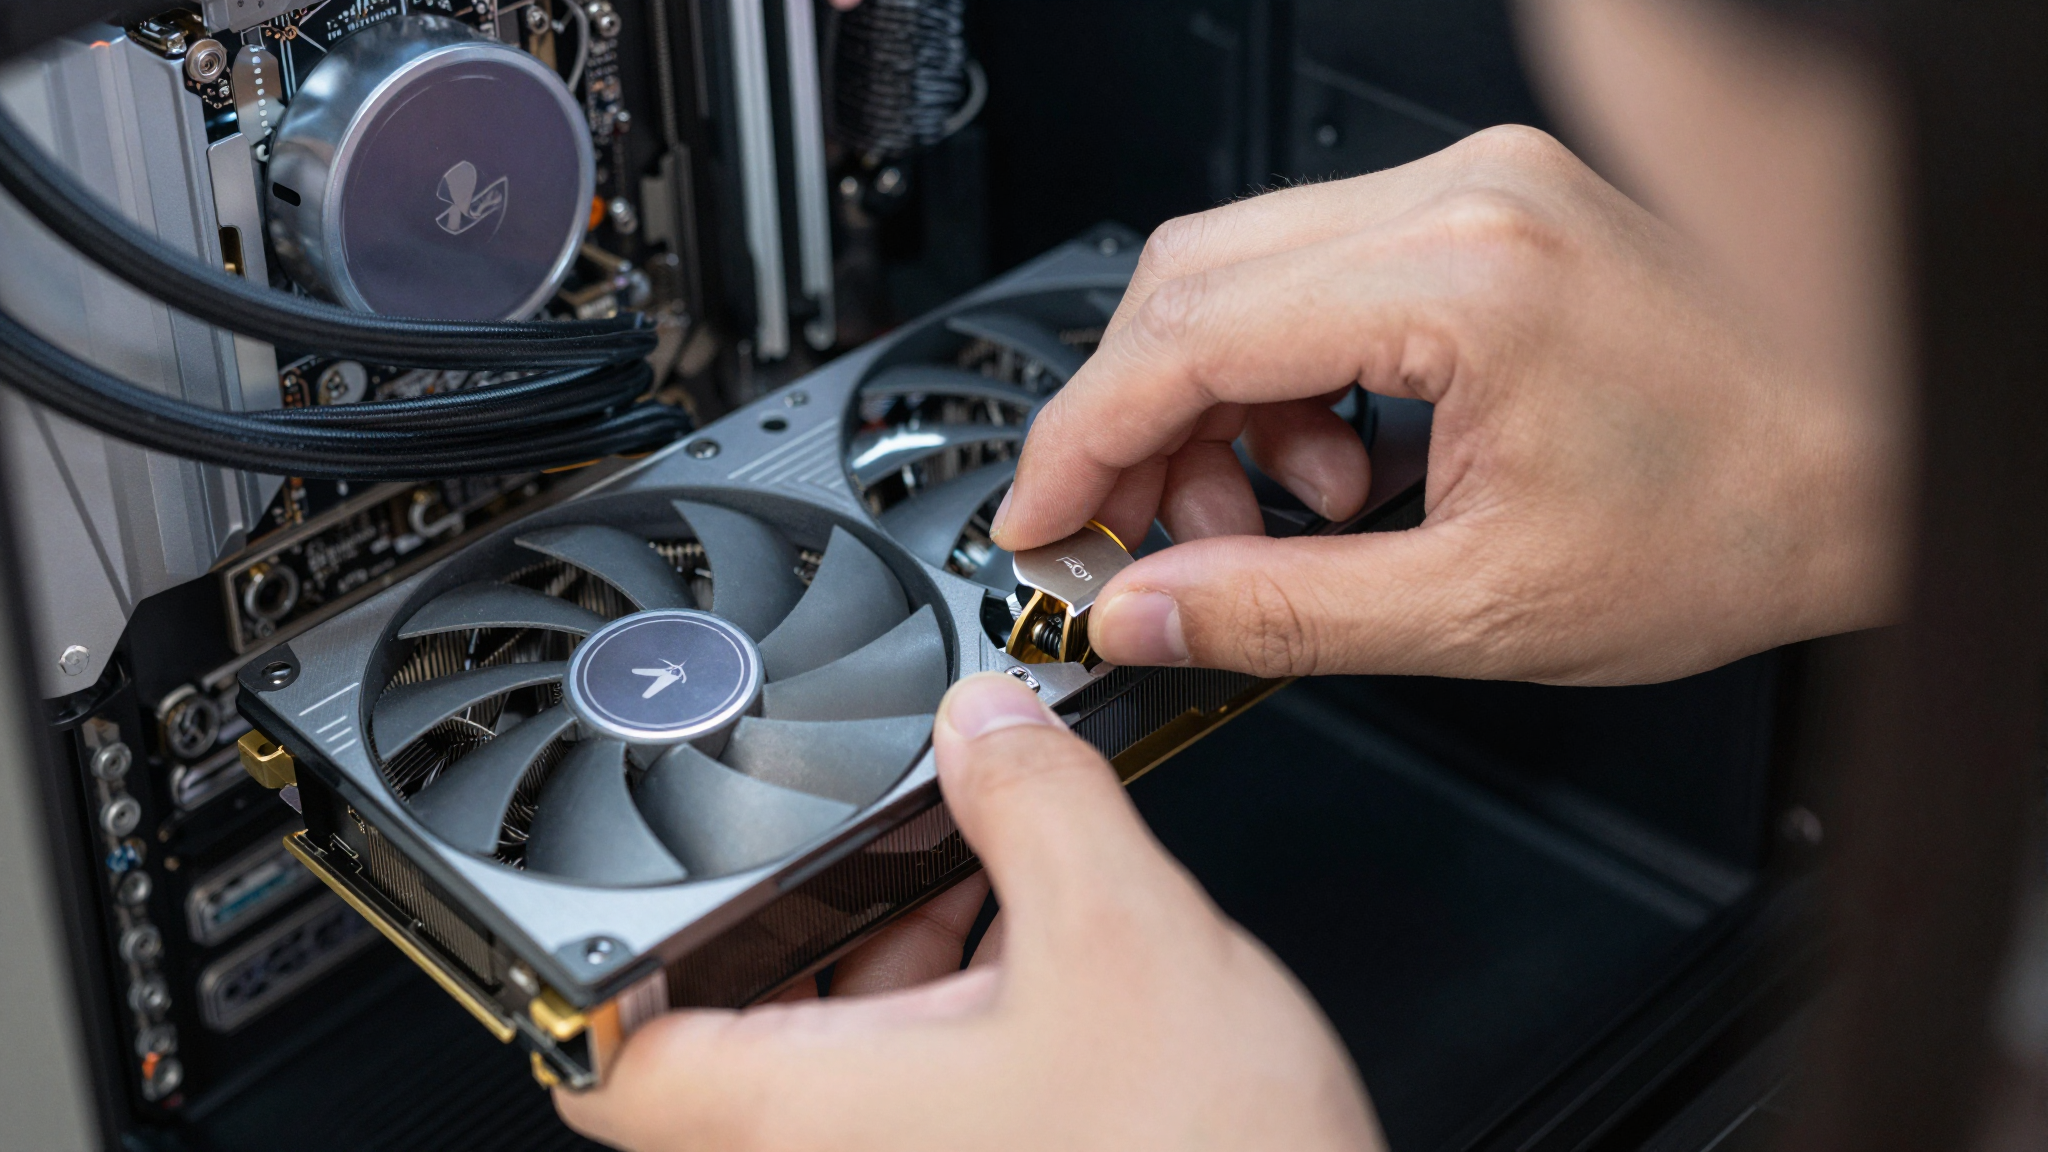 |
Take photos before and during disassembly for reference. |
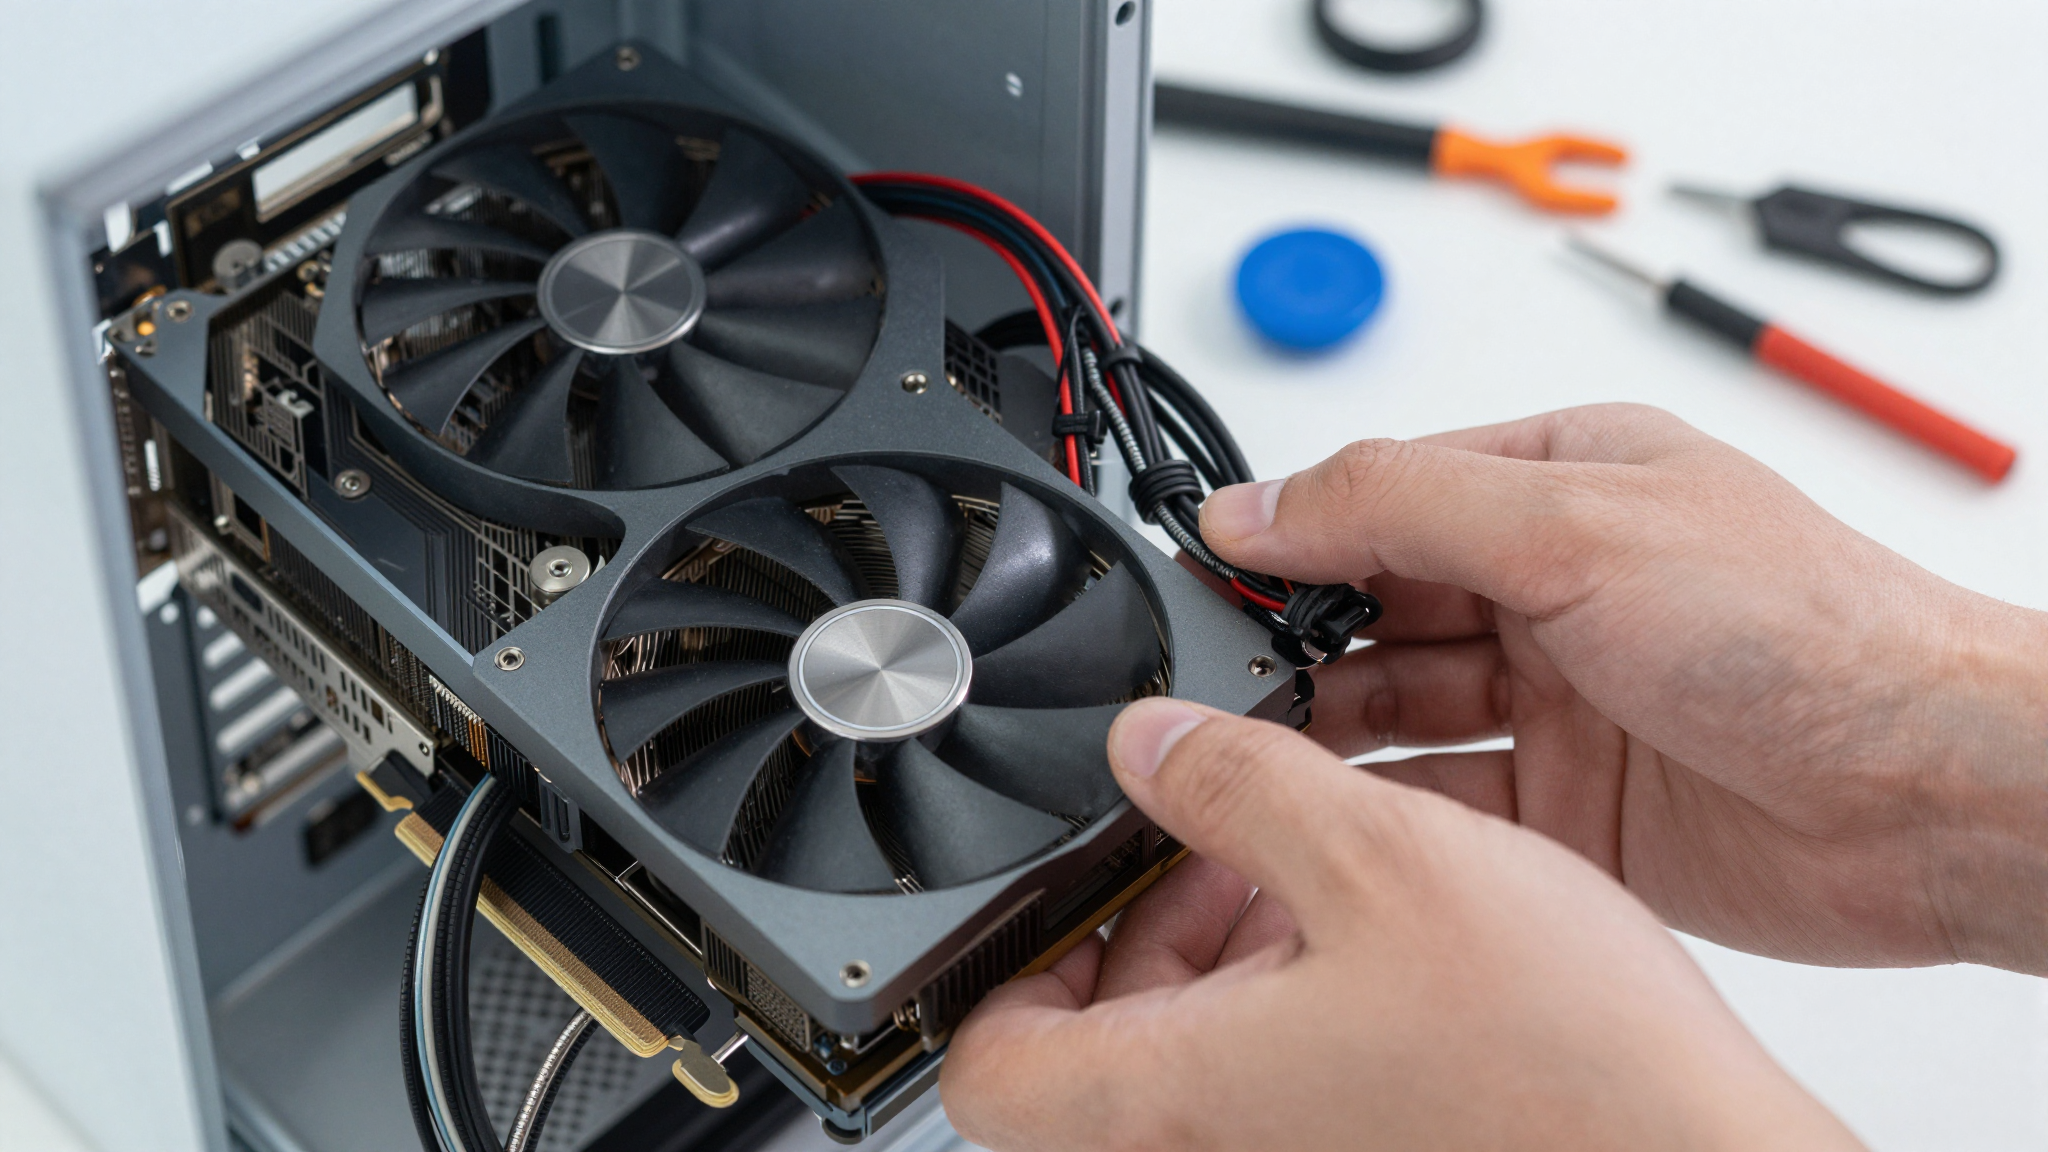
| 4. Disconnect Fan Connector | Gently detach the fan power connector from the GPU PCB. | 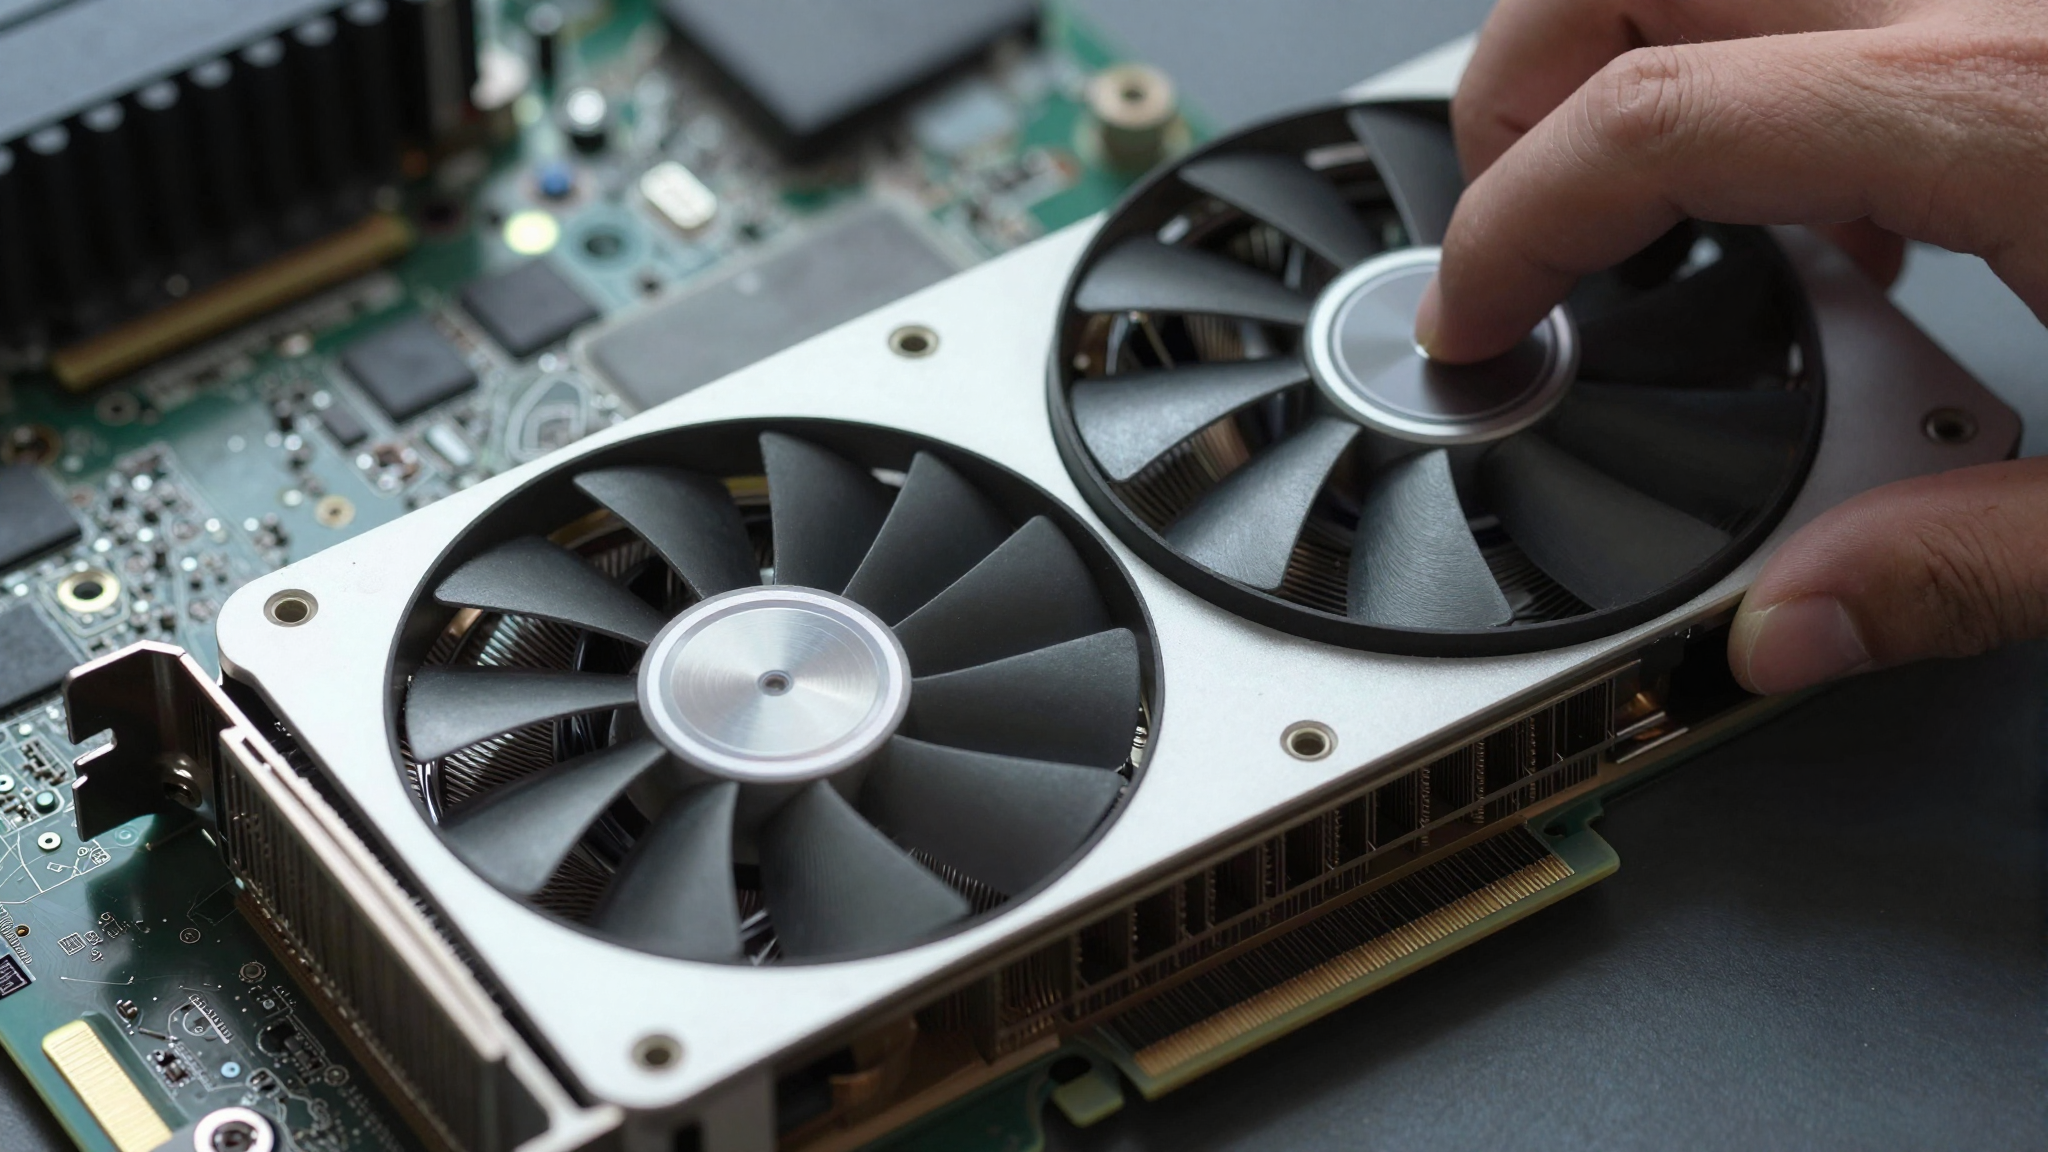 |
Avoid pulling on the wires; use a small tool to release the connector if needed. |
| 5. Remove Old Fan(s) | Carefully detach the old fan(s) from the heatsink or shroud. | [IMG_4 - ADDED] | Note the orientation of the fan(s) for correct reinstallation. |
Once the shroud is detached, you'll have access to the fan itself. The fan is usually connected to the GPU PCB with a small connector. Gently disconnect the connector, being careful not to pull on the wires. With the connector detached, you can now remove the old fan from the shroud. Depending on the design, the fan may be held in place with screws or clips.
Now, install the new fan in the shroud, ensuring it's oriented correctly. Connect the fan connector to the GPU PCB. Reattach the shroud to the heatsink, tightening the screws securely but not overtightening them. Finally, before you re-install the GPU into your system, use the compressed air to blow any dust off the GPU heatsink. A clean heatsink helps with proper cooling.
📊 Fact Check
Overtightening the screws on the fan shroud can damage the GPU PCB or strip the screw threads. Always use the correct screwdriver size and apply gentle pressure.
Overtightening the screws on the fan shroud can damage the GPU PCB or strip the screw threads. Always use the correct screwdriver size and apply gentle pressure.
Connector Chaos: Identifying and Matching Fan Connectors to Avoid Voltage Nightmares
You've successfully swapped the fan, but there's one more potential pitfall lurking: the fan connector. GPU fan connectors come in a few different flavors, and plugging the wrong type into the wrong socket can lead to voltage nightmares and fried components. Don't assume that because it *fits*, it's *correct*. I made that assumption once, and ended up with a fan spinning at warp speed (and making an unholy racket) until I yanked the power cord.
The most common types are 4-pin PWM (Pulse Width Modulation) and 3-pin voltage-controlled connectors. PWM fans allow the GPU to precisely control the fan speed by sending a PWM signal, while 3-pin fans are controlled by varying the voltage supplied to the fan motor. While you *can* often plug a 3-pin fan into a 4-pin header (it'll just run at full speed), you should never plug a 4-pin fan into a 3-pin header, as it may not receive the correct voltage and could fail to spin or even damage the fan controller. It's important to match the connectors and voltages correctly.
| Connector Type | Number of Pins | Voltage | Control Method | Compatibility |
|---|---|---|---|---|
| PWM Fan Connector | 4 pins | 12V | Pulse Width Modulation | Compatible with 4-pin headers; 3-pin may run at full speed |
| Voltage Controlled Fan Connector | 3 pins | 12V | Voltage | Compatible with 3-pin and 4-pin headers |
| Proprietary Connectors | Varies | Varies | Varies | May require adapters or matching proprietary fans |
| Molex Connector | 4 pins | 12V | None (Full speed) | Not GPU specific; Full power all the time. |
Before connecting the fan, carefully examine the connector on the fan and the header on the GPU PCB. Make sure they match. If they don't, you may need to use an adapter or purchase a different fan with the correct connector. Some older GPUs may use proprietary connectors, which can be a real headache. In that case, your best bet is to find a replacement fan specifically designed for your GPU model. If nothing else works, you can manually wire the fan to a Molex connector from the PSU, though this will mean the fan runs at full speed constantly, which is not ideal but sometimes unavoidable.
Thermal Paste Tango: Application Techniques for Optimal Heat Transfer (and Avoiding Disaster)
Here's a truth bomb: a brand new, high-performance fan won't do jack squat if the thermal paste is applied incorrectly (or not at all). Thermal paste is the crucial interface between the GPU die and the heatsink, facilitating heat transfer. Old, dried-out thermal paste is about as effective as trying to cool your CPU with a slice of bread. I once reassembled a GPU without reapplying thermal paste (don't ask), and within minutes, the card was throttling so hard it was practically unusable.
Before applying new thermal paste, you need to clean off the old stuff. Use isopropyl alcohol and cotton swabs or a microfiber cloth to gently wipe away any residue from both the GPU die and the heatsink. Make sure both surfaces are completely clean and dry before proceeding. Now comes the fun part: applying the new thermal paste. There are several schools of thought on the best application method, but I've found that a small, pea-sized dot in the center of the GPU die works best. When you reattach the heatsink, the pressure will spread the paste evenly across the surface.
| Method | Description | Pros | Cons |
|---|---|---|---|
| Pea-Sized Dot | Place a small dot of thermal paste in the center of the GPU die. | Simple, effective, minimizes waste. | May not provide complete coverage on larger dies. |
| Line Method | Apply a thin line of thermal paste across the center of the GPU die. | Good coverage for rectangular dies. | Can be messy if too much paste is applied. |
| X Method | Apply a thin "X" shape of thermal paste across the GPU die. | Ensures coverage in all corners. | Can trap air bubbles if applied incorrectly. |
| Spread Method | Manually spread a thin layer of thermal paste across the entire GPU die using a card or spreader. | Ensures complete coverage. | More time-consuming and requires careful technique. |
Whatever method you choose, the key is to use the right amount of thermal paste. Too much, and it can ooze out the sides and potentially short-circuit components. Too little, and you won't get adequate heat transfer. Experiment to find what works best. Remember, cleaning and preparing the surface area is paramount.
Post-Swap Sanity Check: Monitoring Temperatures and Performance to Ensure Success
Congratulations! You've swapped the fan, connected everything correctly, and reapplied thermal paste. Now, before you start patting yourself on the back and launching your favorite game, it's crucial to perform a post-swap sanity check. This involves monitoring your GPU temperatures and performance to ensure that the new fan is doing its job effectively. Ignoring this step is like baking a cake without checking if it's cooked through – you might end up with a gooey mess.
There are several software tools you can use to monitor GPU temperatures, such as MSI Afterburner, HWMonitor, and GPU-Z. Install one of these tools and run a stress test, such as FurMark or Unigine Heaven. Pay close attention to the GPU temperature. Ideally, you want to keep it below 80°C under load. If the temperature exceeds this threshold, something is wrong. It could be that the thermal paste wasn't applied correctly, the fan isn't spinning at the correct speed, or there's still a problem with airflow.
| Monitoring Tool | Features | Pros | Cons |
|---|---|---|---|
| MSI Afterburner | Temperature monitoring, fan control, overclocking. | User-friendly interface, comprehensive features. | Can be resource-intensive. |
| HWMonitor | Real-time temperature, voltage, and fan speed monitoring. | Lightweight, simple to use. | Limited features compared to MSI Afterburner. |
| GPU-Z | Detailed information about GPU specifications and sensors. | Comprehensive information, real-time monitoring. | Less user-friendly interface. |
| FurMark | GPU stress testing and temperature monitoring. | Effective stress testing, easy to use. | Can push GPU temperatures to extreme levels. |
Also, compare the performance to before. A significant loss could mean the card is throttling, meaning the heatsink is still not adequately dispelling heat. Keep in mind a small change in the ambient temperature can make a big difference, so try to keep conditions consistent.
When to Call a Pro: Recognizing Unsolvable Issues and Seeking Expert Help
Let's be honest: sometimes, despite our best efforts, things just don't go according to plan. You've followed all the steps, double-checked everything, and your GPU is still overheating, making strange noises, or simply refusing to cooperate. That's when it's time to swallow your pride and call in a professional. Knowing when to throw in the towel is a sign of wisdom, not weakness. I once spent three days trying to diagnose a bizarre GPU issue, only to discover that a tiny, almost invisible crack in the PCB was the culprit. A professional diagnosed it in 10 minutes.
Here are a few telltale signs that you're in over your head: Physical damage to the PCB (cracks, burns, or missing components), stripped screws or damaged threads, persistent overheating despite a new fan and properly applied thermal paste, unusual noises or vibrations coming from the GPU, and complete failure to boot or display video. In these situations, attempting to fix the problem yourself could cause further damage, potentially rendering your GPU completely unrecoverable.
| Issue | Possible Causes | DIY Solution | When to Call a Pro |
|---|---|---|---|
| Overheating | Incorrect thermal paste application, inadequate fan speed, poor case airflow. | Reapply thermal paste, adjust fan curve, improve case airflow. | Persistent overheating despite DIY efforts; possible GPU damage. |
| Unusual Noises | Fan bearings wearing out, loose components, obstructions. | Check for obstructions, lubricate fan bearings. | Loud grinding or clicking noises; possible fan motor failure. |
| No Display Output | Loose connections, driver issues, faulty GPU. | Check connections, reinstall drivers. | No display output despite troubleshooting; possible GPU failure. |
| Physical Damage | Cracked PCB, damaged components. | None. | Immediately. |
Find a reputable computer repair shop with experienced technicians. Explain the problem clearly and provide as much detail as possible. Be prepared to pay a diagnostic fee, but it's often worth it to avoid making the problem worse. Remember, a professional has the tools, knowledge, and experience to diagnose and repair complex GPU issues that are beyond the scope of most DIYers. Sometimes, the best solution is to admit defeat and let the experts handle it. Your wallet (and your sanity) will thank you.
Frequently Asked Questions (FAQ)
Q1. How often should I clean my GPU fan?
A1. It depends on your environment, but generally, every 3-6 months is a good practice. If you live in a dusty area or have pets, you might need to clean it more frequently.
Q2. Can I use a regular household vacuum cleaner to clean my GPU fan?
A2. No, it's not recommended. Vacuum cleaners can generate static electricity, which can damage your GPU. Use compressed air instead.
Q3. What type of thermal paste should I use for my GPU?
A3. A high-quality thermal paste designed for computer components is recommended. Arctic MX-4 and Noctua NT-H1 are popular choices.
Q4. How much thermal paste should I apply?
A4. A small, pea-sized dot in the center of the GPU die is usually sufficient. The pressure from the heatsink will spread the paste evenly.
🔗 Recommended Reading
- 📌 Neural Processors in 2026: The Definitive Hardware Review and Performance Benchmarks
- 📌 Extending the Lifespan of Your Neural Processor: Advanced Maintenance Tips for 2026 Hardware
- 📌 Beyond the Hype: Are Neural Processors Worth the Upgrade in 2026? A Data-Driven Analysis
- 📌 Neural Processor Cooling Solutions in 2026: Liquid vs. Air – Which Reigns Supreme?
- 📌 Troubleshooting Neural Processor Bottlenecks: A 2026 Hardware Engineer's Diagnostic Guide