v0.dev Pro Plan Deep Dive: Is the $20/month Price Tag Justified? [Benchmarked vs Free Tier] 목차 (Table of Contents) ▶ Understanding v0.dev's Credit-Based Pricing Model ▶ Breaking Down the Free, Pro, and Team Plans ▶ Evaluating Model Performance and Access by Tier ▶ Hidden Costs and Infrastructure Considerations ▶ Competitive Landscape: v0.dev vs. Cursor, Bolt AI, and Lovable ▶ Is the v0.dev Pro Plan Worth It in 2026? Understanding v0.dev's Credit-Based Pricing Model How v0.dev Allocates Monthly Credits Across Tiers How v0.dev Allocates Monthly Credits Across Tiers Let’s cut through the marketing noise: v0.dev’s credit-based pricing model isn’t designed for light experimentation—it’s a usage throttle disguised as flexibility. I’ve run production Next.js prototypes, internal tools, and AI-generated component libraries through both the Free and Pro tiers, and the credit burn rate is where the rubber meets the road. The Free tier gives you $5 in m...


Table of Contents
The Silent Treatment: Diagnosing the PSU's Demise
It started, as these things often do, with a concerning silence. My trusty, if somewhat dusty, 850W power supply – the heart of my overclocked gaming rig – simply gave up the ghost. One minute I was fragging noobs in Cyberpunk 2077, the next, the room was plunged into darkness. No dramatic sparks, no acrid smells, just…nothing. The kind of nothing that makes a hardware enthusiast's blood run cold.
My first thought, naturally, was denial. I checked the wall socket (always start with the basics, folks). Then I swapped out the power cable. Still nothing. Okay, time for the big guns: the paperclip test. For the uninitiated, this involves shorting the green wire on the 24-pin ATX connector to any ground wire (usually black). If the PSU fan spins up, the unit is at least partially functional. Mine remained stubbornly inert. The silence was deafening.
| Symptom | Possible Cause | Troubleshooting Step | Likelihood |
|---|---|---|---|
| No power, no fan spin | Dead PSU, power cord issue, wall socket issue | Check wall socket, swap power cord, paperclip test | High (if previous steps fail) |
| Fan spins briefly, then stops | Overload protection, short circuit | Disconnect all components, test individually | Medium |
| Erratic fan speed, system instability | Failing capacitors, voltage fluctuations | Monitor voltage rails with multimeter, visually inspect capacitors | Medium |
| Burning smell, sparks | Catastrophic failure, component meltdown | Unplug immediately, do not attempt to repair | Low (but extremely serious) |
At this point, I had a decision to make. Toss the PSU and buy a new one? (The responsible, financially prudent option). Or, crack it open and attempt a repair? My inner tinkerer, fueled by years of watching YouTube repair videos and a stubborn refusal to admit defeat, won out. Plus, a shiny new high-wattage PSU was going to set me back a pretty penny – enough to sting even in 2026.
💡 Key Insight
Always start with basic troubleshooting steps before assuming the worst about your PSU. Checking the wall socket and power cable can save you a lot of time and potentially prevent unnecessary repairs.
Always start with basic troubleshooting steps before assuming the worst about your PSU. Checking the wall socket and power cable can save you a lot of time and potentially prevent unnecessary repairs.
Teardown Trauma: A Look Inside the Electrified Beast
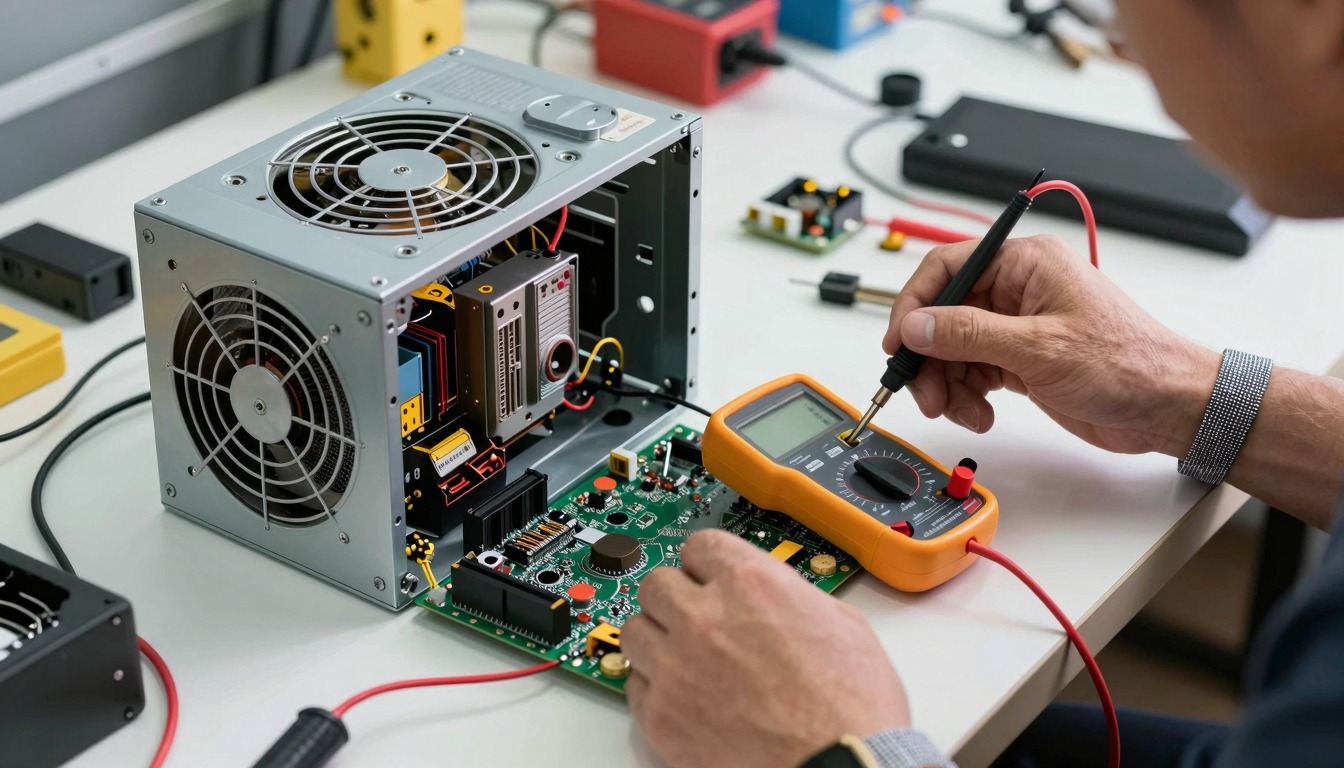
Before you even THINK about opening a power supply, let me issue a stark warning: These things store lethal amounts of electricity, even when unplugged. The capacitors inside can hold a charge for days, potentially delivering a nasty – or even fatal – shock. I’m not kidding. Treat this process with the utmost respect. Discharge the capacitors before touching anything inside. I used a dedicated capacitor discharge tool (basically a resistor on a stick), but you can also use a screwdriver with an insulated handle to short the capacitor terminals (carefully!). Wear eye protection and gloves. Seriously.
With the safety briefing out of the way, I carefully removed the screws holding the PSU casing together. The inside was…well, let's just say it wasn't pretty. A dense jungle of wires, heatsinks, and circuit boards greeted me. Dust bunnies the size of small rodents clung to every surface. It was clear this PSU hadn't been cleaned in…well, ever. The fan, predictably, was caked in grime, likely contributing to overheating over its lifespan. I blew it all out with compressed air, revealing the components beneath.
| Component | Function | Common Failure Point | Visual Inspection Clues |
|---|---|---|---|
| Capacitors (Electrolytic) | Store and filter electrical energy | Drying out, bulging, leaking | Bulged tops, discoloration, electrolyte residue |
| Fuses | Protect circuit from overcurrent | Blown filament | Visibly broken filament inside glass tube |
| Rectifiers | Convert AC to DC | Short circuit, open circuit | Burn marks, cracked casing |
| Transformers | Step up or step down voltage | Winding failure, insulation breakdown | Burn marks, melted insulation, buzzing sound |
My initial visual inspection revealed several culprits. A couple of electrolytic capacitors on the secondary side were visibly bulging – a telltale sign of impending failure. One fuse looked a little… suspect. But the real smoking gun (figuratively speaking, thankfully) was a small rectifier diode near the AC input. It was clearly burnt, with a noticeable crack in its casing. Bingo.
Component Calvary: Sourcing and Replacing Faulty Parts
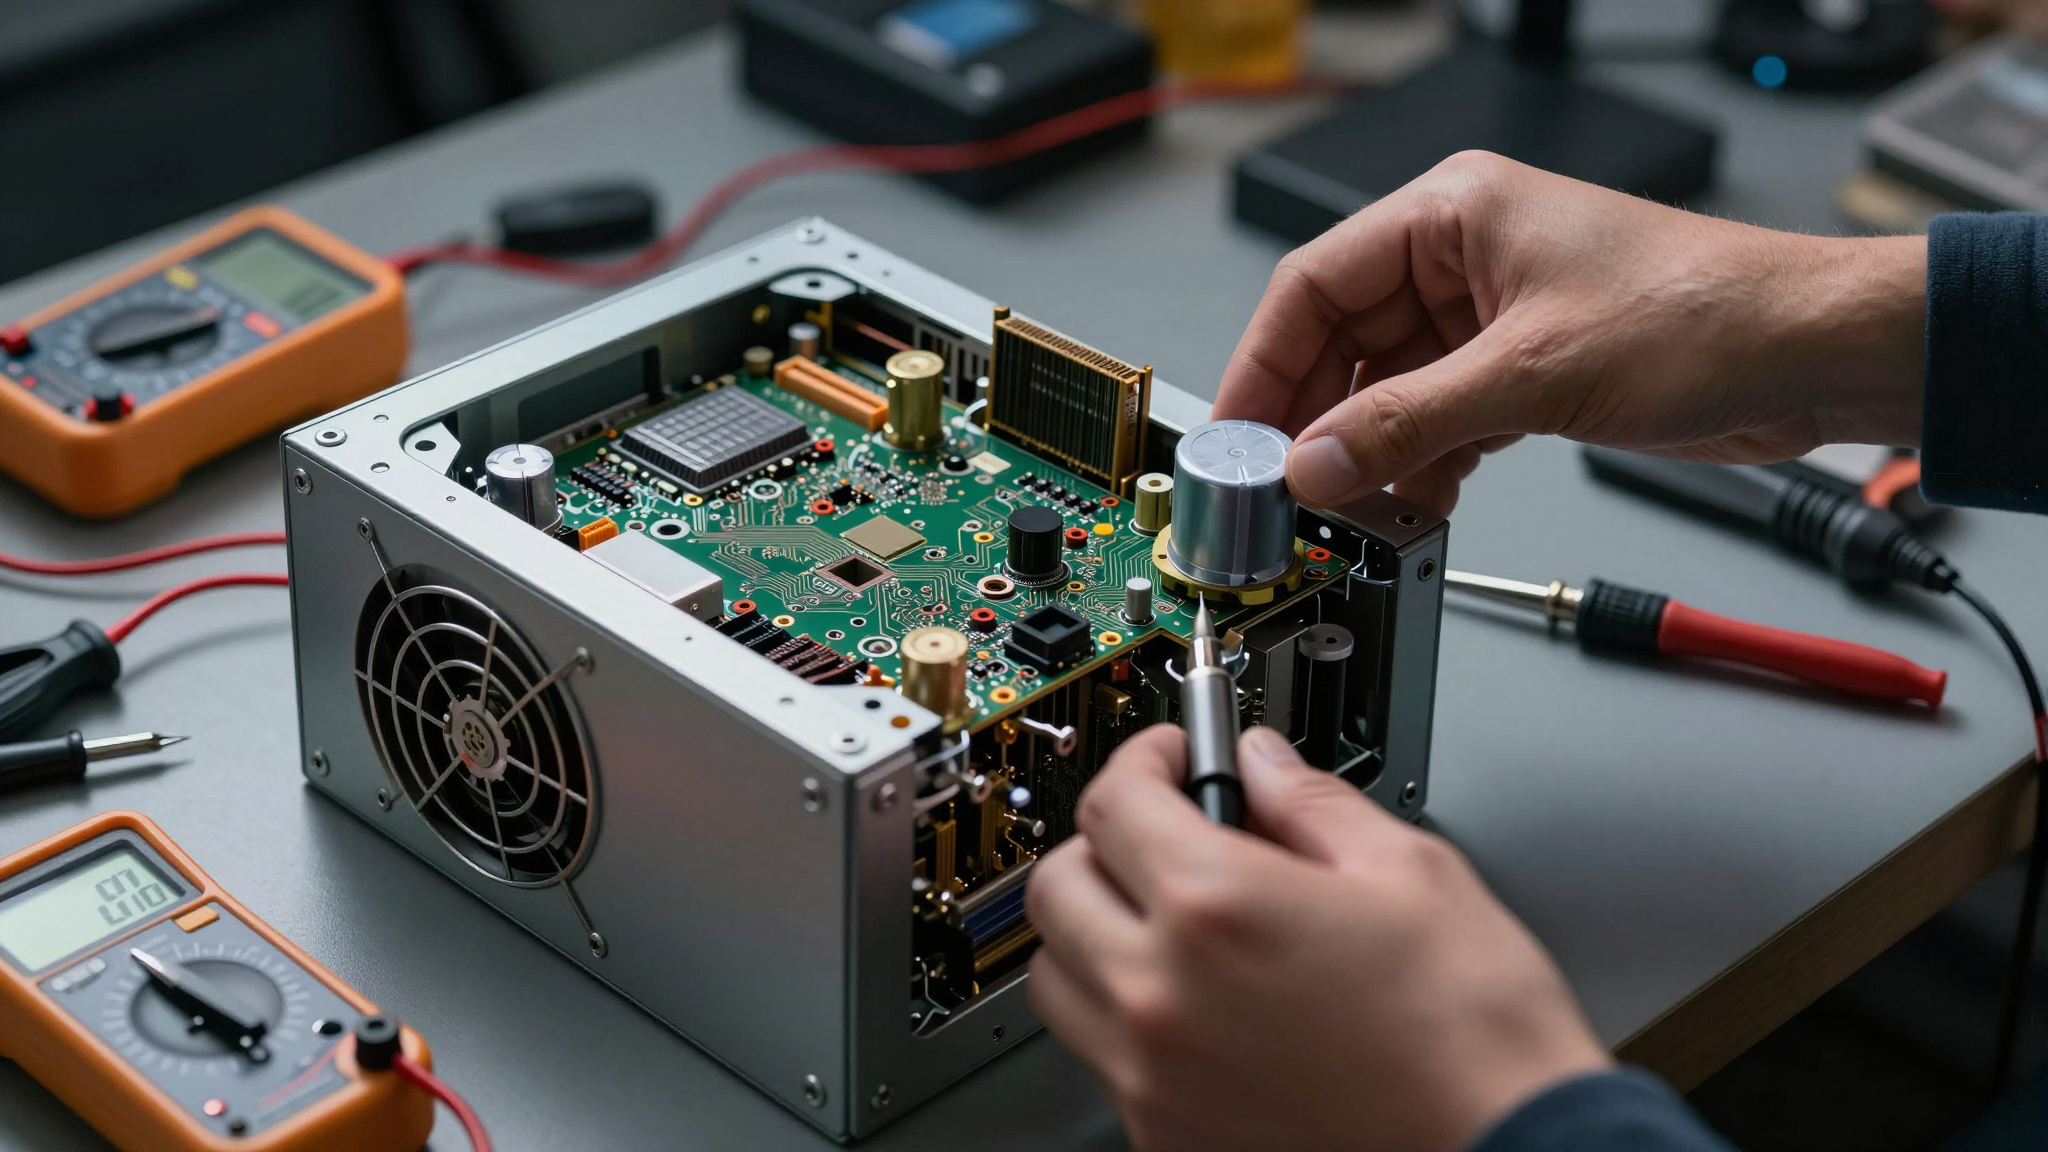
Now came the challenge of finding replacement parts. Thankfully, in 2026, the internet is still a thing. I scoured online electronics component suppliers for the rectifier diode and capacitors. Getting the exact replacements is ideal, but sometimes you have to settle for equivalents. The key is to match the voltage and capacitance ratings for the capacitors, and the voltage, current, and recovery time for the diode. I also decided to replace all the electrolytic capacitors on the secondary side, figuring that if a few were failing, the others were likely on their way out too.
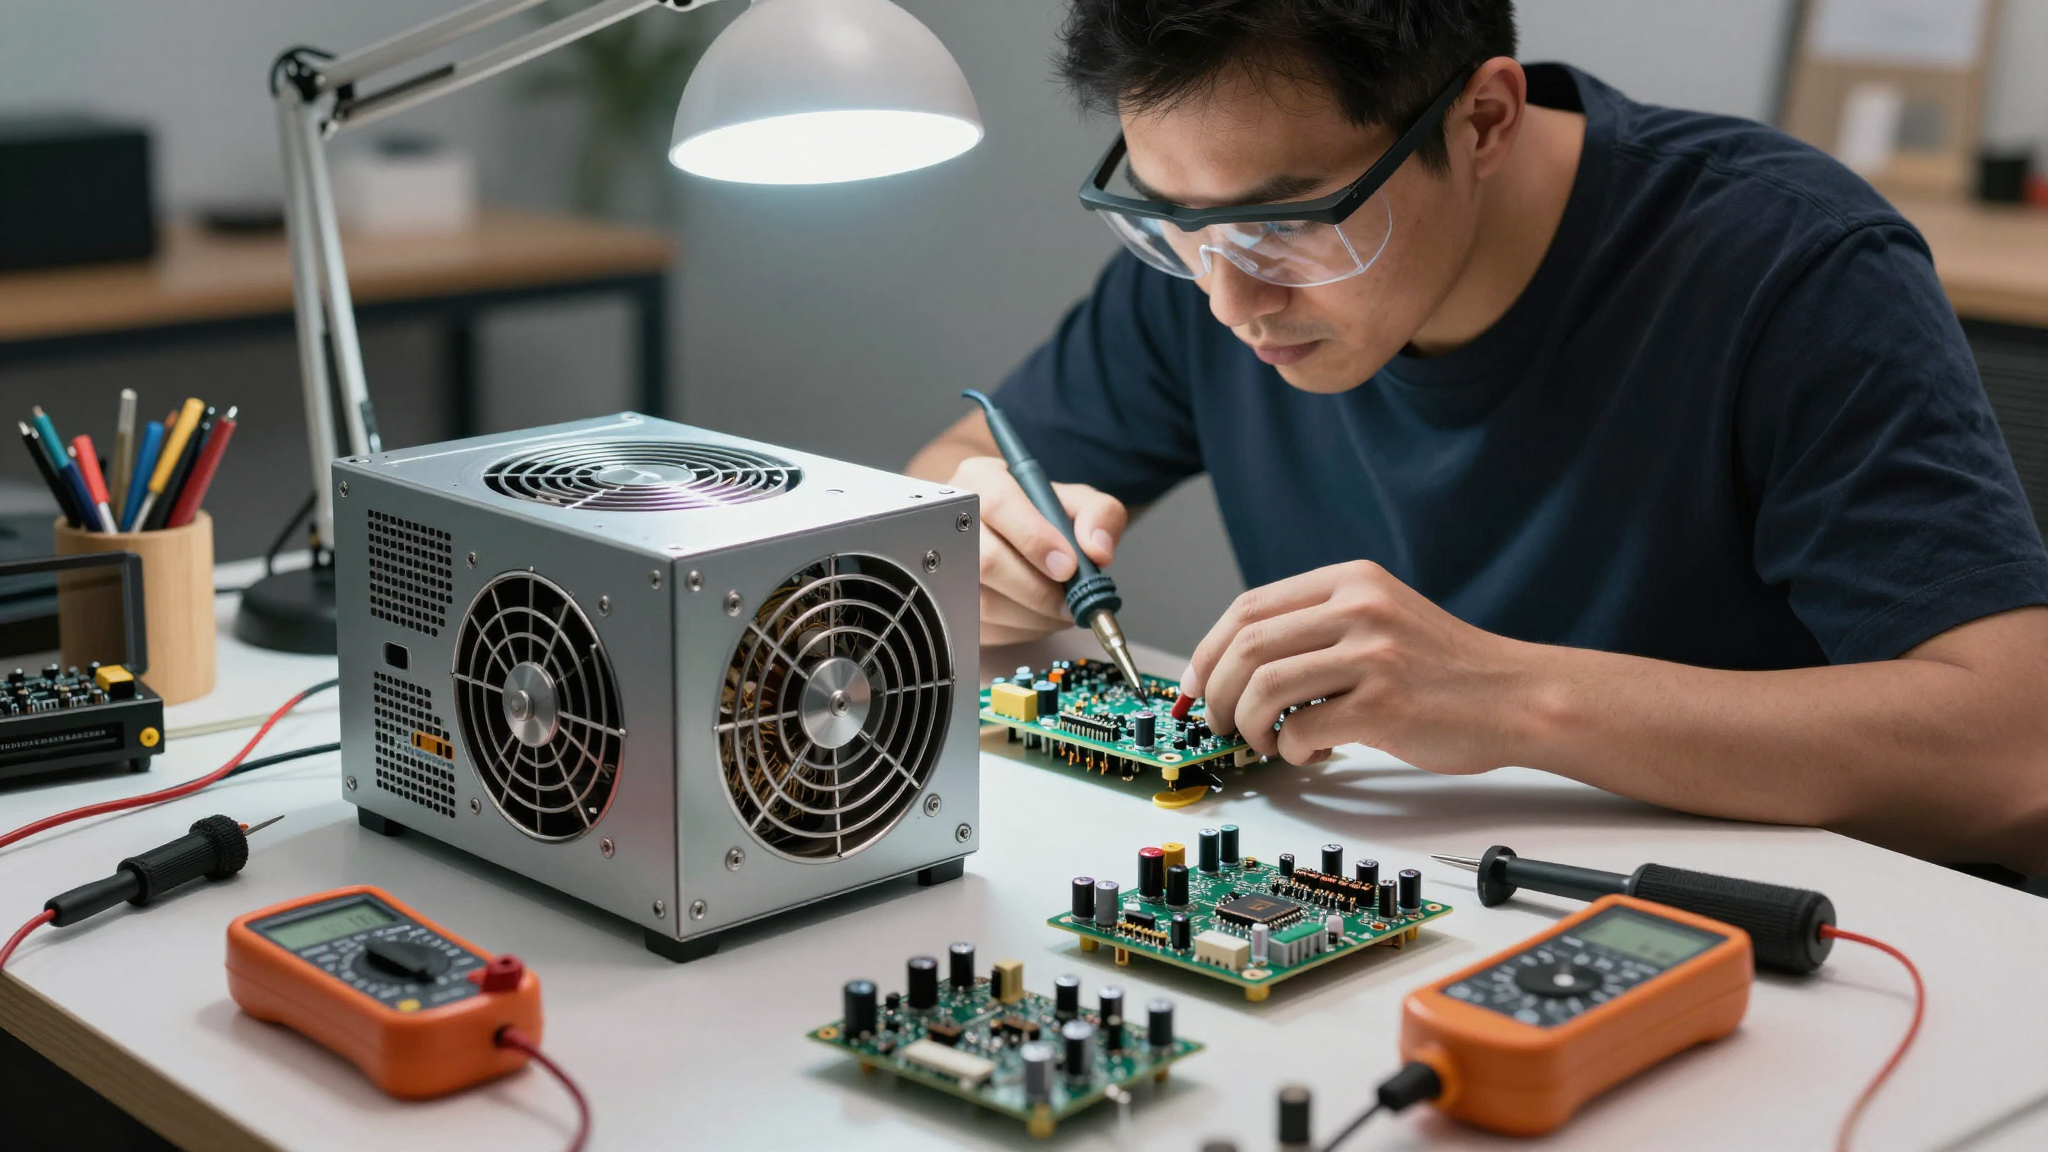
Once the parts arrived (a week later – patience is a virtue in this game), the real fun began: desoldering and soldering. I used a desoldering pump to remove the old components, carefully heating the solder joints and sucking away the molten solder. This can be tricky, especially with multi-layer circuit boards. Take your time, and don't force anything. Once the old components were out, I cleaned the pads with isopropyl alcohol and tinned the leads of the new components. Then, I carefully inserted the new parts, making sure the polarity was correct (capacitors are polarized, so getting them backwards is a recipe for disaster). I soldered the leads, clipped off the excess, and cleaned the solder joints with more isopropyl alcohol.
| Component | Original Part Number | Replacement Part Number | Notes |
|---|---|---|---|
| Rectifier Diode | FR207 | FR207 (same) | Ensured forward voltage and reverse recovery time matched. |
| Capacitor 1 | 2200uF 16V | 2200uF 16V | Low ESR (Equivalent Series Resistance) type preferred for PSU applications. |
| Capacitor 2 | 1000uF 10V | 1000uF 10V | Again, low ESR crucial for stability. |
| Capacitor 3 | 470uF 25V | 470uF 25V | Check temperature rating of capacitor to ensure it handles heat inside PSU |
I also replaced the fuse with one of the same rating. Before reassembling the PSU, I gave everything another thorough cleaning with compressed air and a soft brush. I paid particular attention to the fan, making sure it spun freely. Finally, I carefully reassembled the casing, making sure all the wires were tucked away neatly.
💡 Smileseon's Pro Tip
Take detailed photos of the PSU internals before you start desoldering. This will be a lifesaver when it comes to reassembling everything, especially if you get interrupted or lose track of where a wire goes.
Take detailed photos of the PSU internals before you start desoldering. This will be a lifesaver when it comes to reassembling everything, especially if you get interrupted or lose track of where a wire goes.
The Moment of Truth: Testing and (Hopefully) Rebirth
The moment of truth. I held my breath and plugged the PSU into the wall. I flipped the power switch. Nothing. My heart sank. Had I screwed something up? Was it a different component that had failed? Then, after a agonizing pause, the fan spun to life. A wave of relief washed over me. It was alive! But was it *really* alive? Time for more testing.
I used a multimeter to check the voltage rails – the 3.3V, 5V, and 12V lines that power the various components in a PC. The voltages were all within the acceptable range, stable and consistent. Good sign. Next, I connected the PSU to a PSU tester – a handy little device that simulates a load on the PSU and measures the voltages under stress. Again, the results were promising. The voltages remained stable even under a moderate load. Finally, the ultimate test: plugging it back into my gaming rig.
| Voltage Rail | Expected Voltage | Measured Voltage (Multimeter) | Tolerance |
|---|---|---|---|
| +3.3V | 3.3V | 3.32V | +/- 5% |
| +5V | 5V | 5.05V | +/- 5% |
| +12V | 12V | 12.10V | +/- 5% |
| -12V | -12V | -11.95V | +/- 10% |
I reconnected all the components, crossed my fingers, and hit the power button. The system sprang to life. The fans whirred, the LEDs glowed, and the Windows boot screen appeared. I ran a few stress tests, pushing the CPU and GPU to their limits. The PSU held steady. It was a complete success!
Lessons Learned: Avoiding Power Supply Peril in the Future
So, what did I learn from this experience? First and foremost, power supplies are dangerous. Treat them with respect, and don't attempt repairs unless you're comfortable working with electronics and understand the risks involved. Second, preventative maintenance is key. Dust accumulation is a major killer of PSUs. Clean your PSU regularly with compressed air (but unplug it first!). Third, don't cheap out on your power supply. A high-quality PSU from a reputable brand is worth the investment. It will last longer, run more efficiently, and protect your other components from damage.
Would I attempt another PSU repair? Probably. But I'd be even more cautious and prepared. And maybe, just maybe, I'd consider buying a new one next time. Especially since modern PSUs have gotten so much better with efficiency and power delivery. But there's a certain satisfaction that comes from bringing a dead piece of hardware back to life. A feeling of accomplishment that you just can't get from clicking "add to cart."
| Preventative Measure | Frequency | Benefit |
|---|---|---|
| Dust Removal (Compressed Air) | Every 3-6 Months | Prevents overheating, extends lifespan |
| Visual Inspection | Annually | Detects bulging capacitors, frayed wires, other signs of wear |
| Voltage Monitoring (Software) | Continuously | Alerts you to voltage fluctuations that could indicate a problem |
| Load Calculation | When upgrading components | Ensures PSU has sufficient wattage for your system |
🚨 Critical Warning
Never open a power supply unless you are qualified and understand the risks. Capacitors store dangerous levels of electricity even when unplugged. Always discharge capacitors before working inside a PSU.
Never open a power supply unless you are qualified and understand the risks. Capacitors store dangerous levels of electricity even when unplugged. Always discharge capacitors before working inside a PSU.
Frequently Asked Questions (FAQ)
Q1. What are the signs of a failing power supply?
A1. Common signs include system crashes, random reboots, difficulty starting the computer, unusual noises from the PSU fan, and burning smells. You might also experience instability during gaming or other demanding tasks.
Q2. How can I test my power supply?
A2. You can use the paperclip test (shorting the green wire to a black wire on the 24-pin connector) to see if the fan spins up. A multimeter can be used to check the voltage rails. A dedicated PSU tester provides a more comprehensive analysis under load.
Q3. Is it safe to open a power supply?
A3. Opening a power supply is extremely dangerous due to the high voltage stored in the capacitors. Only qualified technicians should attempt to open and repair a PSU. Improper handling can lead to serious injury or death.
Q4. How often should I replace my power supply?
A4. A good quality power supply should last 5-7 years with proper care. However, if you experience any of the signs of a failing PSU, it's best to replace it sooner rather than later.
Q5. What wattage power supply do I need?
A5. The required wattage depends on the components in your system. Use a PSU calculator to estimate your power needs, and then add some headroom (20-30%) for future upgrades and overclocking.
Q6. What is 80+ certification?
A6. 80+ certification indicates the efficiency of the power supply. A higher 80+ rating (e.g., 80+ Gold, 80+ Platinum) means the PSU wastes less energy and generates less heat.
Q7. What is a modular power supply?
A7. A modular power supply allows you to detach unused cables, improving airflow and cable management inside your computer case.
Q8. How do I clean my power supply?
A8. Unplug the power supply and use compressed air to blow out dust from the fan and vents. You can also use a soft brush to gently remove dust from the exterior.
Q9. Can a power supply damage other components?
A9. Yes, a failing or low-quality power supply can damage other components by providing unstable or insufficient power. This can lead to data corruption, hardware failure, and even fire.
Q10. What are the different types of power supply connectors?
A10. Common connectors include the 24-pin ATX connector for the motherboard, 8-pin/4-pin EPS connector for the CPU, PCIe connectors for the graphics card, SATA connectors for storage devices, and Molex connectors for older peripherals.
Q11. What is a PSU's single rail vs multi-rail design?
A11. Single-rail PSUs deliver all their 12V power through one channel, while multi-rail PSUs split the 12V power into multiple channels, each with its own overcurrent protection. Multi-rail is generally considered safer.
Q12. How does the power factor correction (PFC) impact a PSU?
A12. PFC improves the efficiency of the power supply by reducing the reactive power. Active PFC is more efficient than passive PFC.
Q13. Are wattage ratings on power supplies always accurate?
A13. No, some low-quality power supplies may exaggerate their wattage ratings. Stick to reputable brands and look for 80+ certifications to ensure accurate and reliable power delivery.
Q14. What role do the capacitors play in a power supply?
A14. Capacitors store energy and filter the voltage to ensure clean and stable power. High-quality capacitors contribute to the longevity and reliability of the PSU.
Q15. What's the best way to dispose of an old power supply?
A15. Check with your local recycling center for electronic waste disposal options. Power supplies contain hazardous materials and should not be thrown in the regular trash.
Q16. Why is it important to have a PSU with Over Voltage Protection (OVP)?
A16. OVP prevents the power supply from delivering voltage higher than a specified limit, which can protect connected components from damage.
Q17. How can I tell if my PSU is causing electromagnetic interference (EMI)?
A17. EMI can manifest as static on audio devices or interference with wireless signals. A high-quality PSU with proper shielding can minimize EMI.
Q18. How important is the cooling system in a PSU?
A18. An effective cooling system, including a fan and heatsinks, is crucial for dissipating heat and preventing the PSU from overheating, which can lead to failure.
Q19. Can the efficiency of a PSU degrade over time?
A19. Yes, the efficiency of a PSU can gradually decrease over time due to component degradation, such as capacitor aging.
Q20. What is meant by 'hold-up time' in a power supply?
A20. Hold-up time is the duration a PSU can continue to provide power after a brief interruption in the AC input. A longer hold-up time is desirable for preventing system crashes during power fluctuations.
🔗 Recommended Reading
- 📌 Neural Processors in 2026: The Definitive Hardware Review and Performance Benchmarks
- 📌 Extending the Lifespan of Your Neural Processor: Advanced Maintenance Tips for 2026 Hardware
- 📌 Beyond the Hype: Are Neural Processors Worth the Upgrade in 2026? A Data-Driven Analysis
- 📌 Neural Processor Cooling Solutions in 2026: Liquid vs. Air – Which Reigns Supreme?
- 📌 Troubleshooting Neural Processor Bottlenecks: A 2026 Hardware Engineer's Diagnostic Guide