v0.dev Pro Plan Deep Dive: Is the $20/month Price Tag Justified? [Benchmarked vs Free Tier] 목차 (Table of Contents) ▶ Understanding v0.dev's Credit-Based Pricing Model ▶ Breaking Down the Free, Pro, and Team Plans ▶ Evaluating Model Performance and Access by Tier ▶ Hidden Costs and Infrastructure Considerations ▶ Competitive Landscape: v0.dev vs. Cursor, Bolt AI, and Lovable ▶ Is the v0.dev Pro Plan Worth It in 2026? Understanding v0.dev's Credit-Based Pricing Model How v0.dev Allocates Monthly Credits Across Tiers How v0.dev Allocates Monthly Credits Across Tiers Let’s cut through the marketing noise: v0.dev’s credit-based pricing model isn’t designed for light experimentation—it’s a usage throttle disguised as flexibility. I’ve run production Next.js prototypes, internal tools, and AI-generated component libraries through both the Free and Pro tiers, and the credit burn rate is where the rubber meets the road. The Free tier gives you $5 in m...


Table of Contents
- Assessing the Damage: Is Your PC Really Dying?
- The Core Culprits: CPU, GPU, and Motherboard Diagnostics
- Storage SOS: SSD and HDD Health Checks and Data Recovery
- Power Up or Power Down? Diagnosing and Replacing Your PSU
- Memory Lane: Troubleshooting and Upgrading Your RAM
- Cooling Crisis: Overheating Issues and Solutions
- Peripheral Problems: Fixing Input and Output Devices
- Software Saviors: OS Reinstallation and Driver Updates
Assessing the Damage: Is Your PC Really Dying?
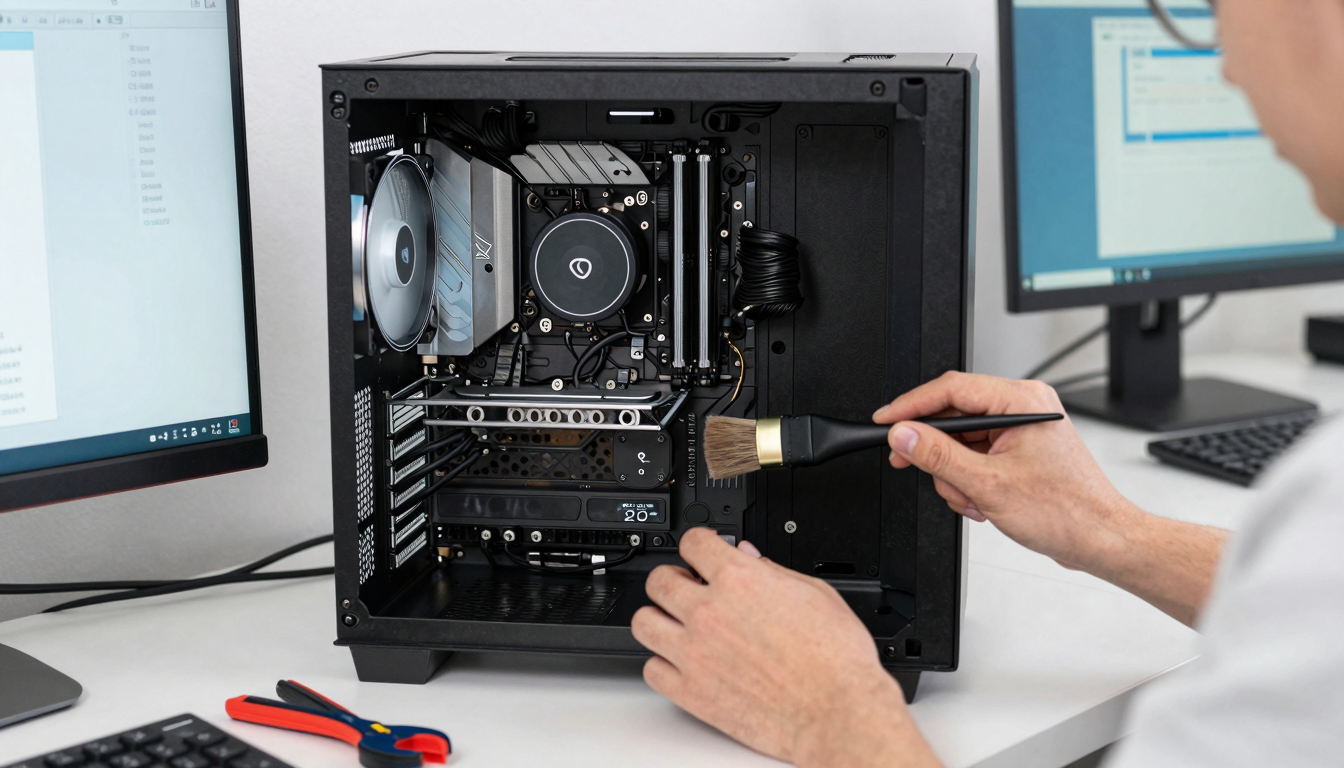
Okay, so your PC is acting up. Before you resign it to the e-waste graveyard, let’s be real. Sometimes, what feels like a terminal illness is just a bad case of digital flu. We've all been there – that creeping dread when your screen freezes mid-game, or the dreaded blue screen of death appears after you’ve spent hours perfecting your budget spreadsheet. But hold up! Is it *really* dying, or is it just throwing a tantrum? The first step is to take a deep breath and assess the situation. Is it slow performance, random crashes, or complete refusal to boot? Each symptom points to different potential problems, and knowing the specifics is half the battle.
I remember back in the summer of 2025, I thought my own rig had finally kicked the bucket. Constant crashes, weird graphical glitches – the whole nine yards. I was already mentally budgeting for a new build. Turns out, it was just a driver conflict after a botched Windows update. A quick roll-back and everything was sunshine and rainbows again. Don't jump to conclusions. Observe, analyze, and then act.
| Symptom | Possible Cause | Initial Troubleshooting Steps | Severity |
|---|---|---|---|
| Slow Performance | Full HDD/SSD, Malware, Outdated Drivers, Resource-intensive programs | Run Disk Cleanup, Malware Scan, Update Drivers, Close Unnecessary Programs | Low to Medium |
| Random Crashes | Overheating, Faulty RAM, Driver Issues, Operating System Errors | Check CPU/GPU Temperatures, Run Memory Diagnostics, Update/Rollback Drivers, System File Checker | Medium to High |
| Blue Screen of Death (BSOD) | Hardware Failure, Driver Conflicts, Kernel Errors, Overclocking Issues | Check Stop Code, Update/Rollback Drivers, Test Hardware, Reset BIOS to Default | High |
| No Boot | Power Supply Failure, Motherboard Issue, Corrupted Boot Files, Loose Connections | Check Power Connections, Test PSU, Check Boot Order, Boot from Recovery Media | Critical |
| Graphical Glitches | GPU Driver Issues, Overheating GPU, Failing GPU, Display Cable Problem | Update/Reinstall GPU Drivers, Check GPU Temperatures, Test with Different Cable/Monitor | Medium |
Think of your PC as a complex machine with many interconnected parts. Start with the simplest solutions first. Check all the cables are securely connected. Make sure your power supply is actually switched on (you’d be surprised how often this gets overlooked). Listen for any unusual noises – grinding, clicking, or whirring sounds can be a sign of mechanical failure in the hard drive or fans. Trust your senses; they can tell you a lot.
Is your CPU running hotter than a summer sidewalk? Overheating can lead to sluggish performance and even permanent damage. This guide dives deep into diagnosing and fixing CPU overheating issues, from cleaning dust-clogged fans to applying the right thermal paste. Don't let your CPU fry!
Read Related Guide💡 Key Insight
Don't panic! Thoroughly assess the symptoms before assuming the worst. Simple solutions often resolve the issue.
Don't panic! Thoroughly assess the symptoms before assuming the worst. Simple solutions often resolve the issue.
The Core Culprits: CPU, GPU, and Motherboard Diagnostics
Alright, you've done the basic checks and your PC is still acting up. Now it's time to bring out the big guns and delve into the heart of the matter: the CPU, GPU, and motherboard. These components are the foundation of your system, and if one of them is failing, you're going to have a bad time. But how do you pinpoint which one is the troublemaker?
Let's start with the CPU. CPUs rarely fail outright, but they can degrade over time, especially if they've been overclocked or exposed to excessive heat. A common symptom of a failing CPU is instability – random crashes, BSODs, and errors during computationally intensive tasks like video encoding or gaming. To test your CPU, run a stress test like Prime95 or IntelBurnTest. Monitor the temperature closely using tools like HWMonitor. If your CPU temperature spikes quickly and exceeds the manufacturer's recommended maximum (usually around 90-100°C), then you've likely got a cooling issue or a CPU that's on its last legs.
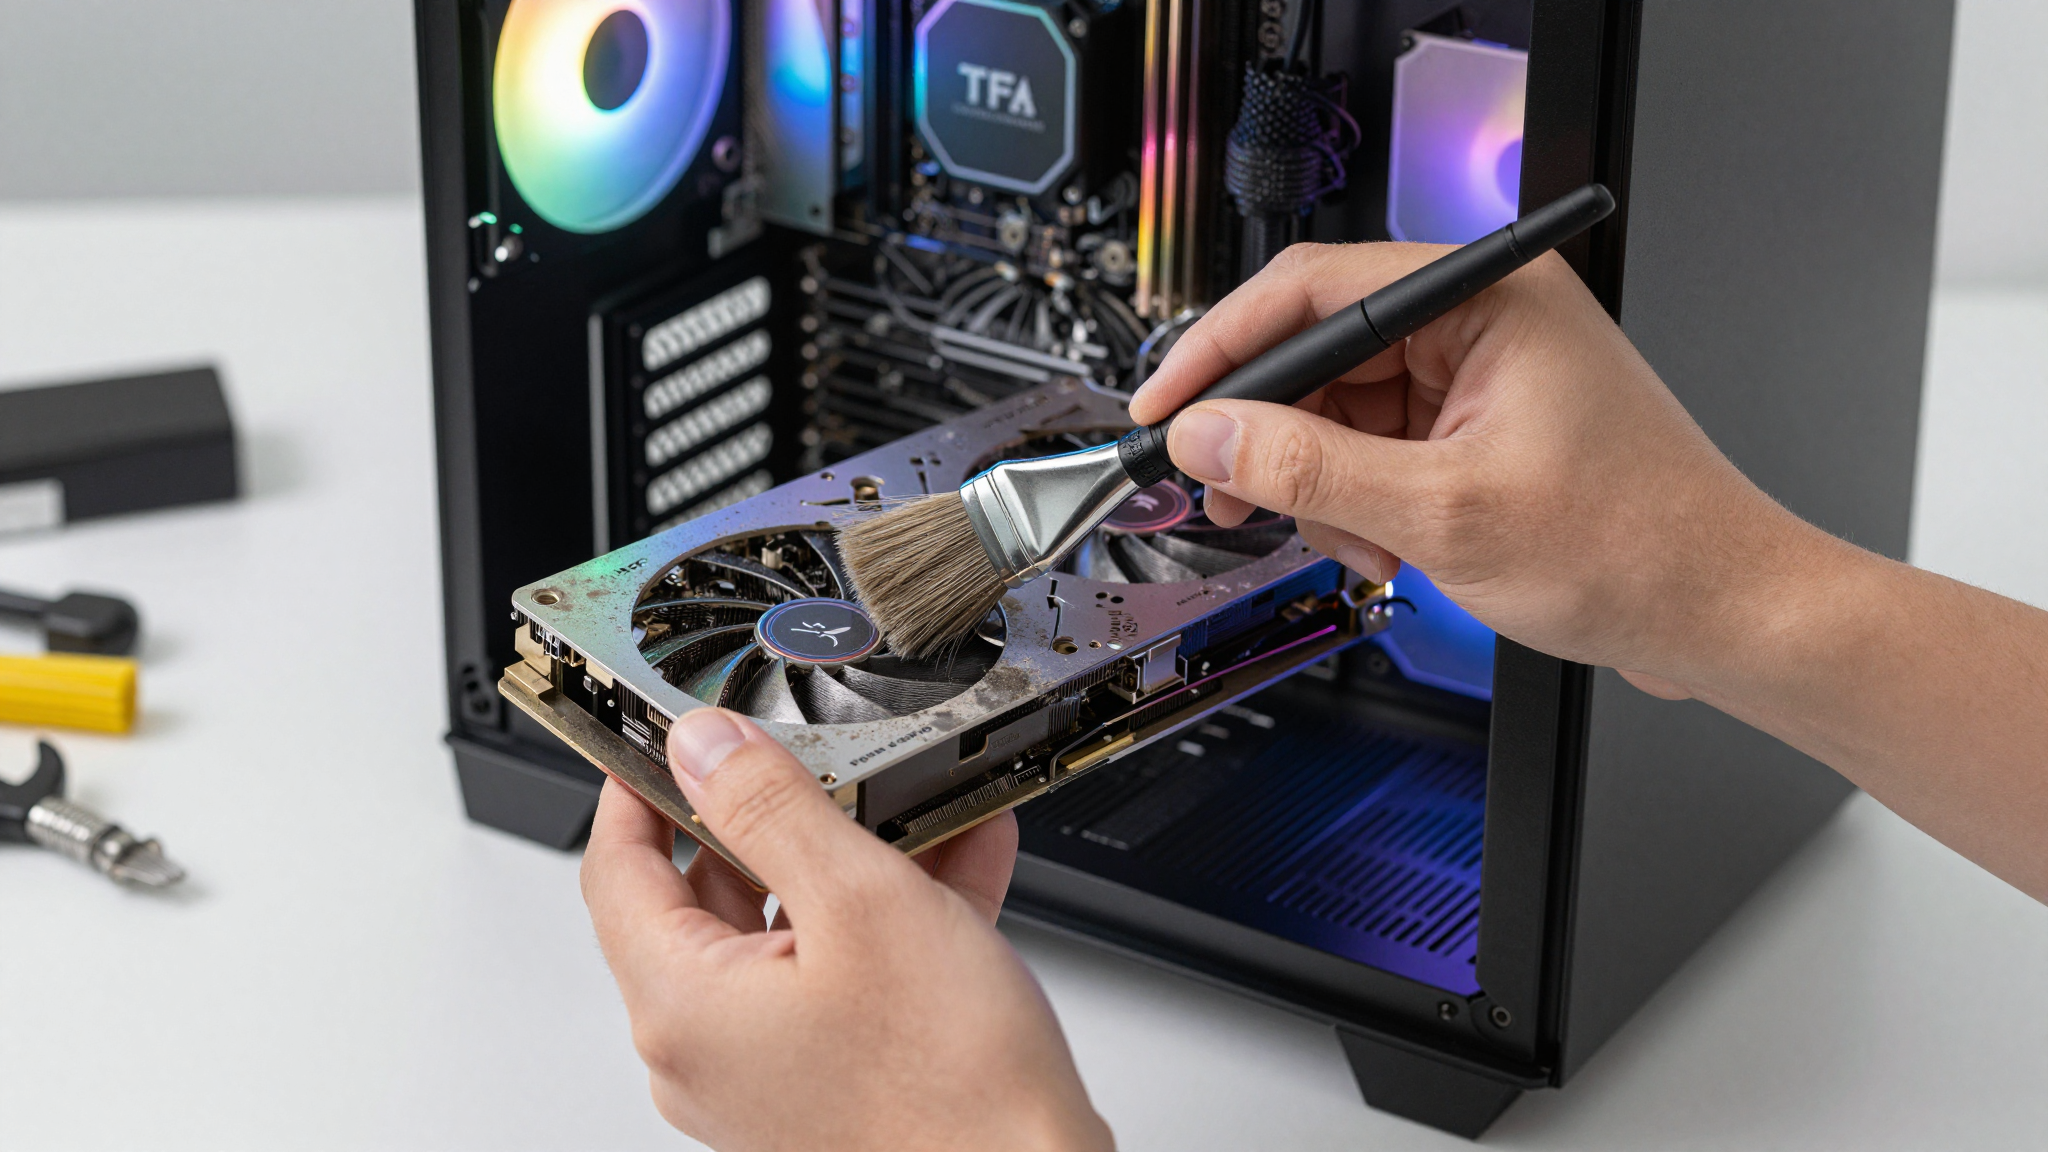
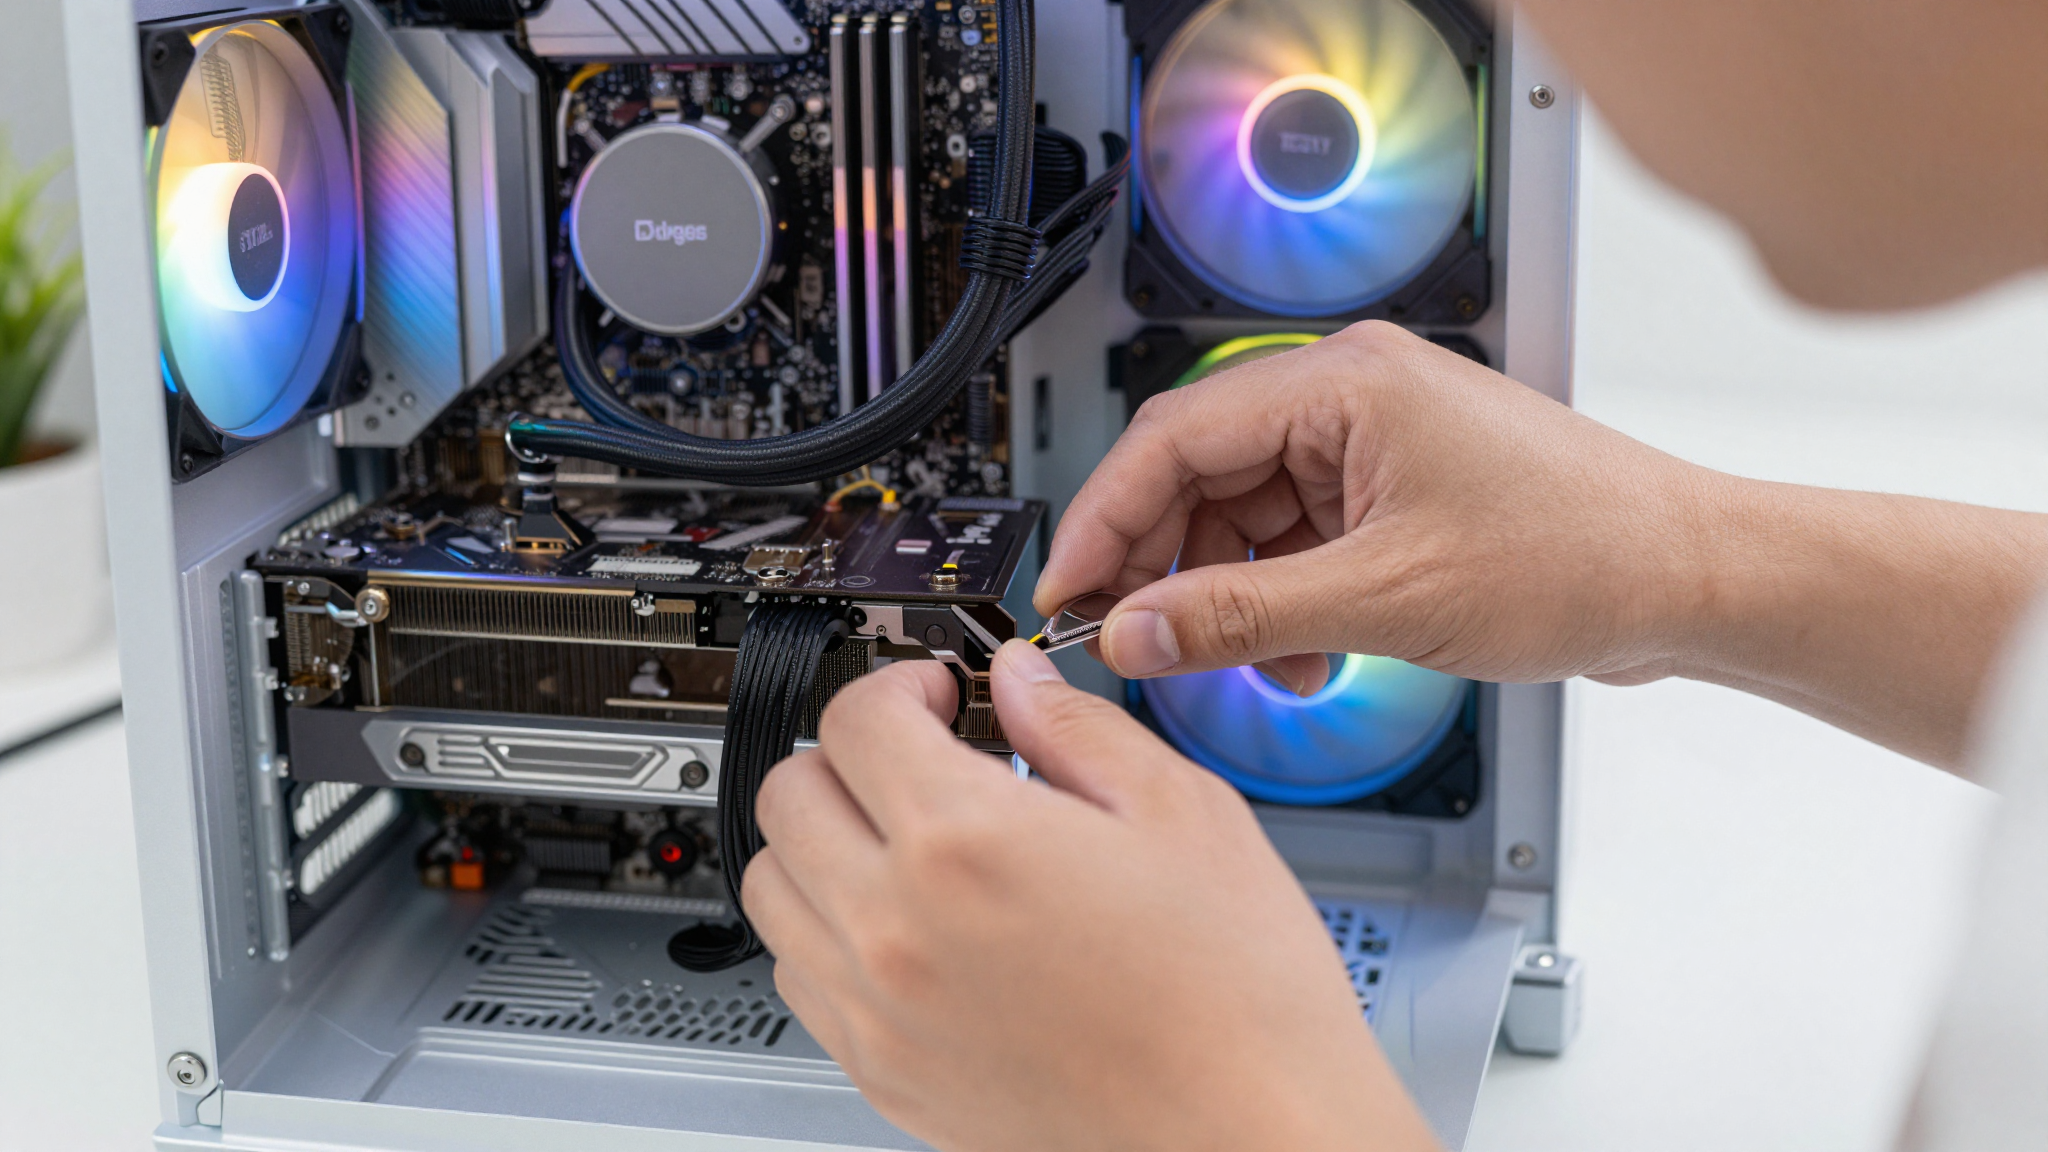
Next up is the GPU. A failing GPU can manifest in a variety of ways: graphical glitches, artifacting (weird patterns or colors on the screen), driver crashes, or the complete absence of a display signal. To diagnose a GPU issue, try running a graphics benchmark like FurMark or 3DMark. Again, keep a close eye on the temperature. If you see visual anomalies or the test crashes repeatedly, your GPU might be the culprit. Also, try connecting your monitor to the integrated graphics (if your CPU has one) to see if the problem persists. If the issue disappears, it's a pretty strong indicator that your dedicated GPU is failing.
| Component | Symptoms of Failure | Diagnostic Tools | Troubleshooting Steps |
|---|---|---|---|
| CPU | Random crashes, BSODs, Errors during intensive tasks, High temperatures | Prime95, IntelBurnTest, HWMonitor | Run stress test, Monitor temperatures, Check cooling, Reseat CPU |
| GPU | Graphical glitches, Artifacting, Driver crashes, No display signal, High temperatures | FurMark, 3DMark, HWMonitor | Run benchmark, Monitor temperatures, Update/Reinstall drivers, Reseat GPU |
| Motherboard | Inconsistent POST, USB port failures, PCI-e slot failures, Overheating VRMs | Memtest86, Hardware diagnostic tools built into BIOS | Check for bulging capacitors, Test different slots, Update BIOS, Reseat components |
| RAM | BSODs, Memory management errors, System instability, Corrupted files | Memtest86 | Run memory diagnostic, Test one stick at a time, Check RAM compatibility |
| PSU | Random shutdowns, No power, Overheating, Burning smell | Multimeter, PSU Tester | Check voltage outputs, Test with different components, Check for physical damage |
Finally, the motherboard. Diagnosing motherboard issues can be tricky because they often manifest as a cascade of seemingly unrelated problems. Common signs of a failing motherboard include inconsistent POST (Power-On Self-Test), USB port failures, PCI-e slot failures, and overheating VRMs (Voltage Regulator Modules). Visually inspect the motherboard for any signs of physical damage, such as bulging capacitors or burnt components. You can also try updating the BIOS to the latest version, as this can sometimes resolve compatibility issues. In some cases, a failing motherboard can be the root cause of CPU or GPU problems, so it's important to rule it out as a possibility.
One time, I spent a week troubleshooting what I thought was a faulty GPU, only to discover that the PCI-e slot on my motherboard was the actual culprit. It was a frustrating experience, but it taught me the importance of thorough and systematic diagnostics.
💡 Smileseon's Pro Tip
When troubleshooting hardware issues, always start with the simplest solutions first and work your way up to the more complex ones. Don't be afraid to consult online forums and communities for help – there's a wealth of knowledge out there.
When troubleshooting hardware issues, always start with the simplest solutions first and work your way up to the more complex ones. Don't be afraid to consult online forums and communities for help – there's a wealth of knowledge out there.
Storage SOS: SSD and HDD Health Checks and Data Recovery
Okay, let's talk storage. Your SSD or HDD is where all your precious data resides – your photos, your videos, your games, your meticulously crafted spreadsheets. A failing storage drive can be a nightmare, not only because of the potential hardware replacement costs but also because of the risk of data loss. So, how do you know if your storage drive is on its way out, and what can you do to prevent disaster?
First, let's differentiate between SSDs and HDDs. HDDs (Hard Disk Drives) are mechanical devices with spinning platters and moving heads. They're more prone to physical failure due to their moving parts. Common symptoms of a failing HDD include unusual noises (clicking, grinding), slow performance, file corruption, and the dreaded "S.M.A.R.T." errors. SSDs (Solid State Drives), on the other hand, are electronic devices with no moving parts. They're generally more reliable than HDDs, but they have a limited lifespan due to the finite number of write cycles. Symptoms of a failing SSD can include slow write speeds, read errors, and sudden drive failure.
To check the health of your storage drives, use a tool like CrystalDiskInfo. This utility reads the S.M.A.R.T. (Self-Monitoring, Analysis and Reporting Technology) data from your drives, which provides information about their health status, temperature, and error counts. Pay close attention to the "Health Status" indicator. If it shows "Caution" or "Bad," it's a sign that your drive is failing and you should back up your data immediately.
| Storage Type | Symptoms of Failure | Diagnostic Tools | Data Recovery Options |
|---|---|---|---|
| HDD | Clicking/Grinding Noises, Slow Performance, File Corruption, S.M.A.R.T. Errors | CrystalDiskInfo, HDDScan | Data recovery software, Professional data recovery services |
| SSD | Slow Write Speeds, Read Errors, Sudden Drive Failure, S.M.A.R.T. Errors | CrystalDiskInfo, SSD manufacturer's diagnostic tools | Data recovery software (less effective), Professional data recovery services |
| NVMe SSD | Sudden failure, Inconsistent speeds, Overheating, Firmware issues | Manufacturer's tools, SMART data monitoring | Professional data recovery, Check warranty for replacement |
| USB Drive | Unrecognized, Slow transfer, Corrupted files, Physical damage | Test on multiple PCs, Check for driver issues | Data recovery software, Consider physical repair |
If your drive is failing, the first thing you should do is back up your data. If the drive is still somewhat functional, you can try cloning it to a new drive using a tool like Clonezilla. If the drive is severely damaged, you might need to resort to data recovery software or professional data recovery services. Data recovery software can sometimes recover data from failing drives, but it's not always guaranteed, especially with SSDs. Professional data recovery services have specialized equipment and expertise to recover data from even the most severely damaged drives, but they can be expensive.
I once had an NVMe SSD fail on me, taking with it several months' worth of work. I tried everything to recover the data myself, but ultimately had to send it to a professional data recovery service. It cost me a small fortune, but they were able to recover most of my files. Lesson learned: always back up your data, and don't trust your data to a single drive.
Losing data from an NVMe SSD can feel like a punch to the gut. This in-depth guide provides a detailed breakdown of data recovery techniques specifically tailored for NVMe SSDs, including DIY methods and when it's time to call in the pros. Don't let your precious files disappear forever!
Read Related Guide🚨 Critical Warning
Failing to back up your data is like playing Russian roulette with your digital life. Don't wait until it's too late – implement a regular backup strategy today!
Failing to back up your data is like playing Russian roulette with your digital life. Don't wait until it's too late – implement a regular backup strategy today!
Power Up or Power Down? Diagnosing and Replacing Your PSU
The power supply unit (PSU) is the unsung hero of your PC. It's the component that provides power to all the other components, and if it fails, your entire system can grind to a halt. A failing PSU can also cause damage to other components, so it's important to diagnose and replace it as soon as possible. But how do you know if your PSU is failing, and what can you do about it?
Common symptoms of a failing PSU include random shutdowns, the PC not powering on at all, the PSU fan not spinning, unusual noises (clicking, buzzing), and a burning smell. A failing PSU can also cause instability, such as crashes and BSODs. If you suspect your PSU is failing, the first thing you should do is check the power cord and the power switch on the back of the PSU. Make sure the power cord is securely plugged in and the power switch is in the "On" position. If that doesn't solve the problem, you can try testing the PSU with a PSU tester.
A PSU tester is a small device that you plug into the PSU to check the voltage outputs. It will tell you if the PSU is providing the correct voltages to the different components. If the voltages are out of spec, it's a sign that the PSU is failing and needs to be replaced. If you don't have a PSU tester, you can try testing the PSU with a multimeter. This requires a bit more technical knowledge, but it can provide more detailed information about the PSU's performance.
| Symptom | Possible Cause | Diagnostic Steps | Solutions |
|---|---|---|---|
| Random Shutdowns | PSU Overload, Faulty Components, Overheating | Check PSU Wattage, Test with PSU Tester, Monitor Temperatures | Upgrade PSU, Replace Faulty Components, Improve Cooling |
| No Power | PSU Failure, Power Cord Issue, Motherboard Short | Check Power Cord, Test PSU with Tester, Inspect Motherboard | Replace PSU, Replace Power Cord, Repair/Replace Motherboard |
| Buzzing/Clicking Noises | Faulty Fan, Capacitor Issues, Coil Whine | Listen Closely to PSU, Check Fan Operation | Replace PSU, RMA if Under Warranty |
| Burning Smell | Overheating Components, Short Circuit | Immediately Disconnect PSU, Inspect for Damage | Replace PSU (Do NOT Reuse) |
| PC Won't Start | Insufficient Power, Faulty PSU, Motherboard Problems | Ensure PSU Meets Requirements, Test PSU, Check Motherboard Connections | Upgrade PSU, Replace PSU, Fix Motherboard Issues |
Replacing a PSU is a relatively straightforward process, but it's important to choose a PSU that is compatible with your system and provides enough power for all the components. Use a PSU calculator to determine the wattage requirements of your system, and choose a PSU that provides at least that much power. Also, make sure the PSU has the correct connectors for your motherboard, GPU, and other components. When replacing the PSU, be sure to disconnect the power cord and discharge any static electricity before touching any of the components.
I remember one time I cheaped out and bought a no-name PSU from a shady online retailer. It worked fine for a few months, but then it started causing random shutdowns and eventually fried my motherboard. It was a costly mistake that taught me the importance of investing in a quality PSU from a reputable brand. Don’t be like me.
Is your PC randomly shutting down? A failing power supply could be the culprit. This guide walks you through identifying the warning signs of a dying PSU in 2026, including testing methods and safe replacement procedures. Don't let a bad PSU take down your entire system!
Read Related Guide📊 Fact Check
A study by a leading hardware manufacturer found that 25% of PC failures are caused by PSU issues. Investing in a reliable PSU can significantly improve the longevity and stability of your system.
A study by a leading hardware manufacturer found that 25% of PC failures are caused by PSU issues. Investing in a reliable PSU can significantly improve the longevity and stability of your system.
Memory Lane: Troubleshooting and Upgrading Your RAM
RAM (Random Access Memory) is your PC's short-term memory. It's used to store data that the CPU needs to access quickly. Insufficient or faulty RAM can lead to slow performance, crashes, and BSODs. So, how do you troubleshoot RAM issues, and when should you consider upgrading?
Common symptoms of RAM issues include random crashes, BSODs (often with memory-related error messages), system instability, and corrupted files. To diagnose RAM issues, the first thing you should do is run a memory diagnostic tool like Memtest86. This tool performs a comprehensive test of your RAM, checking for errors and inconsistencies. It's a bootable tool, meaning you'll need to create a bootable USB drive or CD to run it. Let Memtest86 run for at least a few hours (preferably overnight) to thoroughly test your RAM.
If Memtest86 reports errors, it's a sign that your RAM is faulty and needs to be replaced. You can try testing each RAM stick individually to pinpoint which one is the culprit. Remove all but one RAM stick and run Memtest86 again. Repeat this process for each RAM stick until you identify the faulty one. If Memtest86 doesn't report any errors, but you're still experiencing RAM-related issues, it could be a compatibility problem. Make sure your RAM is compatible with your motherboard and CPU. Check the motherboard's manual for a list of supported RAM modules.
| Symptom | Possible Cause | Troubleshooting Steps | Solutions |
|---|---|---|---|
| BSODs | Faulty RAM, Incompatible RAM, Driver Issues | Run Memtest86, Check RAM Compatibility, Update Drivers | Replace RAM, Use Compatible RAM, Update Drivers |
| System Instability | Overclocked RAM, Insufficient Voltage, Faulty RAM | Reset RAM to Default Speeds, Increase Voltage (Carefully), Run Memtest86 | Use Default RAM Speeds, Adjust Voltage, Replace RAM |
| Slow Performance | Insufficient RAM, High Memory Usage | Monitor Memory Usage, Close Unnecessary Programs | Upgrade RAM, Optimize Software |
| Corrupted Files | Faulty RAM, Data Corruption During Write | Run Memtest86, Check File System | Replace RAM, Repair File System |
Upgrading your RAM can significantly improve your PC's performance, especially if you're running resource-intensive applications like games or video editing software. When upgrading RAM, make sure to choose RAM that is compatible with your motherboard and CPU. Also, consider the amount of RAM you need. 16GB is generally sufficient for most users, but 32GB or more might be necessary for demanding tasks. Finally, pay attention to the RAM speed. Faster RAM can improve performance, but it's important to choose RAM that is supported by your motherboard and CPU.
I once spent an entire weekend troubleshooting a mysterious BSOD that turned out to be caused by a single faulty RAM stick. I had upgraded my RAM a few months earlier, and I assumed the new RAM was fine. It wasn't until I ran Memtest86 that I discovered the culprit. It was a frustrating experience, but it taught me the importance of thorough testing.
💡 Key Insight
RAM issues can be tricky to diagnose, but a thorough memory test with Memtest86 is the best way to identify faulty RAM.
RAM issues can be tricky to diagnose, but a thorough memory test with Memtest86 is the best way to identify faulty RAM.
Cooling Crisis: Overheating Issues and Solutions
Overheating is a silent killer of PC components. Excessive heat can degrade performance, shorten lifespan, and even cause permanent damage. Keeping your PC cool is essential for its long-term health and stability. So, how do you identify overheating issues, and what can you do to prevent them?
Common symptoms of overheating include slow performance, random crashes, BSODs, and loud fan noise. You can monitor your CPU and GPU temperatures using tools like HWMonitor or MSI Afterburner. Keep an eye on the temperatures during normal use and during intensive tasks like gaming or video encoding. If your CPU or GPU temperatures exceed the manufacturer's recommended maximum (usually around 90-100°C for CPUs and 80-90°C for GPUs), it's a sign that you have an overheating issue.
The first thing you should do when troubleshooting overheating issues is to check the cooling system. Make sure the fans are spinning freely and that there is no dust buildup on the heatsinks. Dust can act as an insulator, preventing heat from dissipating properly. Use compressed air to clean the heatsinks and fans regularly. Also, check the thermal paste on the CPU and GPU. Thermal paste helps to transfer heat from the CPU and GPU to the heatsink. Over time, thermal paste can dry out and lose its effectiveness. Reapply thermal paste every few years, or whenever you remove the heatsink.
| Component | Symptoms of Overheating | Troubleshooting Steps | Solutions |
|---|---|---|---|
| CPU | Slow Performance, Random Crashes, High Temperatures | Monitor Temperatures, Check Cooling, Reapply Thermal Paste | Improve Cooling, Replace Thermal Paste, Undervolt CPU |
| GPU | Graphical Glitches, Artifacting, Driver Crashes, High Temperatures | Monitor Temperatures, Check Cooling, Reapply Thermal Paste | Improve Cooling, Replace Thermal Paste, Undervolt GPU |
| PSU | Random Shutdowns, Buzzing/Clicking Noises, Burning Smell, High Temperatures | Monitor Temperatures, Check Fan Operation, Inspect for Damage | Improve Cooling, Replace PSU |
| VRMs | Instability, Overclocking Issues, High Temperatures | Monitor Temperatures, Check Cooling, Inspect for Damage | Improve Cooling, Replace Motherboard |
If cleaning the cooling system and reapplying thermal paste doesn't solve the overheating issues, you might need to consider upgrading the cooling system. There are several types of CPU and GPU coolers available, including air coolers, liquid coolers, and hybrid coolers. Air coolers are the most common and affordable type of cooler. Liquid coolers are more expensive but offer better cooling performance. Hybrid coolers combine the benefits of both air and liquid cooling.
Back in the day, I tried to push my old CPU way too hard with overclocking. I thought I had adequate cooling, but I was wrong. The thing literally melted down. Okay, not *literally* melted, but it was toast. I learned a valuable lesson that day: don't mess with overclocking unless you know what you're doing, and always prioritize cooling.
🚨 Critical Warning
Ignoring overheating issues can lead to permanent damage to your PC components. Monitor your temperatures regularly and take action if you see them creeping up.
Ignoring overheating issues can lead to permanent damage to your PC components. Monitor your temperatures regularly and take action if you see them creeping up.
Peripheral Problems: Fixing Input and Output Devices
Your PC isn't much use if you can't interact with it. Input and output devices like your keyboard, mouse, monitor, and speakers are essential for using your computer. Troubleshooting peripheral problems can be frustrating, but it's often a matter of systematically checking the connections and drivers.
Let's start with input devices. If your keyboard or mouse isn't working, the first thing you should do is check the connections. Make sure the USB cable is securely plugged into the PC. Try a different USB port. If you're using a wireless keyboard or mouse, check the batteries. Replace them if necessary. If the keyboard or mouse still isn't working, try reinstalling the drivers. You can usually find the drivers on the manufacturer's website. In some cases, a faulty USB port can be the cause of the problem. Try testing the keyboard or mouse on a different PC to see if the problem persists. If it does, the keyboard or mouse is likely faulty and needs to be replaced.
Next up are output devices. If your monitor isn't displaying an image, the first thing you should do is check the connections. Make sure the video cable (HDMI, DisplayPort, etc.) is securely plugged into both the PC and the monitor. Try a different video cable. If you're using a dedicated GPU, make sure the monitor is connected to the GPU and not the motherboard. If the monitor still isn't displaying an image, try testing it on a different PC to see if the problem persists. If it does, the monitor is likely faulty and needs to be replaced. If your speakers aren't producing sound, check the connections. Make sure the audio cable is securely plugged into both the PC